Once your filters are set, these are the actions you'll use all day. A few of them look similar but do
very different things, so it's worth getting them straight from the start.
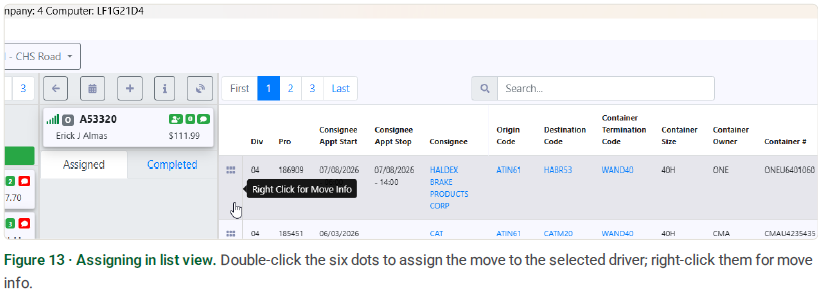
Select the driver in the driver list first, then:

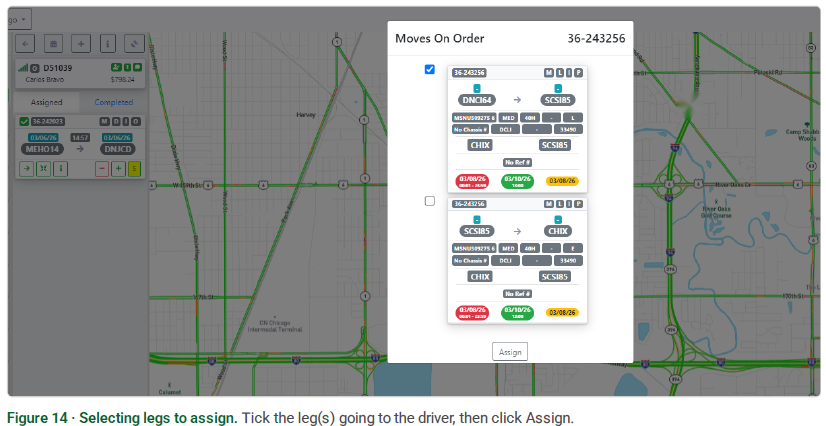
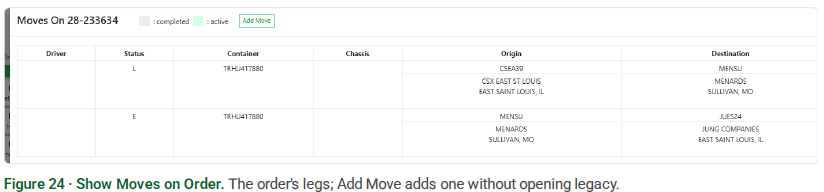
When you assign a move that has other unassigned legs, the Moves On Order popup appears. Check the leg (or legs) you're assigning to the driver and click Assign; add more legs with the green + if needed.
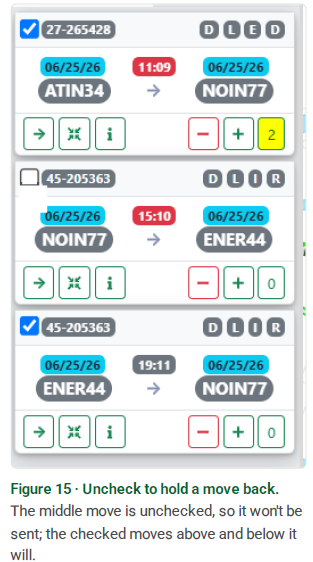
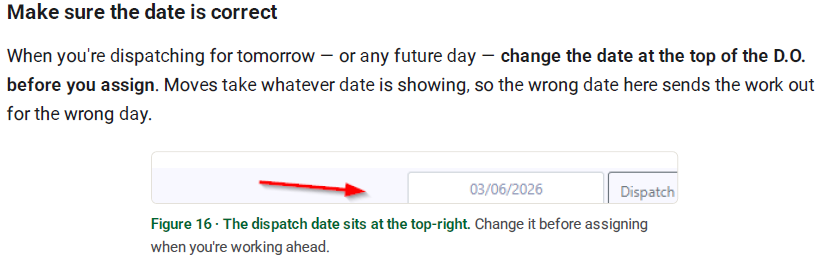
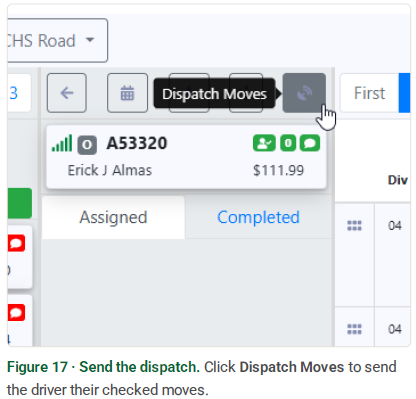
Every move you assign is set to go out by default — you'll see a check in the box at the top-left of its card, and when you send the driver their dispatch, the checked moves are the ones that transmit. To keep a move from going out — it isn't ready, or you only meant to stage it on the driver — uncheck its box before you send. The move stays assigned to the driver; it just won't be dispatched until you check it again.

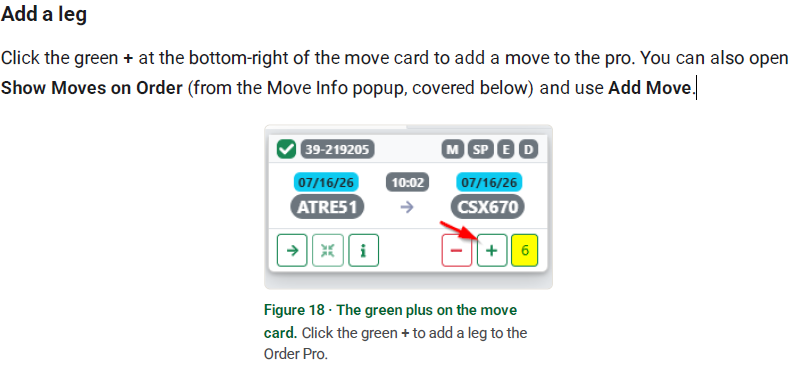
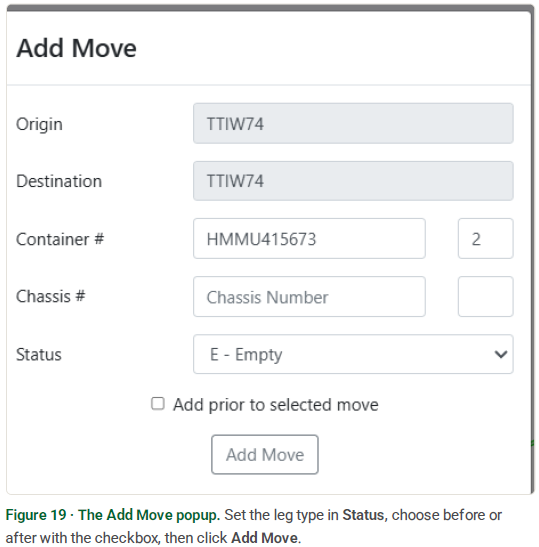
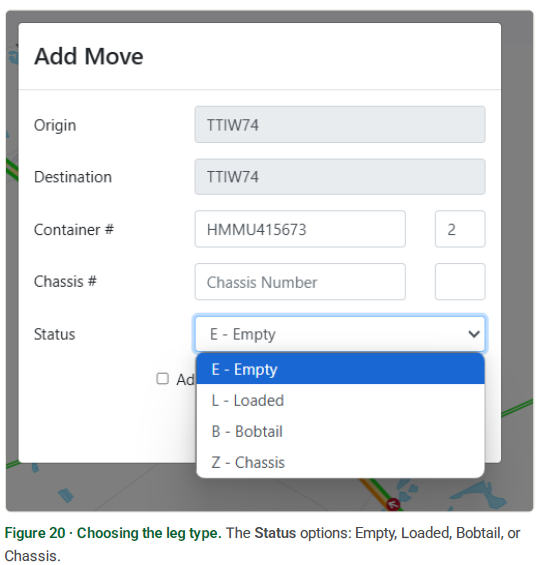
The Add Move popup opens. Set the Status to the type of leg you're adding — E - Empty, L - Loaded, B - Bobtail, or Z - Chassis — then use the Add prior to selected move checkbox to place the new leg before or after the current move. Click Add Move to save it to the Pro.
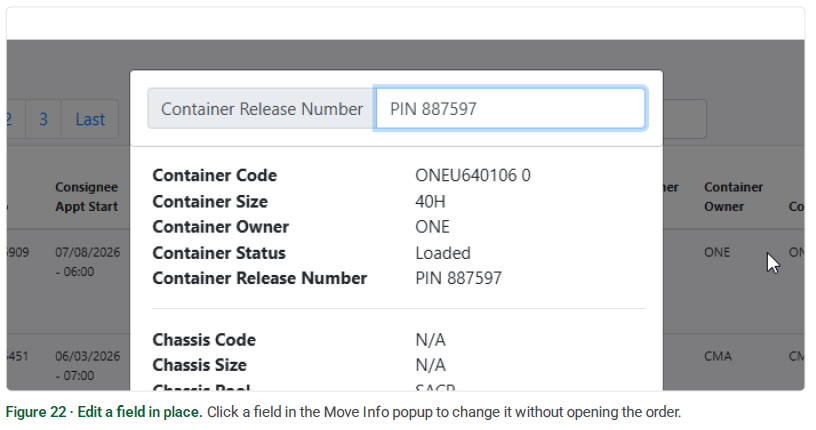
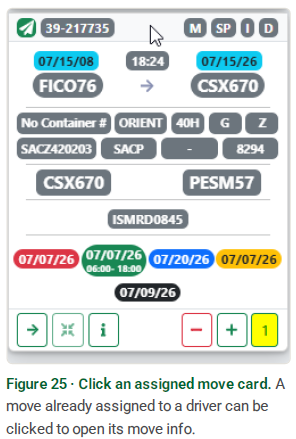
To see everything about an order without opening it in legacy, right-click the six dots to the left of the Pro. The Move Info popup shows the order at a glance — container and chassis, references, port and rail ETAs, and the shipper and consignee appointments. Need to fix one of these? Click the field to edit it right in the popup — no need to open the order.
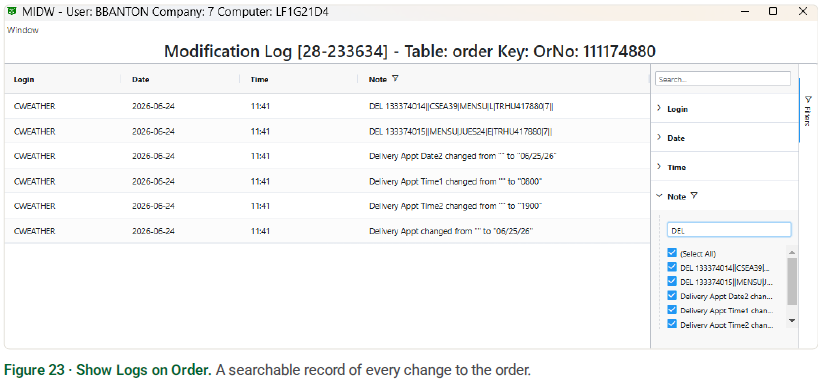
The buttons along the bottom of the popup open the rest, all inside the D.O.:
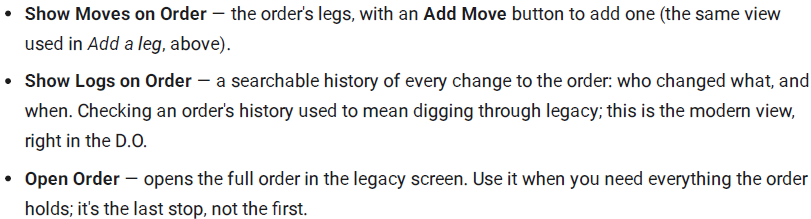
The numbered box at the end of the row holds the order's notes — when it's yellow with a count, there are notes on the order.
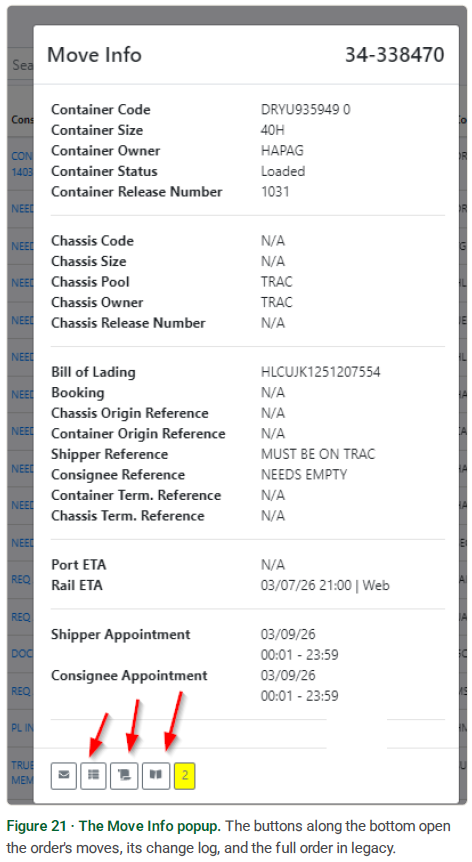
You can also open the same details straight from an assigned move card — click the card of a move that's already assigned to a driver to view its move info.
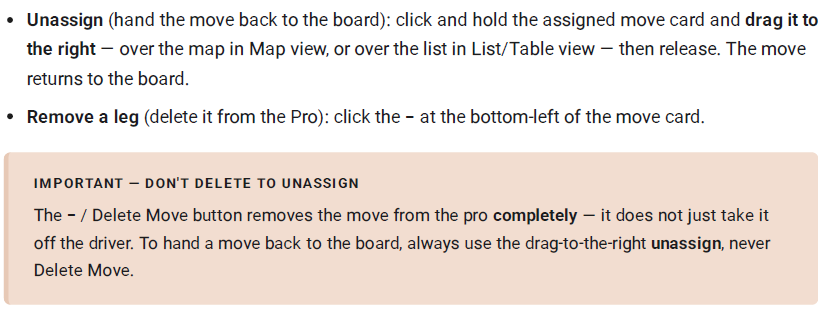
These look similar but are very different actions: