The Transload Screen (opened as the TLS Transload window) is used to capture warehouse activity for transload shipments and send EDI transactions that give customers real-time visibility into that activity. Users can search for an existing shipment by container, master BOL, SWS order number, or Div-Pro, or import an On-The-Water (OTW) report to capture warehouse activity across multiple shipments at once.
Important: Imported records are matched to existing shipments using the container number and master BOL together (Match keys: container + masterBol). A record that doesn't match an existing shipment on both keys will not be processed.
Use the Transload Screen when you need to:
Look up a transload shipment by container number, master BOL, SWS order number, or Div-Pro.
Import an On-The-Water (OTW) report to capture warehouse activity for one or more shipments.
Generate the EDI transactions that give the customer visibility into recorded warehouse activity.
Review import results to confirm which records matched and processed successfully.
From the top menu bar, click Customer Service.
In the dropdown, click Utilities.
In the submenu, click Transload Screen, listed at the bottom of the menu.
The TLS Transload window opens to the Shipments tab by default. (As below)

The Shipments tab lets users look up a transload shipment before reviewing its activity.
NOTE: Users must enter both the Container # and Master BOL to search for a shipment OR search by the Order # OR by the Div-Pro.
Container # — the container number for the shipment.
Master BOL — the master bill of lading number for the shipment.
Order # (SWS) — the SWS order number tied to the shipment.
Div-Pro — the division-pro number for the shipment.
Next, left-click Search.
Use the Import Report tab to capture warehouse activity for multiple shipments at once. The import runs through four steps: Configure, Upload, Import, and Results. (As below)

Click the Import Report tab at the top of the TLS Transload window.
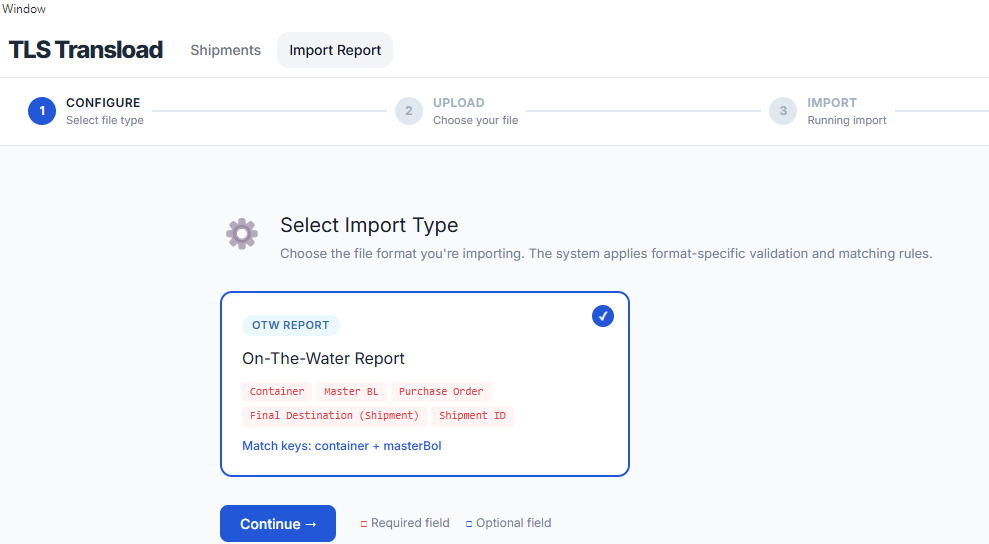
Left-click the OTW REPORT card to select the On-The-Water Report import type.
Review the fields this import type reads — Container, Master BL, Purchase Order, Final Destination (Shipment), and Shipment ID — marked as required or optional using the legend at the bottom of the page.
Note the Match keys: container + masterBol shown on the card — these are the fields used to match each imported row to an existing shipment.
Left-click Continue. (As below)
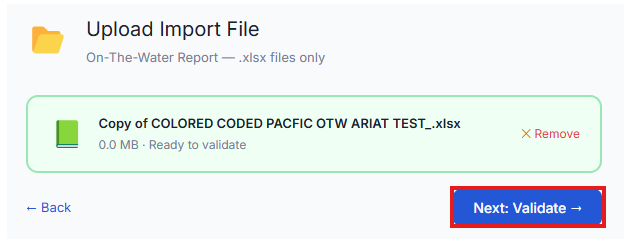
Drag and drop the OTW report file into the upload area (or browse to select it).
Left-click Next: Validate or X Remove to Upload a different file. (As below)
Important: Do not make any changes to the OTW report template.
The system validates and processes the uploaded report data, matching each row to an existing shipment by container and master BOL, and applies the reported warehouse activity to the matching shipment.
Once processing finishes, the Results step displays the outcome of the import — including which rows matched an existing shipment and which did not.
Use the View toggle to sort the results By Group or By Shipment ID. (See example below)
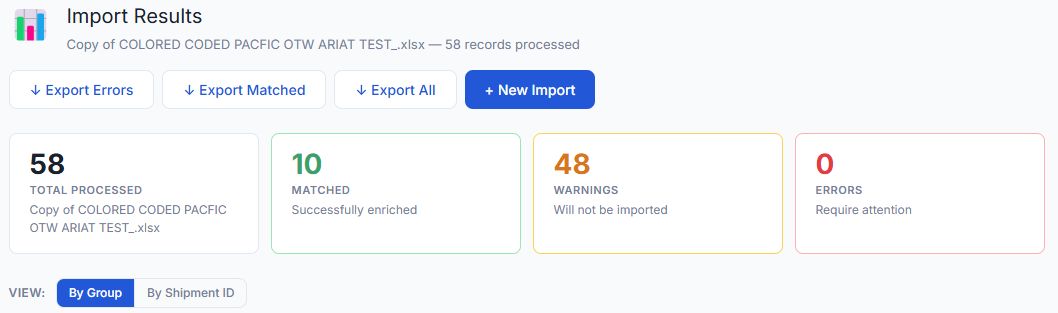
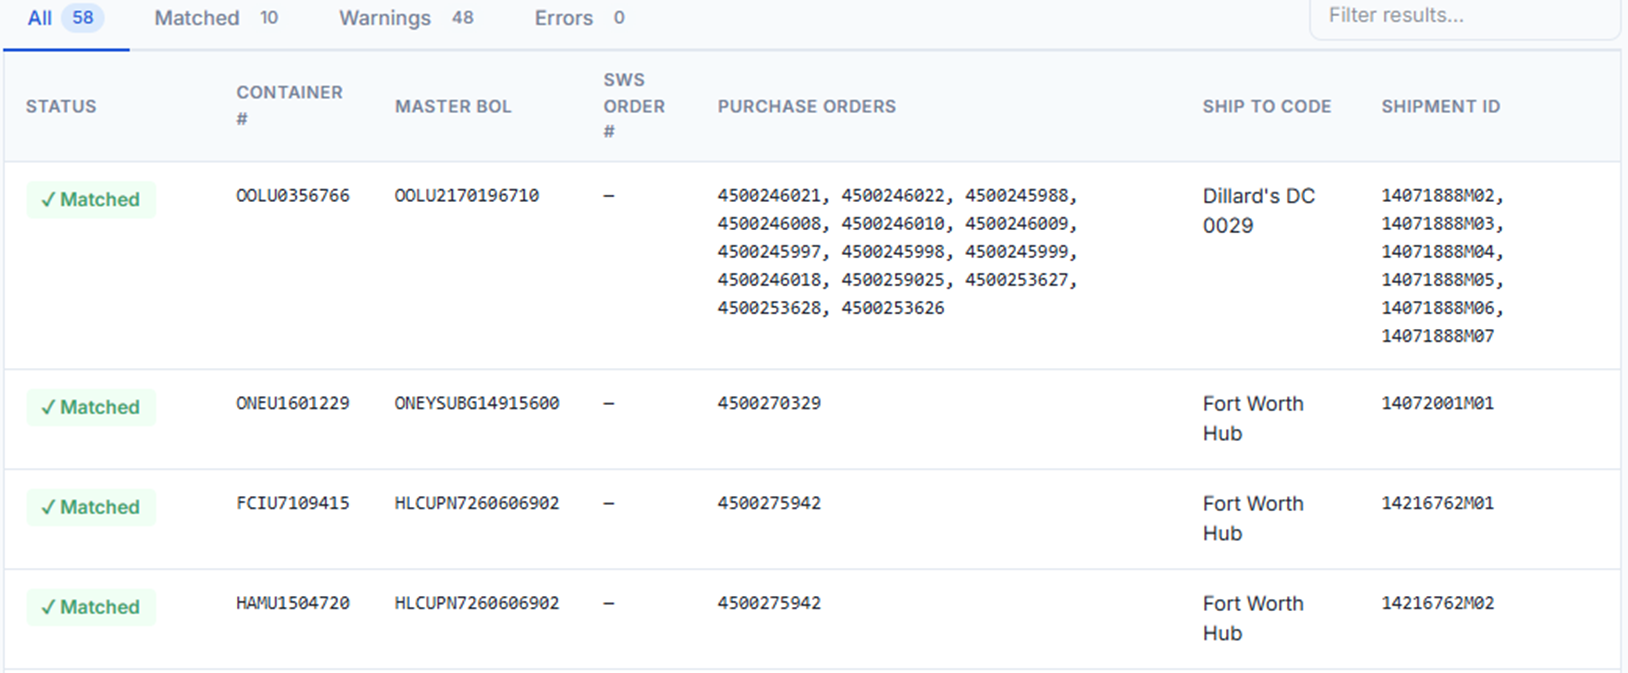
Left-click any Matched line to display that shipment's warehouse activity events.
In the Warehouse Routing, Available to Ship, and Freight Departure sections, left-click the calendar icon, select the date, then enter the time at the bottom of the calendar window. (As below)
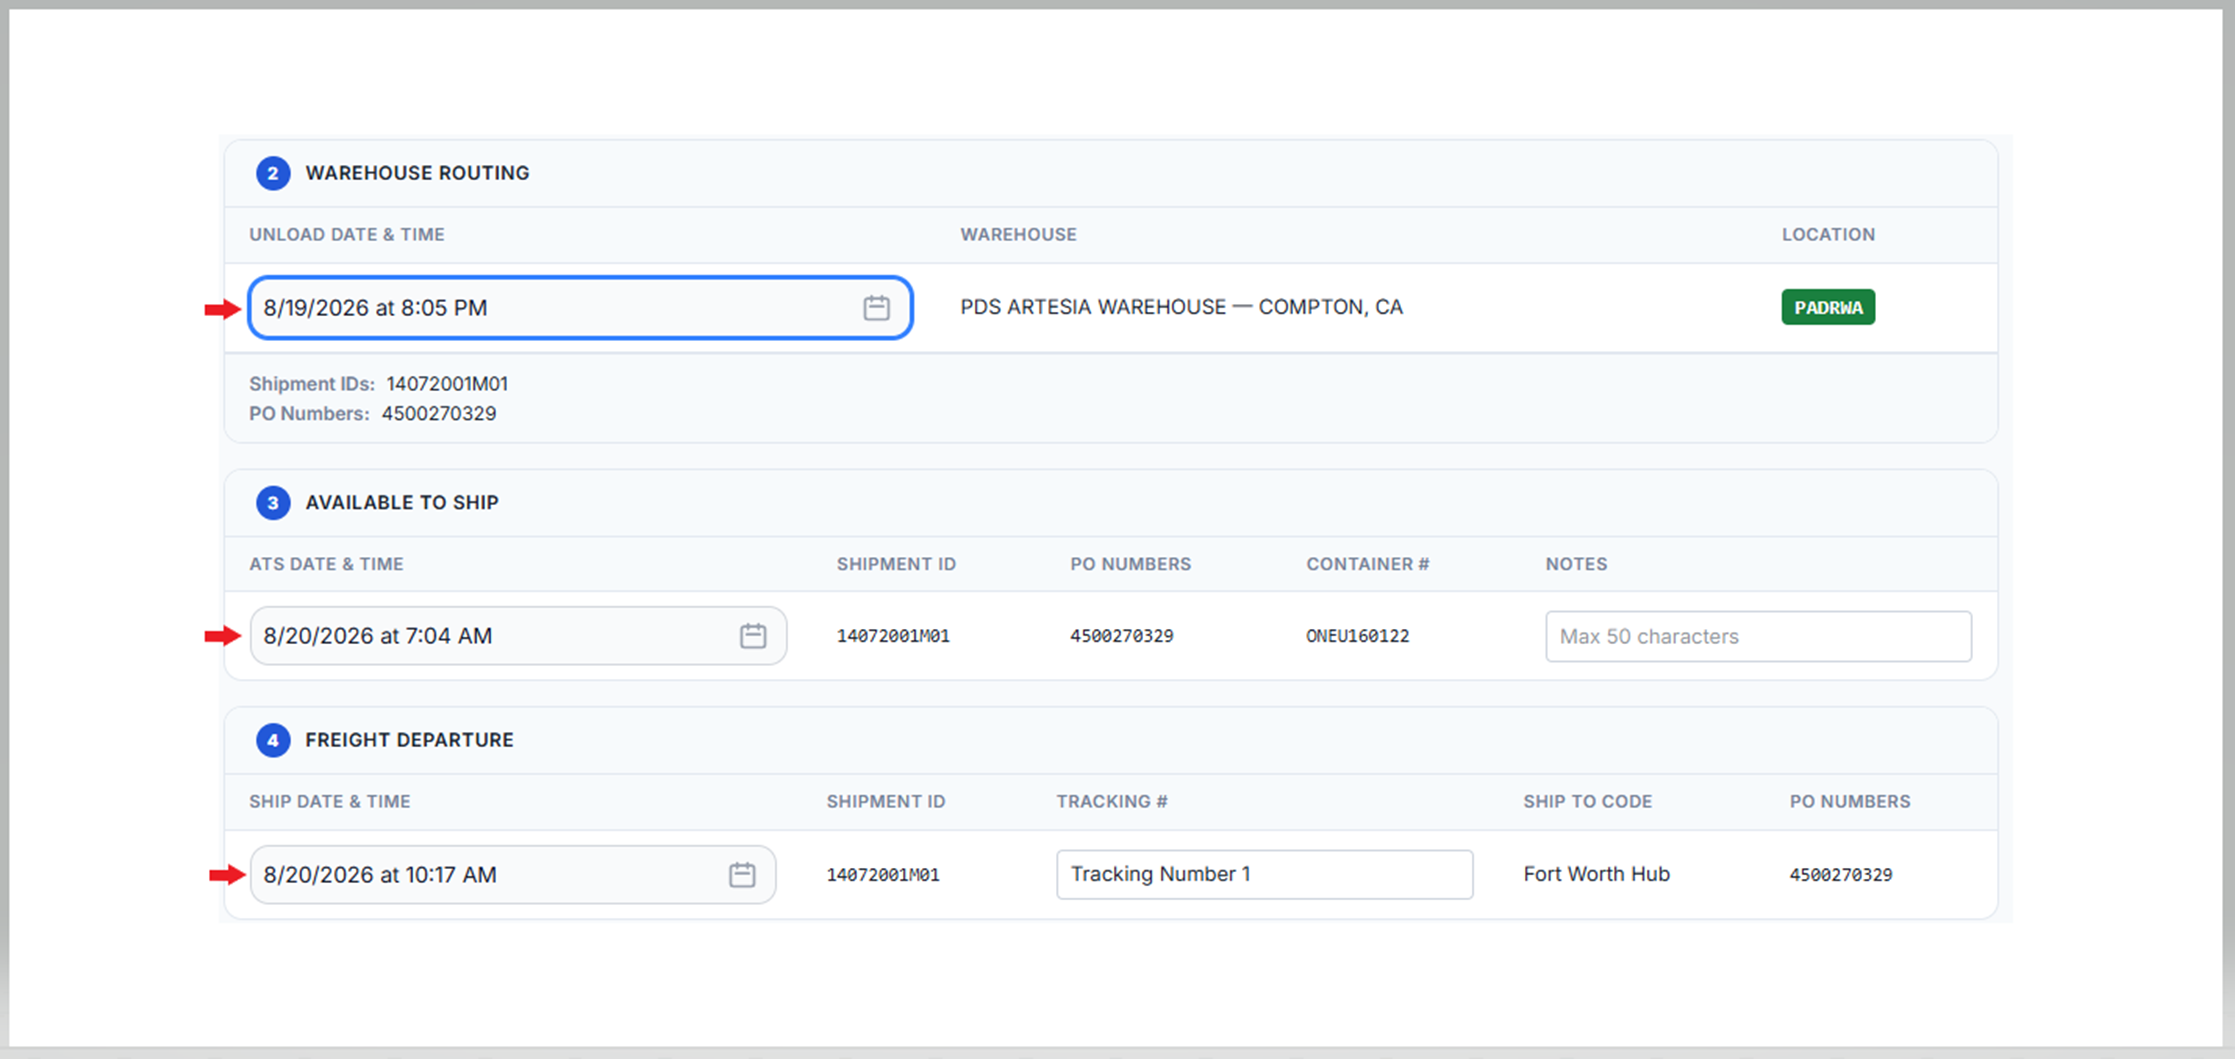
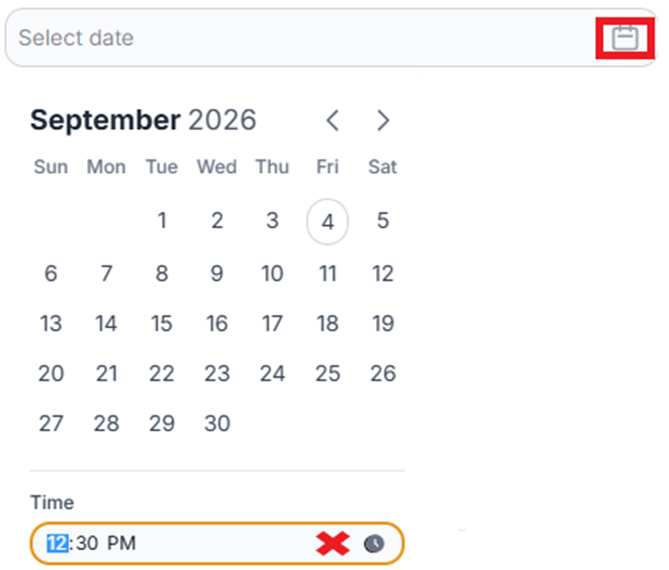
Important: Users cannot select a date in the past and cannot enter a date/time earlier than the date/time already saved in the section before it.
When updating the Freight Departure section, enter the Tracking # provided by the carrier — this field is required. (As below)

NOTE: If a Pro has been completed but has not invoiced, changes can be made to all sections of the Transload Screen. If the Pro has invoiced, a message will display advising users that only changes to Section 4 Freight Departure can be made as defined below:

Once updated, left-click Save Changes. (See example below)
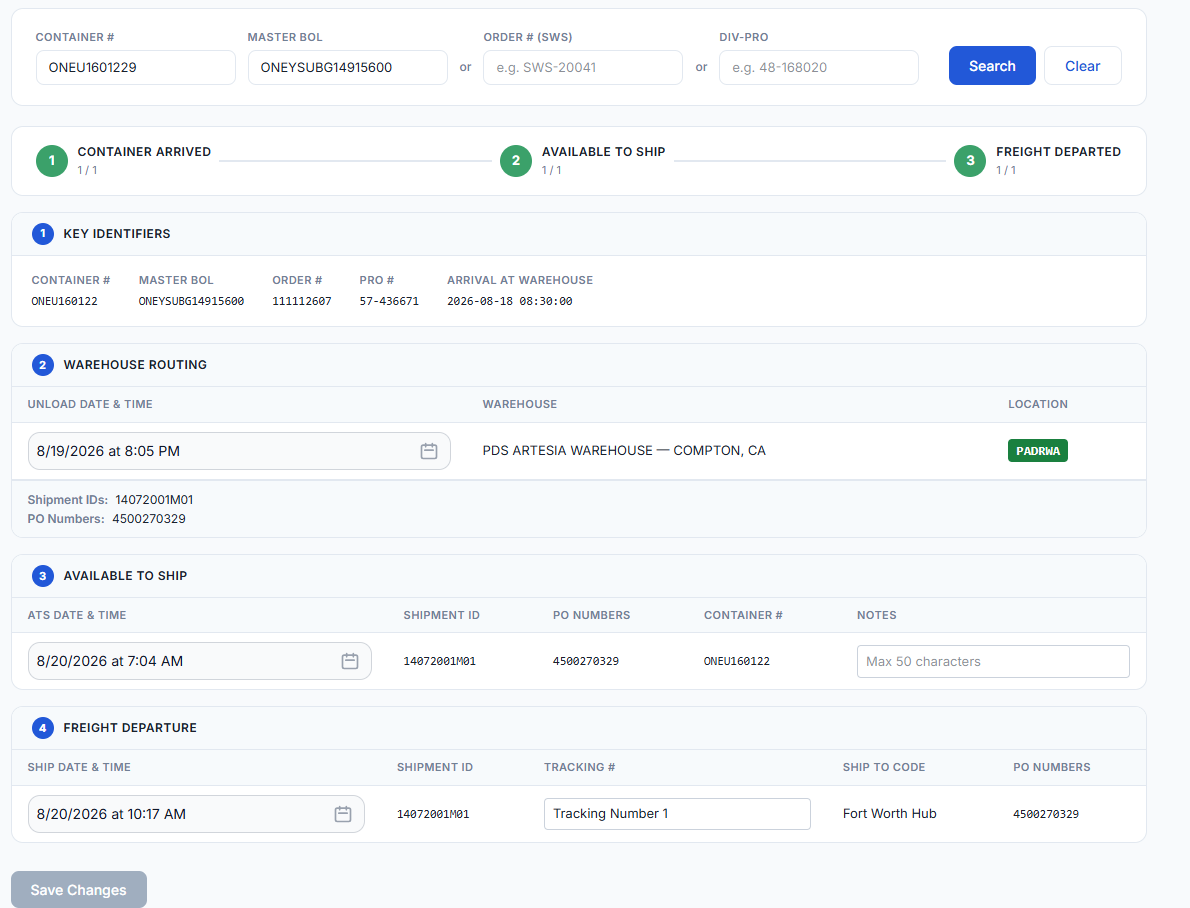
Review the results to confirm the warehouse activity was captured correctly.
Important: Rows that don't match an existing shipment on both the container number and master BOL will not be processed. Review any unmatched rows on the Results screen and correct the source data before re-importing.
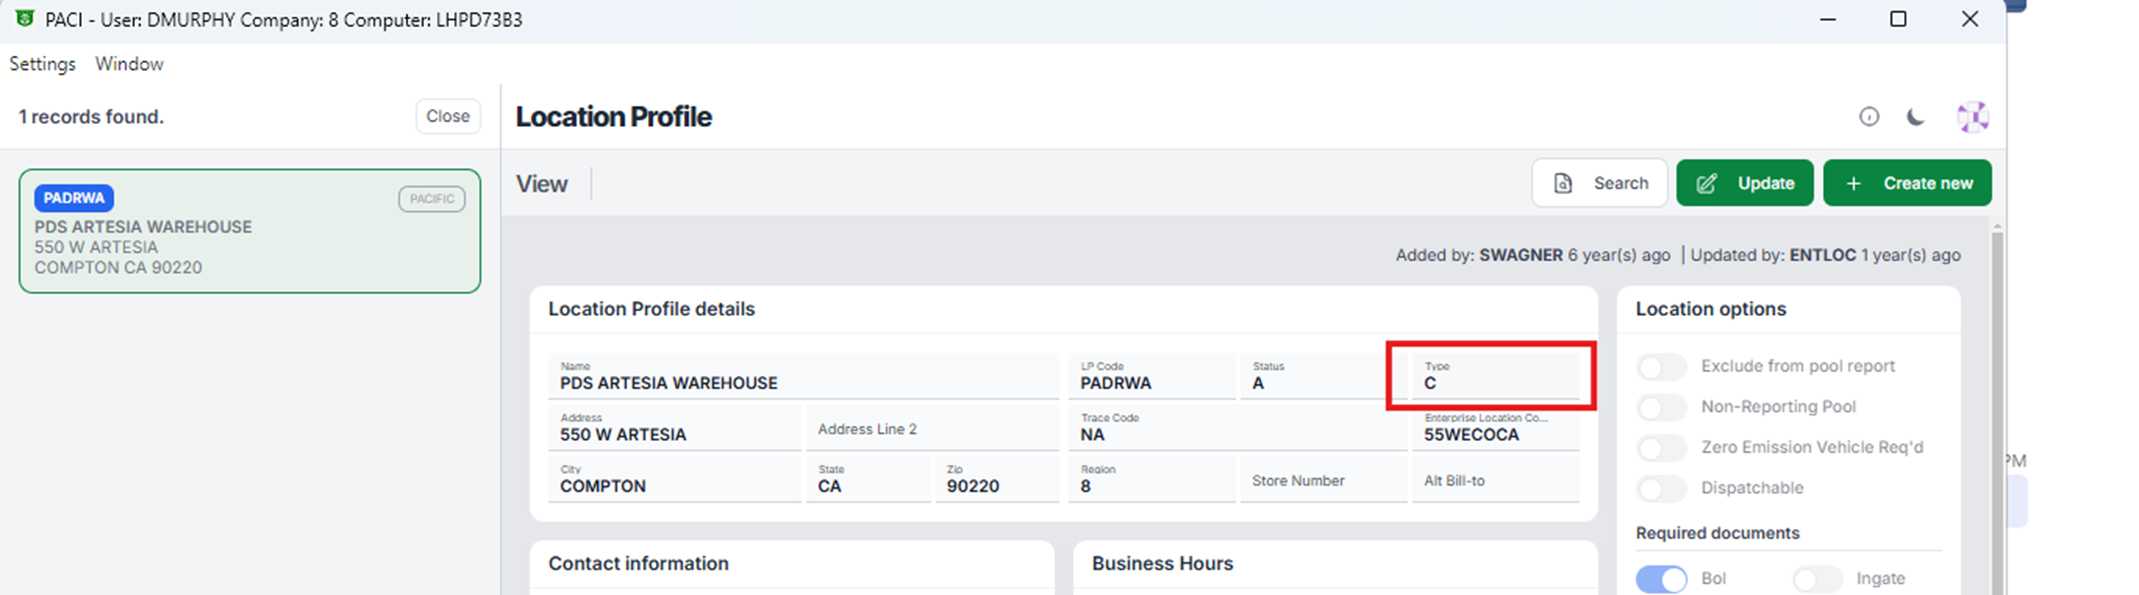
Important: For the Warehouse Routing section to populate, the location's LP Code Type must be set to W (Warehouse) on the Location Profile screen. (As below)

NOTE: Each time a change is made and saved, an EDI 214 transaction is sent to the customer.
Left-click the X in the upper right corner of the TLS Transload window to close it.