
Overview
The Ticket function on the New Order screen allows users to select a driver and print a dispatch ticket for the order.
Important: The Ticket window requires a Driver Code to be selected before a dispatch ticket can be printed. If no driver is selected, the Print Ticket action cannot be completed.
When to Use Ticket
Use the Ticket function when you need to:
Assign or confirm the driver associated with an order.
Look up a driver by Driver Code from the driver list.
Confirm the driver's name once a Driver Code has been selected.
Print a dispatch ticket for the order to hand off to the driver or dispatch team.
Accessing Ticket
Open the desired order in the New Order screen.
Locate the Ticket icon in the order toolbar, next to Complete and Manifest. (As below)
Left-click Ticket. (As below)
Note: Clicking Ticket opens the Select Driver From List window, where the driver for the order is chosen. (As below)
Selecting a Driver
When the “Select Driver From List” window opens (see below), it displays the following fields:
Driver Code — a required field, marked with a red
asterisk. Left-click the dropdown and select the driver from the list.Driver Name — a display-only field. It is blank until a Driver Code is selected, and then automatically populates with the corresponding driver's name.
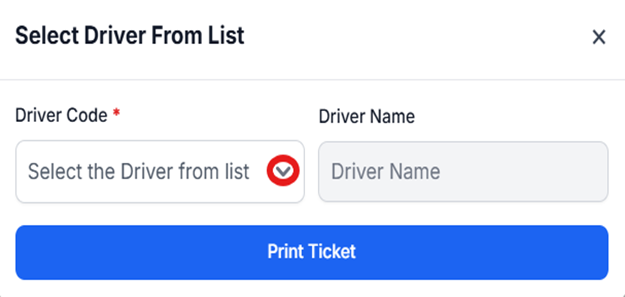
Note: Driver Name cannot be typed in directly — it is populated automatically based on the Driver Code selected from the dropdown.
Printing the Dispatch Ticket
From the “Select Driver From List” window, users can:
Print Ticket
Left-click Print Ticket to generate and print the dispatch ticket for the selected driver.
Closing the Select Driver From List Window
To close the window without printing a ticket:
Left-click the X in the upper right corner of the window.