The Brokerage Mode in the Dispatch Optimizer (D.O.) enables users to assign moves to Vendors classified as LMC (Licensed Motor Carrier) instead of internal drivers.
This mode introduces:
Vendor-based assignment workflows
A brokerage confirmation process
Visibility into brokered loads once completed
Easy Operations → Dispatch → Dispatch Optimizer
Open Dispatch Optimizer
Locate the Mode Select dropdown (top-right)
Left-click the dropdown
Select Brokerage
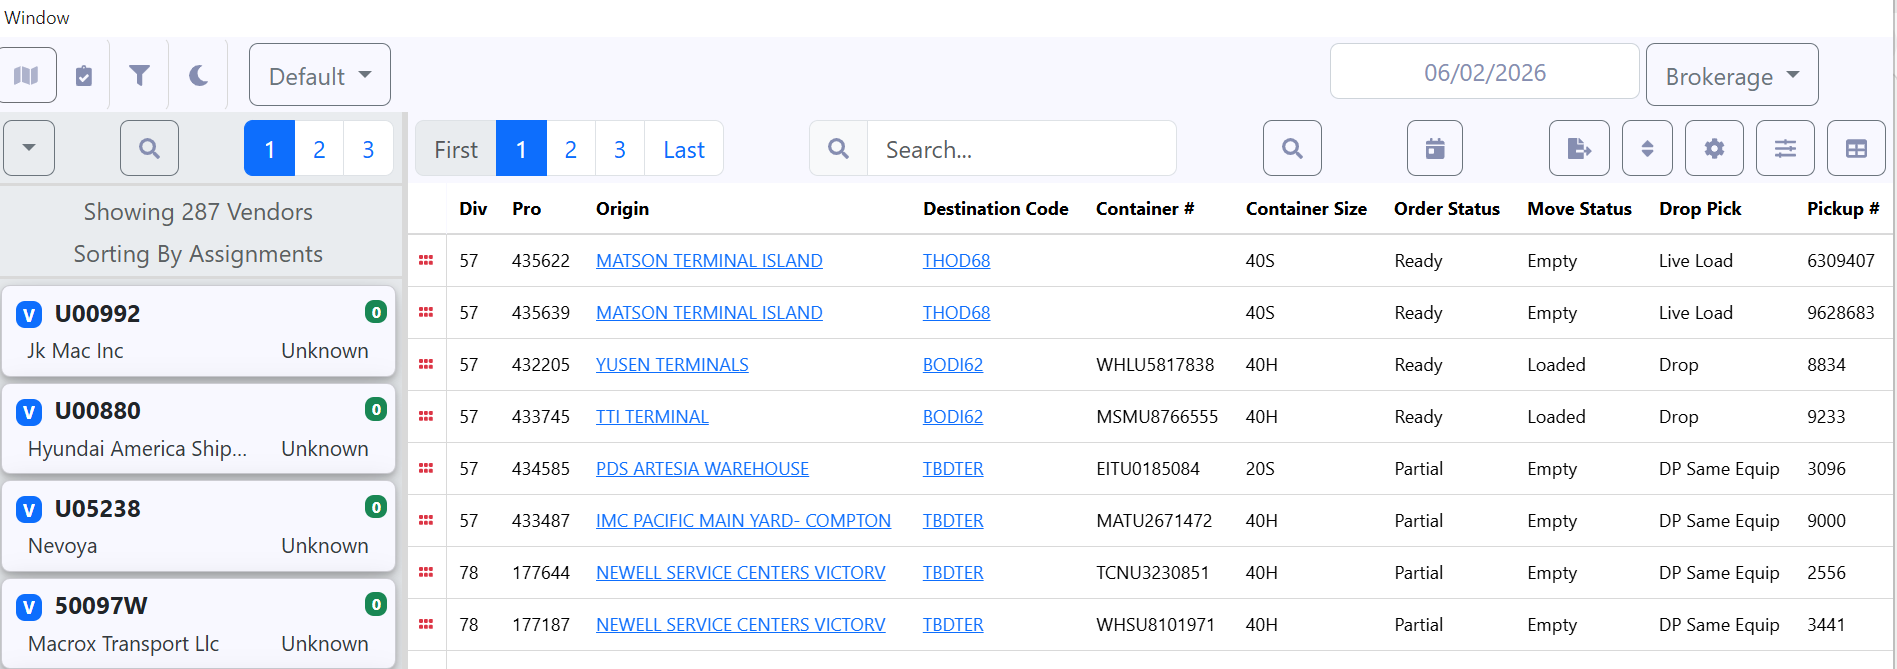
Displays LMC vendors
Shows:
Vendor ID (e.g., U05735)
Vendor Name
Assignment count indicator
Displays move details such as:
Pro Number
Origin and Destination
Container Number and Size
Order Status (Ready, Partial)
Move Status (Loaded, Empty)
Drop/Pick Type
Table settings and filters can be applied to this view just like in “Dispatch” Mode.
Ensure Brokerage Mode is selected
Select (left-click) a Vendor from the left panel
Select a Pro # from the load board using drag-and-drop and drop the move/pro on the selected Vendor
Once the move has been dropped on the selected Vendor, a Move Brokerage modal appears. (As below)
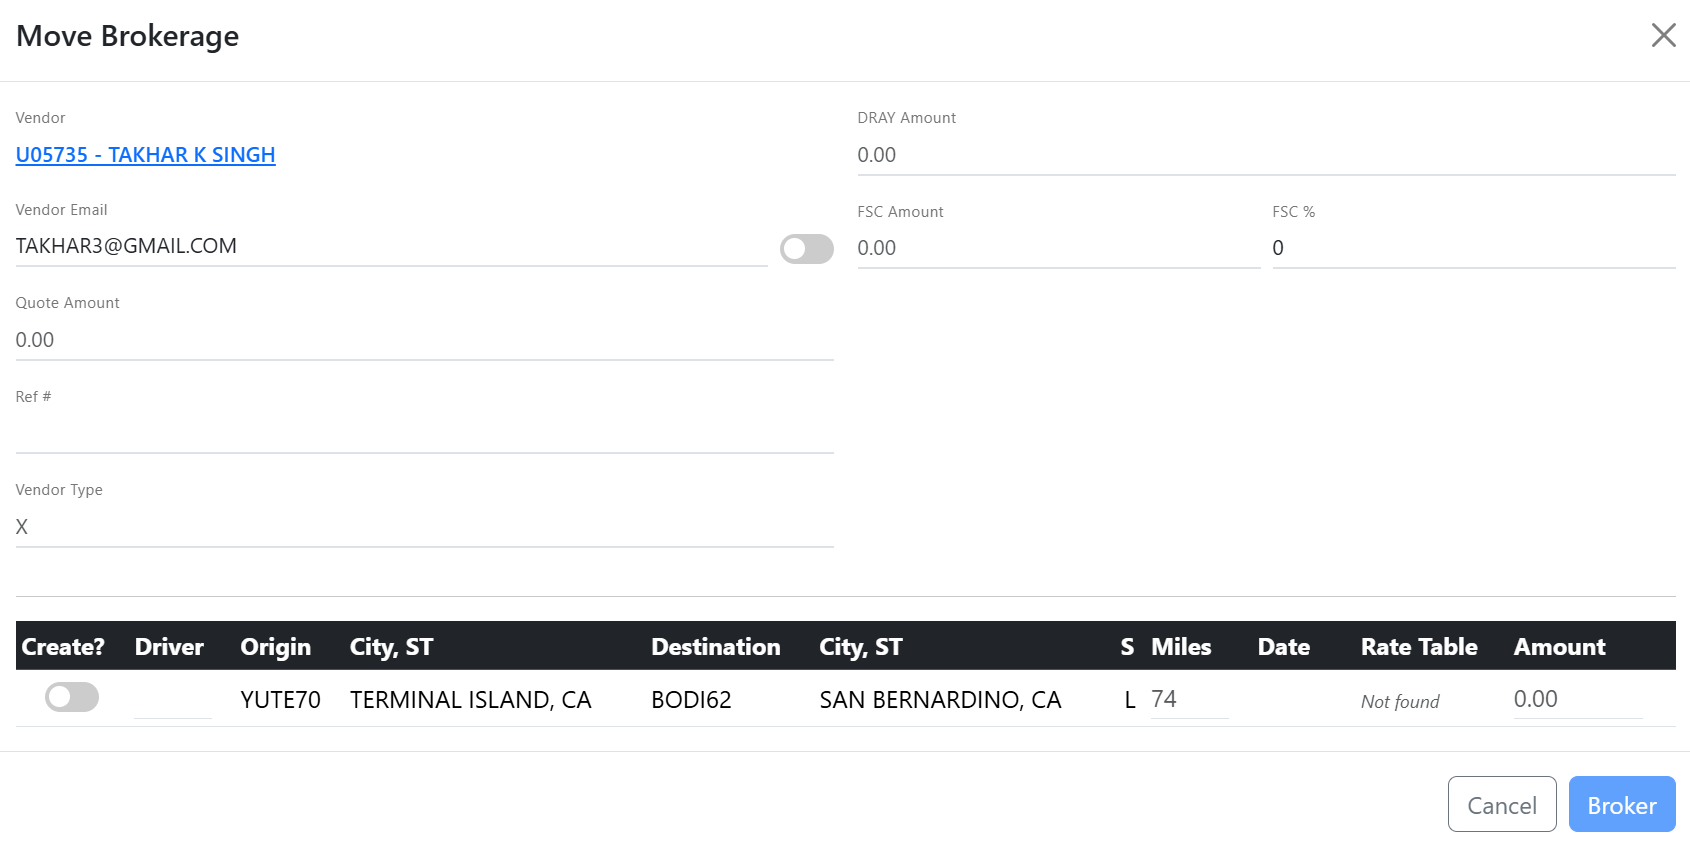
NOTE: The FSC % field can be updated or cleared if no FSC applies to the move(s). (As below)

If no P2P (Point to Point) Vendor rate exists for a displayed move, the Rate Table field will display Not Found. (As above)
If a P2P (Point to Point) Vendor rate does exist for a displayed move, the Rate Table toggle will show blue and in the righthand position with the rate populated in the Amount field. (As below)
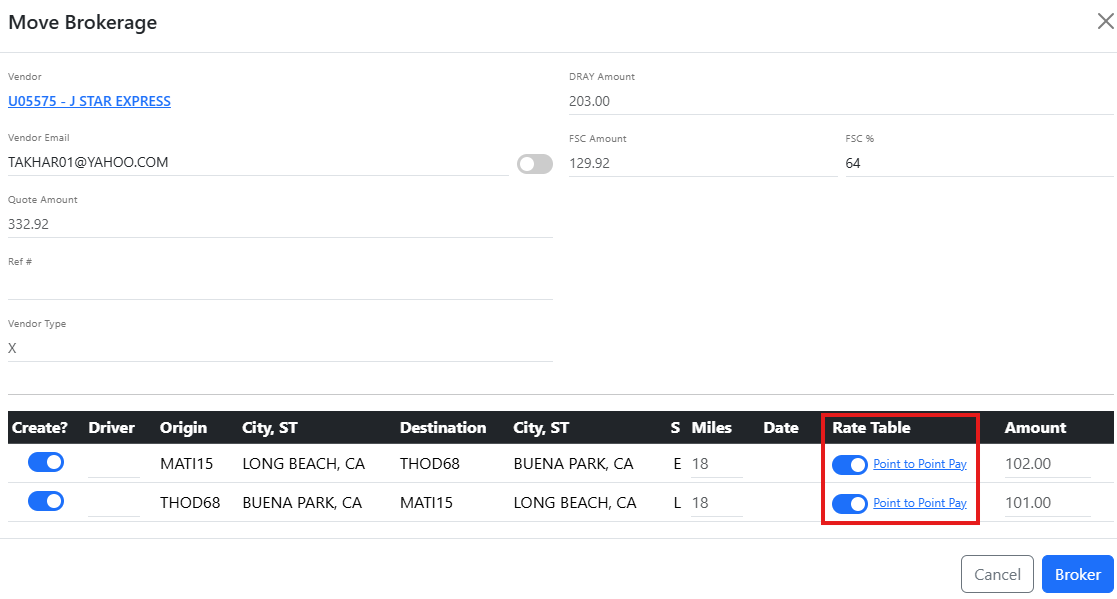
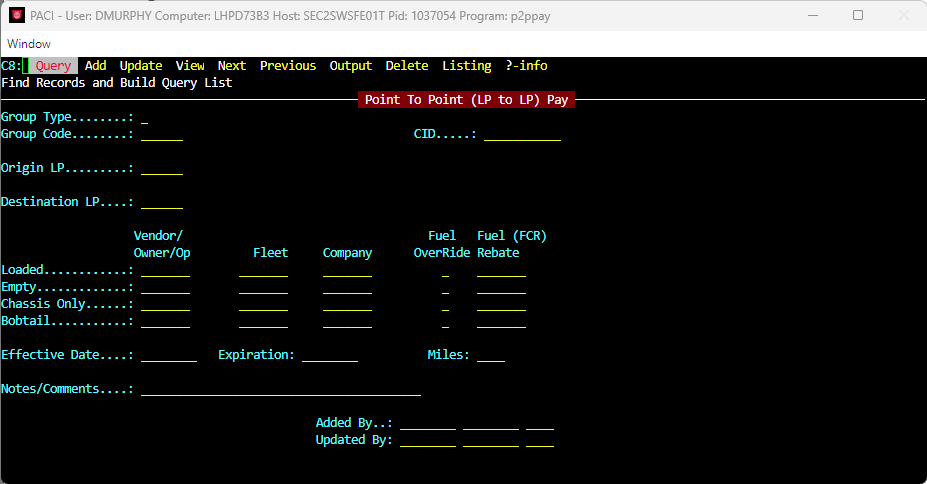
NOTE: If displayed, users can left click on the Point to Point Pay link to navigate to the Point to Point (LP to LP) Pay screen if needed.
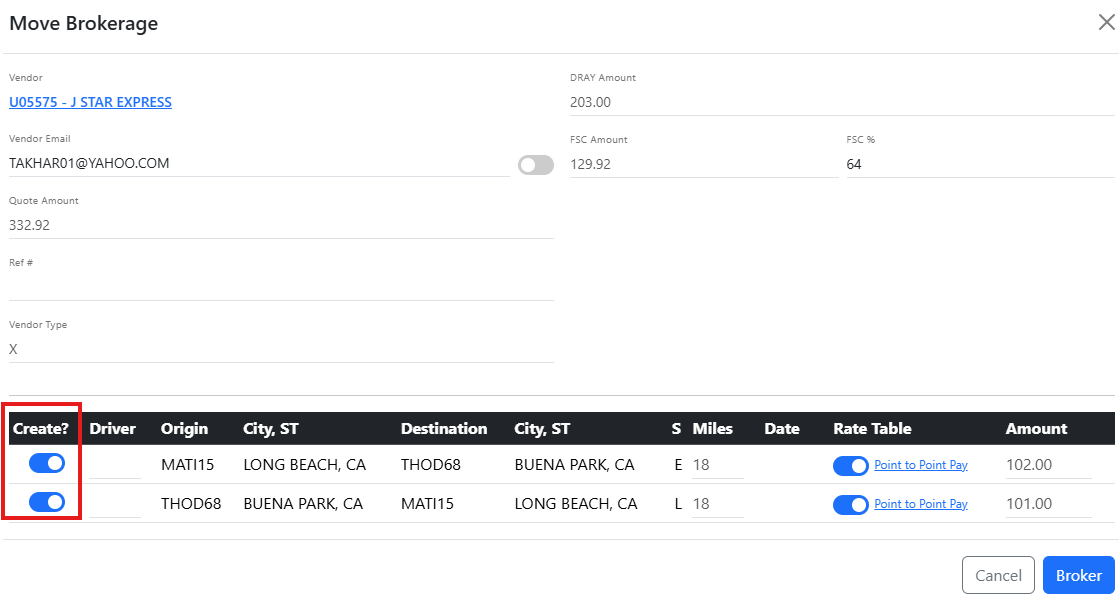
To OVERRIDE a Point to Point Pay amount, left click the applicable Rate Table toggle to the left position, then type the desired rate in the Amount. (As below)

LAST STEP:
✅ Toggle the Create? option on the move(s) you wish to broker (As above)
✅ Review all information carefully
Click Broker to complete the process
Click Cancel to abort the process
Once the brokerage process is completed:
The move is assigned to the vendor
The assignment appears under the vendor card in the Assigned tab
The move displays:
Pro Number (e.g., 57-435623)
Route information (Origin → Destination)
Move indicators (e.g., D, L, E, A)
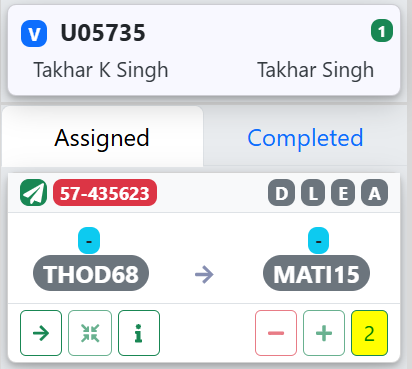
Under the selected Vendor:
Displays all currently assigned moves
Each move card includes:
Pro Number
Route (Origin → Destination)
Action buttons
Displays completed brokered moves
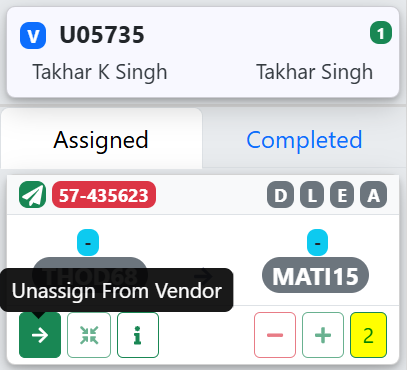
There are two ways to unassign a brokered move:
Click and hold the move card
Drag it from the Assigned tab
Drop it back into the list view
✅ The move is removed from the vendor
Select the move under the Vendor card
Click the Right Arrow (→) Unassign from Vendor action button
✅ The move is returned to the available load list
Brokerage Mode is used when assigning freight to external/vendor capacity
Vendor must be properly configured to support brokerage
The brokerage process creates the formal vendor assignment record
Assignment visibility shifts from internal resources to vendor-based cards
Use Brokerage Mode when:
Assigning moves to LMC vendors
Managing outsourced/brokered freight
Balancing capacity across vendor partners instead of internal fleet
