FileBound 8.3.1 — IMC User Guide
For Business Users Managing Documents
1. Introduction
What’s New in Version 8.3.1 (High-Level Overview)
Performance Improvements: Faster page loads and smoother navigation between modules.
Security Enhancements: Updated authentication handling and stricter session timeouts.
Workflow Updates: More responsive task lists, better filtering, and faster task routing.
UI Refinements: Cleaner icons, improved spacing, and easier-to-read status indicators.
System Requirements / Browser Compatibility
Supported Browsers:
Google Chrome (latest version recommended) - PREFERRED
Microsoft Edge (latest version recommended)
Minimum Screen Resolution: 1366×768 (1920×1080 or higher recommended)
Connectivity: Must be connected to your internal network or VPN (if remote)
Other Requirements: Pop-ups enabled for FileBound site; cookies and JavaScript enabled.
2. Access & Navigation
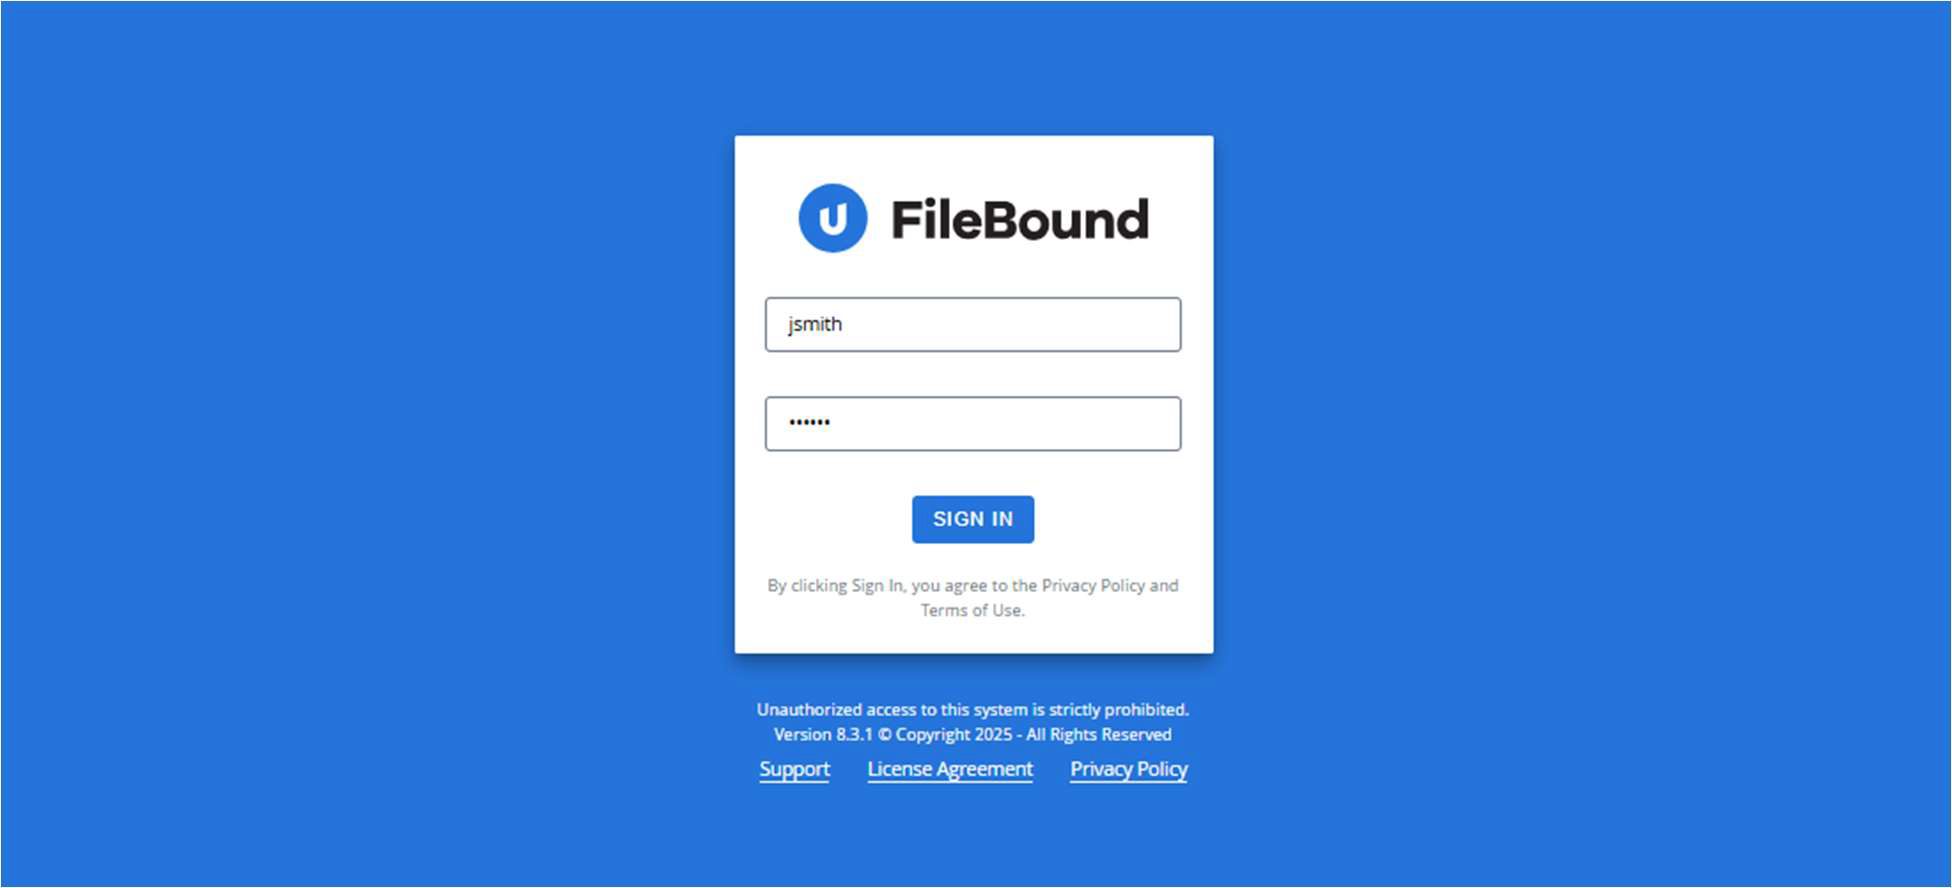
Logging In (On-Prem Workflows)
1. Open your browser and go to your FileBound URL: https://apimaging.imcc.com/v7/PRODFileBound
2. Enter your assigned Username and Password.
3. Click Login.
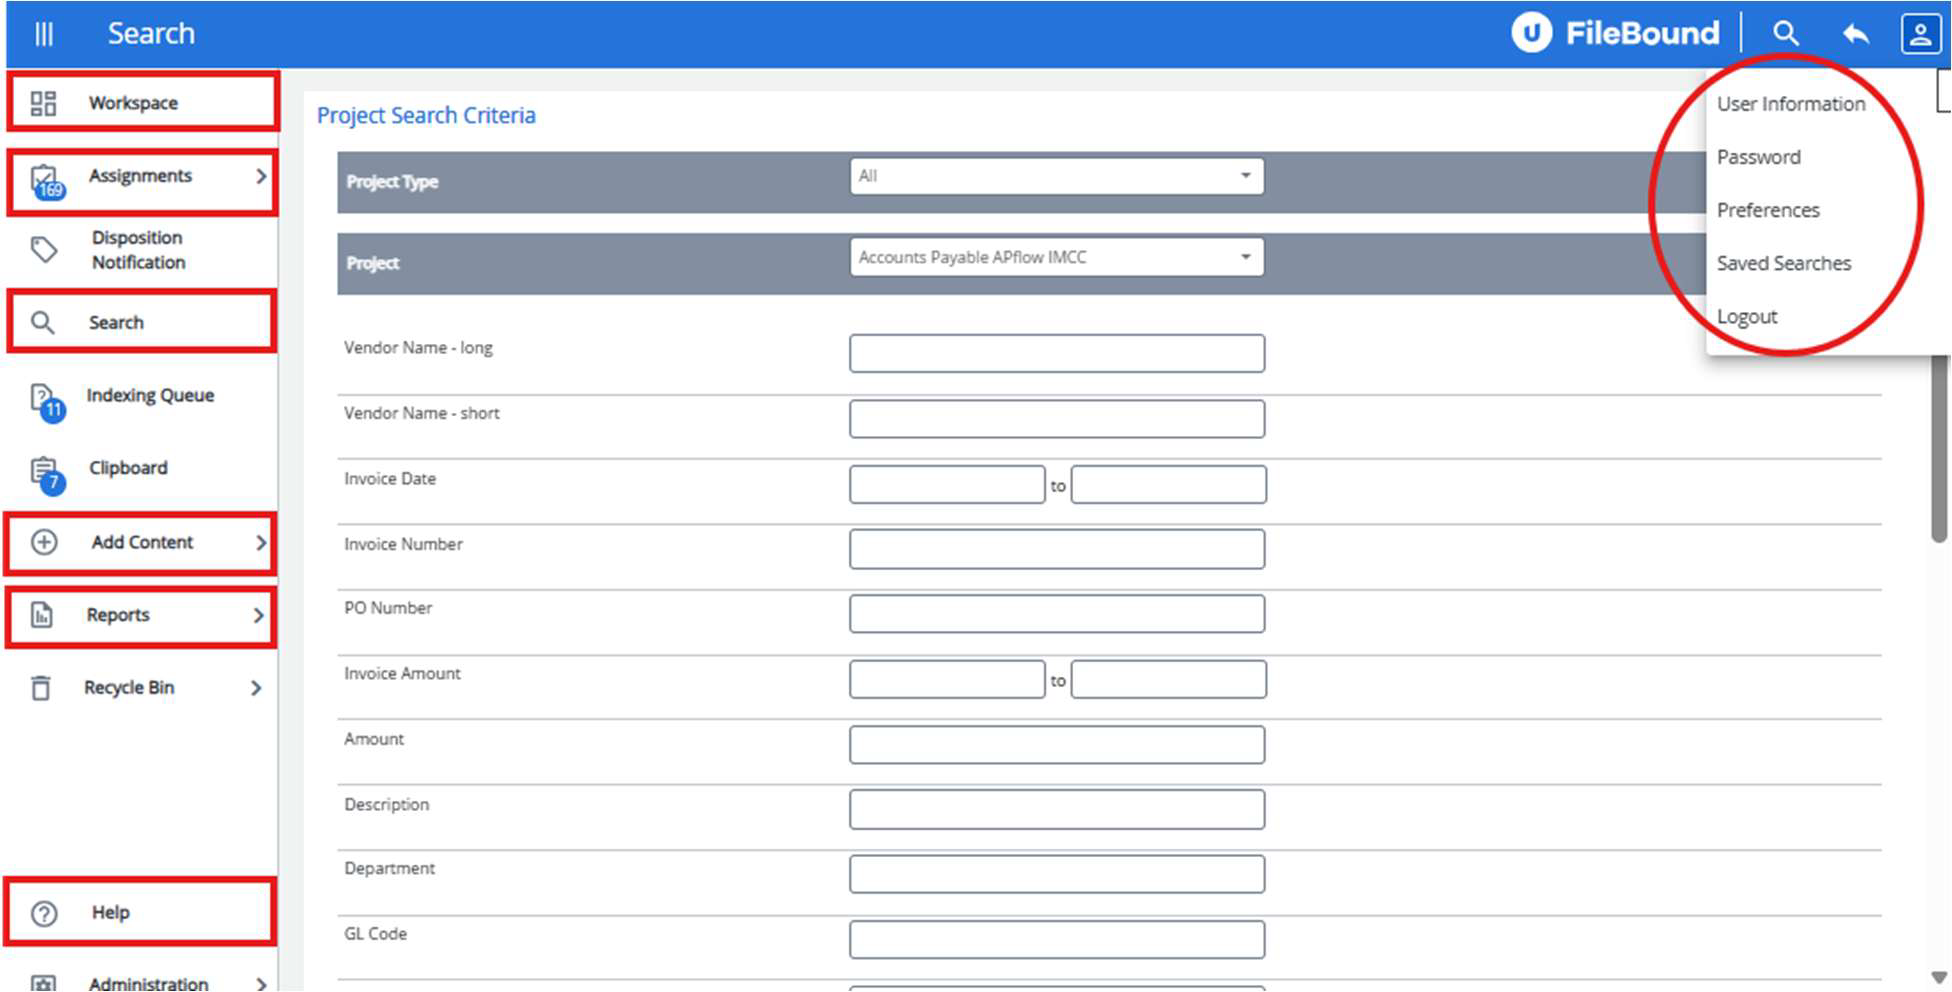
Main Interface Layout
Dashboard: Displays key widgets such as Recent Documents, My Tasks, and Quick Search.
Navigation Bar:
Workspace – Widegets – Submit to GP Batch by Region
Assignments Workflow – View, claim, and act on assigned tasks.
Search – Access basic or advanced document searches.
Reports – Generate and run reports (based on permissions).
Add Content – Add/Upload New Invoice into FileBound
Help – Links to internal documentation or FileBound resources.
Personal Settings, Profile, Help Resources
Access your profile by clicking your User Name in the top right corner.
Change your password, update contact information, or set notification preferences.
3. Document Capture & Import
How to Import Documents
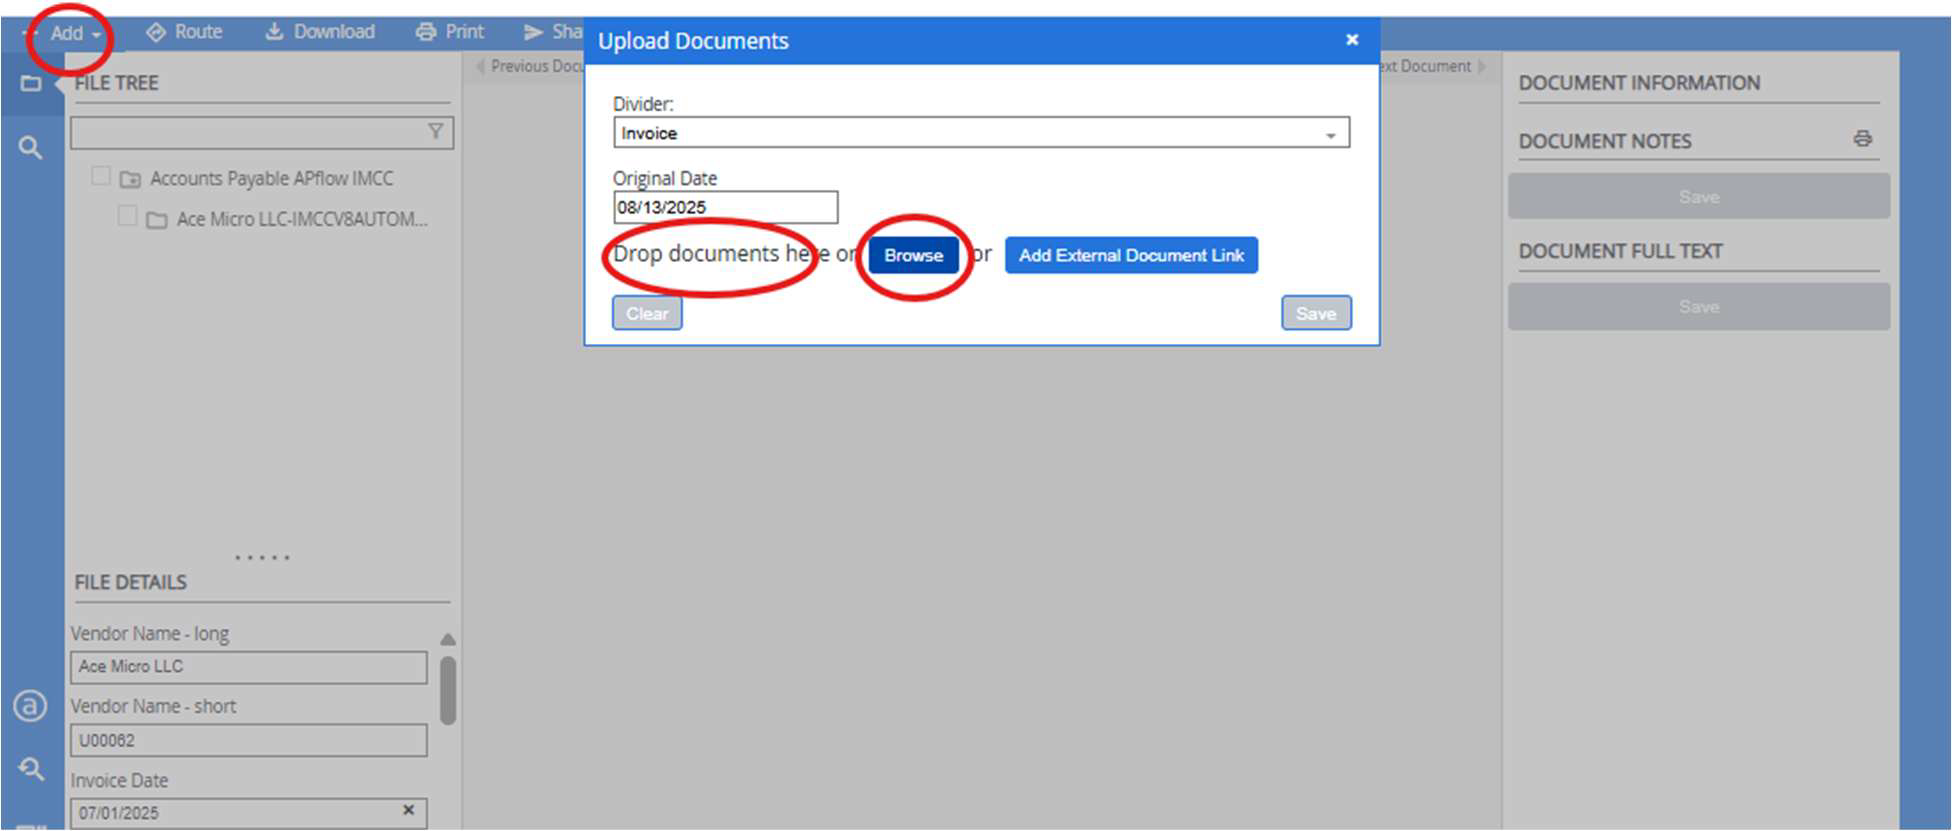
Drag-and-Drop:
Navigate to the target Invoice and open the Web Viewer, choose Upload
Drag a file from your desktop or email directly into the upload area.
Upload: Browse to folder on your PC, choose the file and Upload
Supported File Types and Size Limits
Common types: PDF, TIFF, DOCX, XLSX, PPTX, TXT, JPEG, PNG.
Size limit: Typically 3-5 MB per file
Metadata Entry & Indexing Best Practices
Complete all required index fields to ensure accurate search results.
Use consistent naming conventions
Double-check date formats and numeric fields for accuracy.
4. Searching & Retrieval
Basic Search
From the navigation bar, select Search.
Enter a keyword, document ID, or date range (e.g., Vendor Name, Invoice Number, Invoice Date).
Click Search to view results.
Advanced Search Filters
Filter by additional index fields (e.g., Divider, Date Changed).
Narrow by workflow state or assigned user.
Saving and Managing Search Queries
After running a search, click Save Search to store it for future use.
Saved searches can be accessed from the Search menu under Saved Queries.
5. Workflow / Task Management
Reviewing and Acting on Tasks
Go to Assignments → AP Workflow XXX.
Click on an Assignment to view its associated document(s) and task.
Approving or Rejecting
Select the appropriate action button within the task view.
Add required comments if prompted.
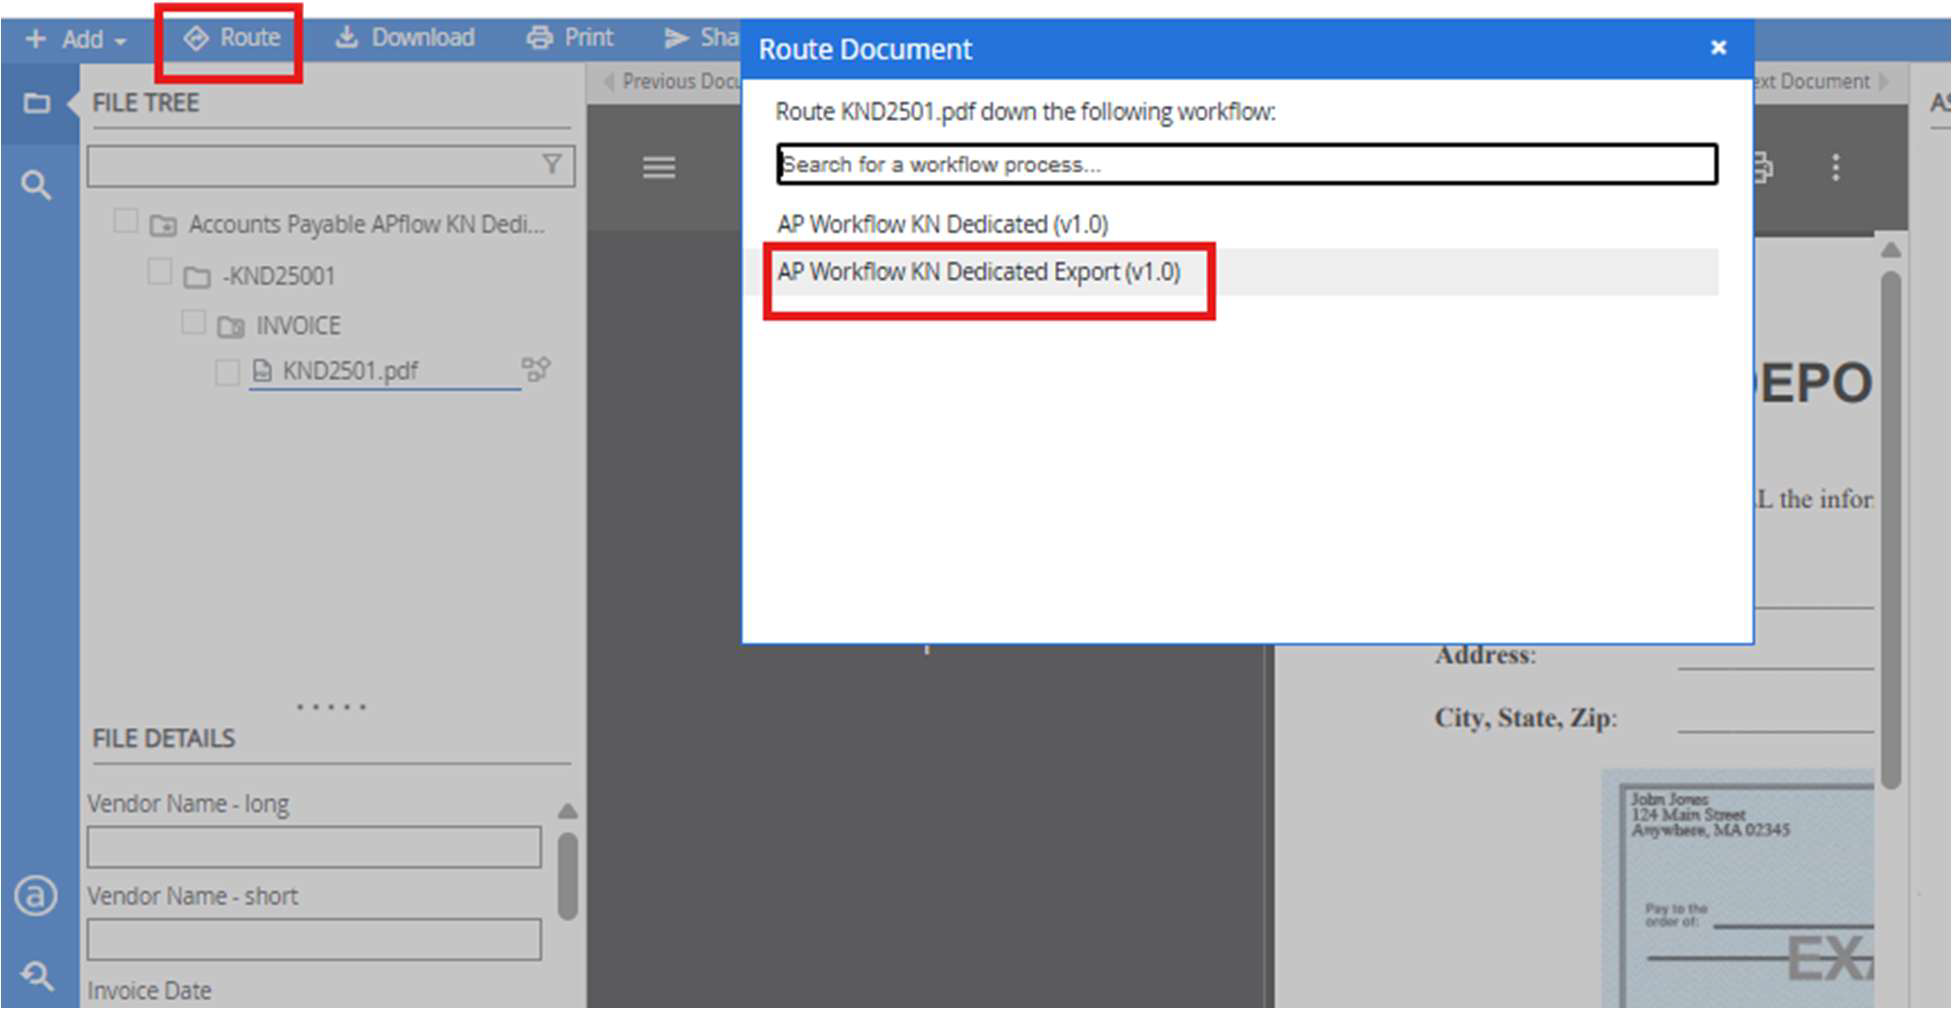
Routing Tasks
The Route option should ONLY be used once an invoice has completed workflow to
send invoice back for GP Submission.
Correct the erroneous data and Route back through the Export workflow, this will
put the invoice back on the Workspace page for GP Submission
6. Reporting & Analytics
Standard Reports
Examples: Document Volume by Type, Workflow Duration, Task Completion Rates.
Available reports depend on your role permissions.
Running and Exporting Reports
Go to Reports from the navigation bar.
Select the desired report and date range.
Export as PDF or CSV for sharing or analysis.
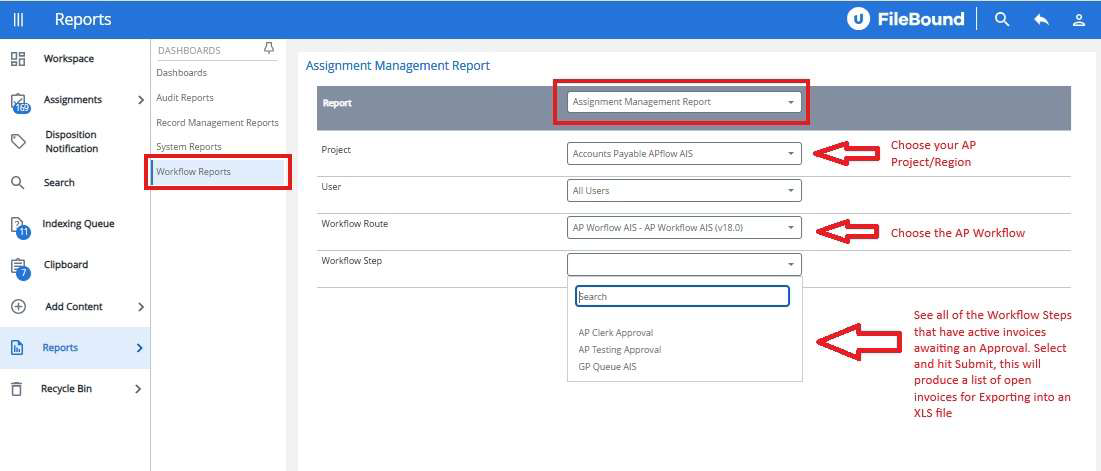
Workflow – Assignment Management Report
The Assignment Management Report is a workflow assignment report that will show
you how many invoices exist in each workflow step assignment, by region.
This report can be used to track down open invoices for Close.
7. Troubleshooting & Support
Common Issues
Login problems – Verify credentials and network connection. Contact IT if
password reset is needed.
Missing tasks – Check workflow filters and ensure you’re viewing the correct queue.
Search failures – Verify index field spelling/values and date formats.
Who to Contact Internally for Help
Primary Contact: IT Help Desk - OneSupport ([email protected])
Secondary Contact: Document Management Team - DL-IT-Imaging (DL-ITImaging@
IMCC.COM)
Provide: Detailed description of the issue, Steps to reproduce, Screenshots if possible
