The Brokerage Mode in the Dispatch Optimizer (D.O.) enables users to assign moves to Vendors classified as LMC (Licensed Motor Carrier) instead of internal drivers.
This mode introduces:
Vendor-based assignment workflows
A brokerage confirmation process
Visibility into brokered loads once completed
Before an LMC vendor can be assigned brokered moves in the Dispatch Optimizer, the vendor must first be configured correctly:
Step 1: Safety Risk Management (SRM) must add the vendor to the Vendor Screen.
Step 2: A user with the applicable permissions must update the Vendor Entity field on the Vendor screen to LMC. (As below)

Navigation Path
Customer Service → File Maintenance → Vendor
Important: A vendor will not be available for selection in Brokerage Mode until the Vendor Entity field has been set to LMC.
Open Dispatch Optimizer (From SWS main menu Easy Operations → Dispatch → Dispatch Optimizer
Locate the Mode Select dropdown (top-right)
Left-click the dropdown
Select Brokerage
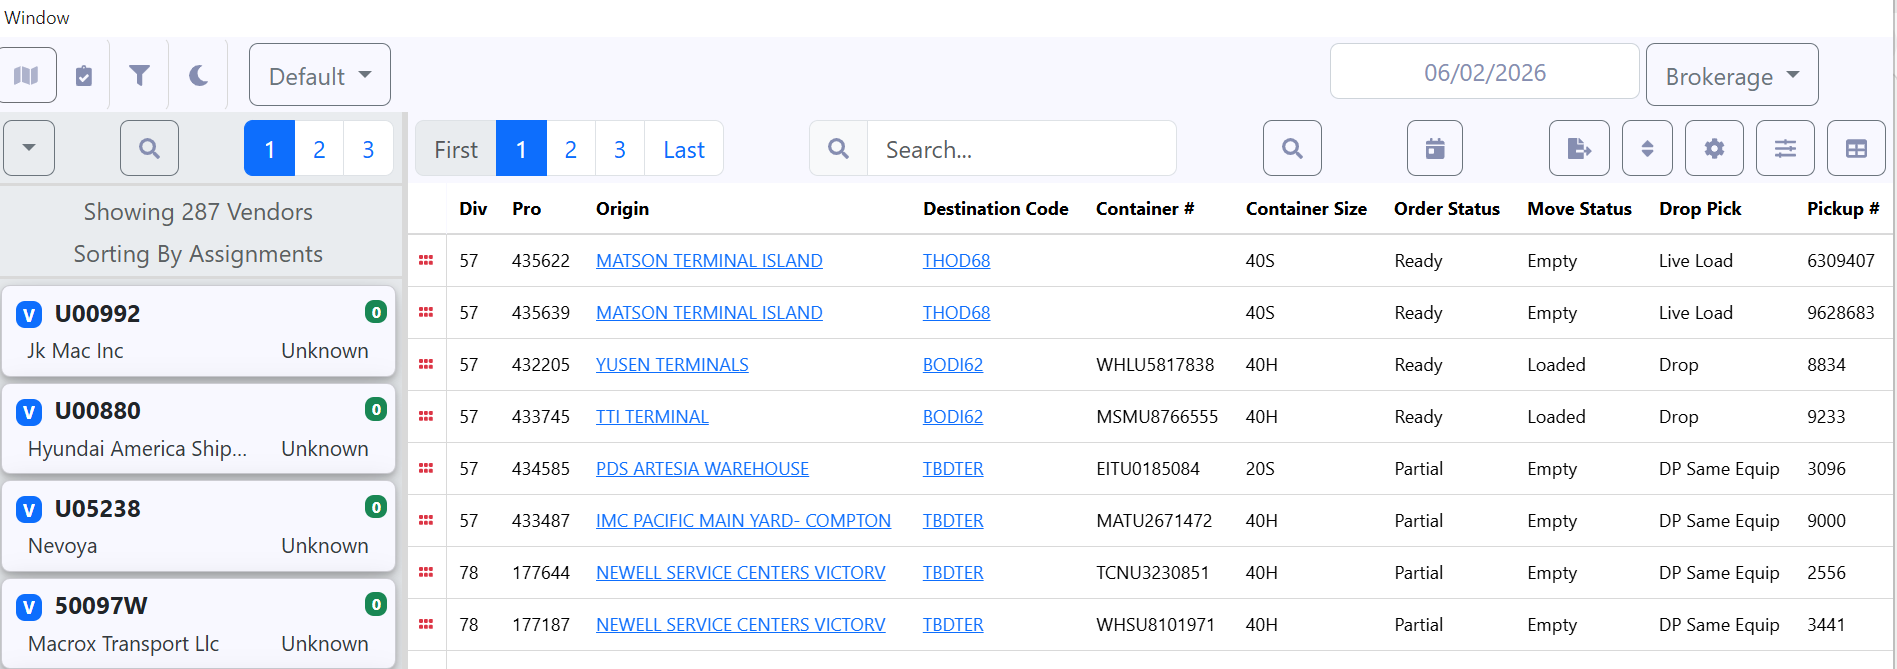
Displays LMC vendors
Shows:
Vendor ID (e.g., U05735)
Vendor Name
Assignment count indicator
Displays move details such as:
Pro Number
Origin and Destination
Container Number and Size
Order Status (Ready, Partial)
Move Status (Loaded, Empty)
Drop/Pick Type
Table settings and filters can be applied to this view just like in “Dispatch” Mode.
Ensure Brokerage Mode is selected
Select (left-click) a Vendor from the left panel
Select a Pro # from the load board using drag-and-drop and drop the move/pro on the selected Vendor
Once the move has been dropped on the selected Vendor, a Move Brokerage modal appears. (As below)
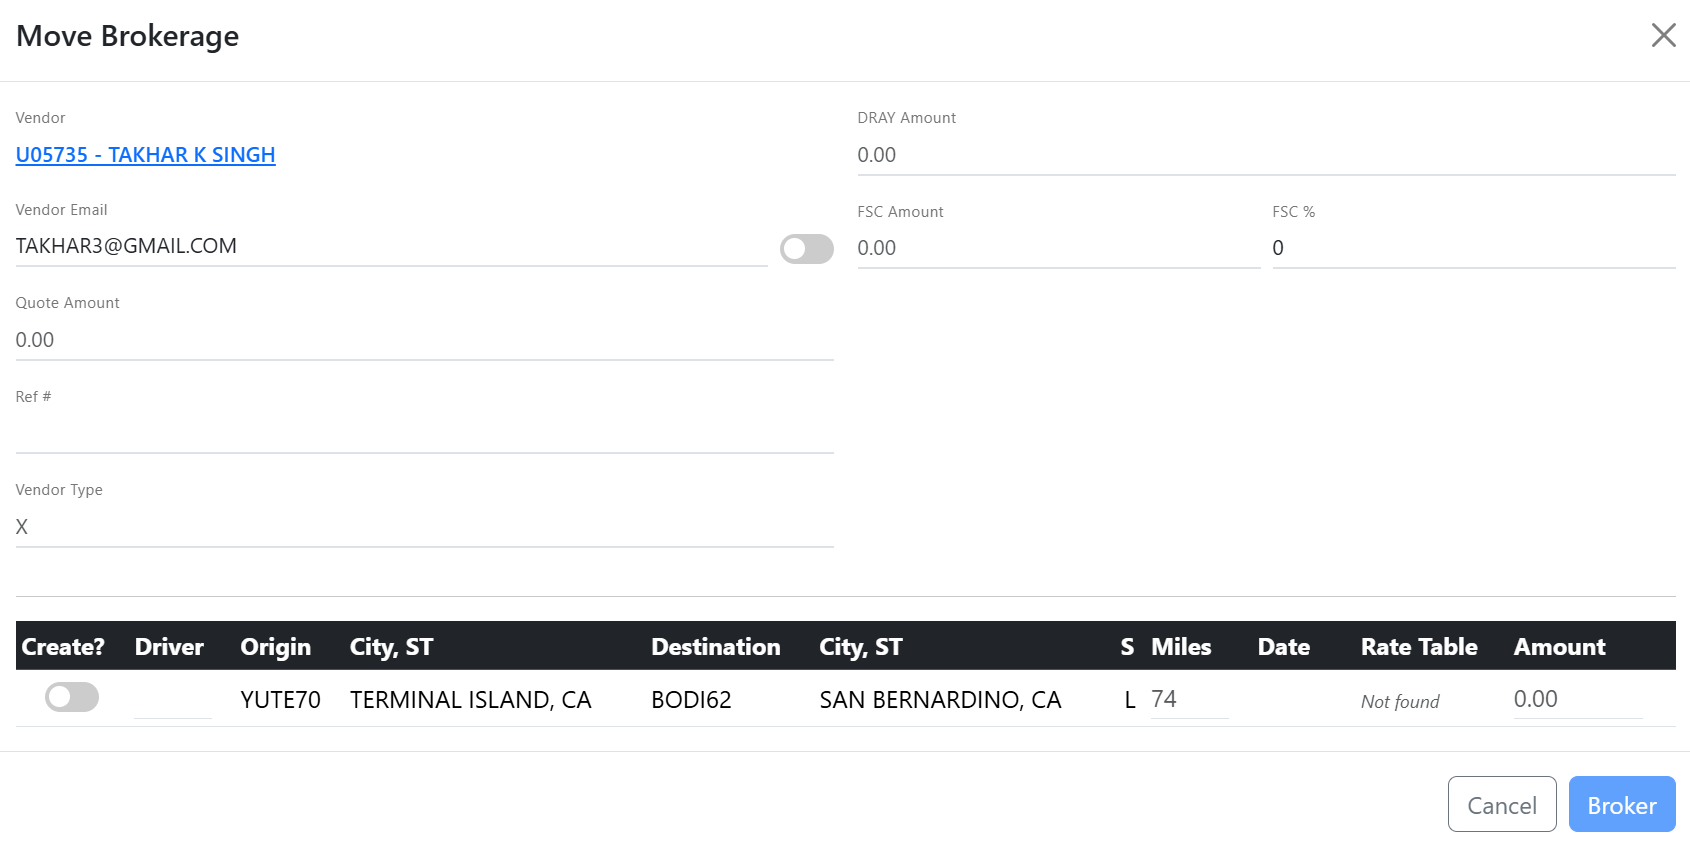
NOTE: The FSC % field can be updated or cleared if no FSC applies to the move(s). (As below)

If no P2P (Point to Point) Vendor rate exists for a displayed move, the Rate Table field will display Not Found. (As above)
If a P2P (Point to Point) Vendor rate does exist for a displayed move, the Rate Table toggle will show blue and in the righthand position with the rate populated in the Amount field. (As below)
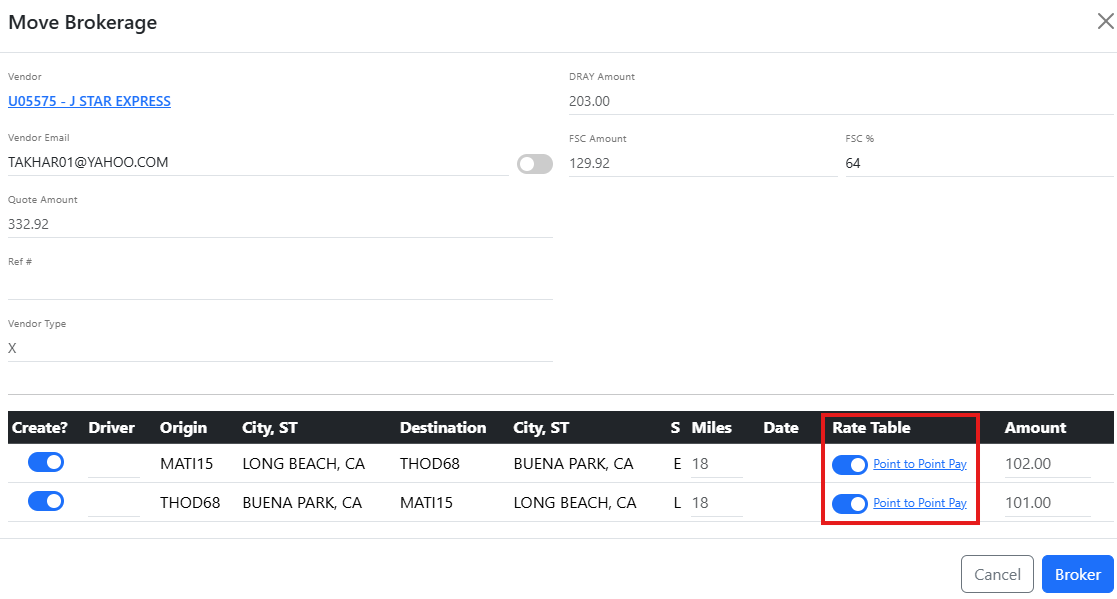
NOTE: If displayed, users can left click on the Point to Point Pay link to navigate to the Point to Point (LP to LP) Pay screen if needed.
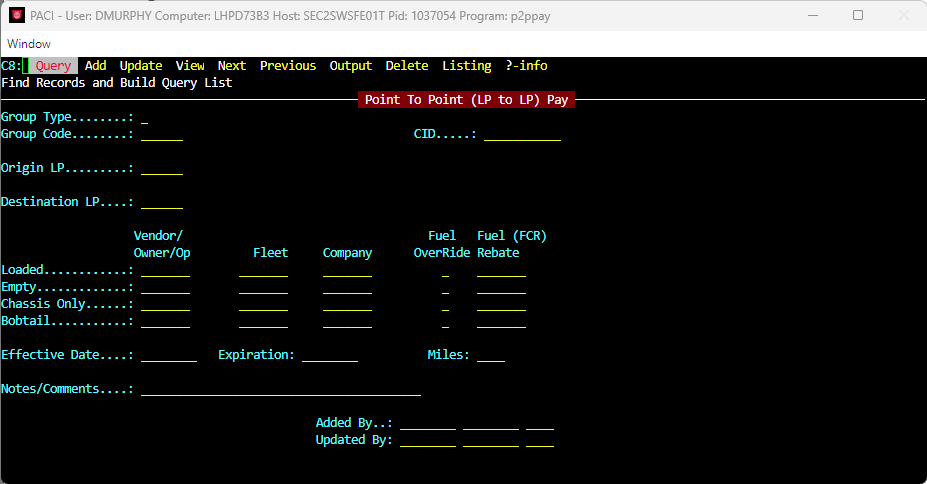
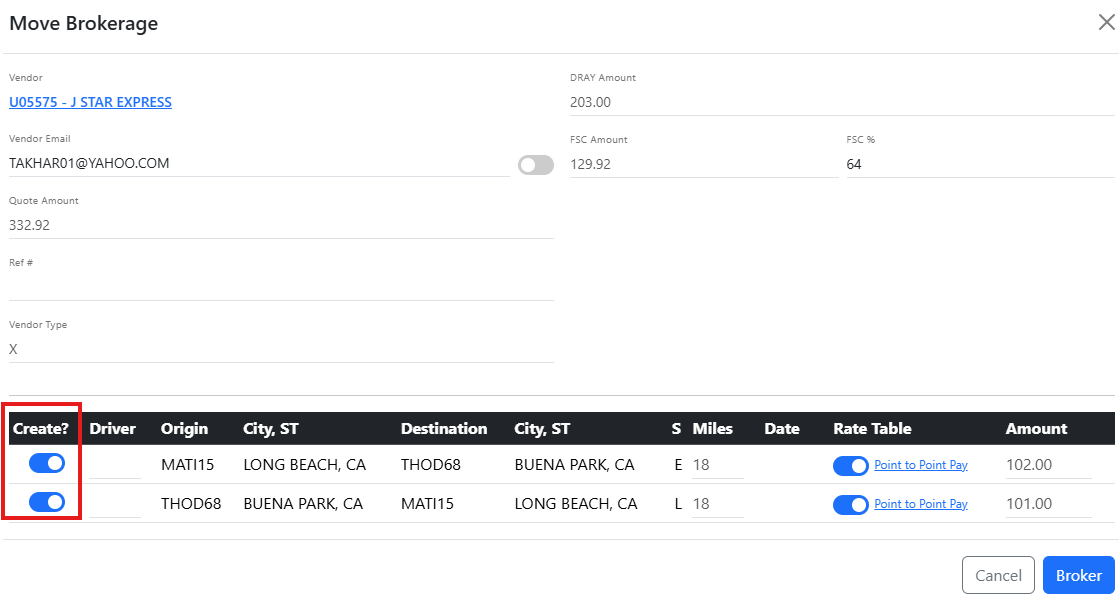
To OVERRIDE a Point to Point Pay amount, left click the applicable Rate Table toggle to the lefthand position, then type the desired rate in the Amount. (As below)

LAST STEP:
✅ Toggle the Create? option on the move(s) you wish to broker (As above)
✅ Review all information carefully
Click Broker to complete the process
Click Cancel to abort the process
Once the brokerage process is completed:
The move is assigned to the vendor
The assignment appears under the vendor card in the Assigned tab
The move displays:
Pro Number (e.g., 57-435623)
Route information (Origin → Destination)
Move indicators (e.g., D, L, E, A)
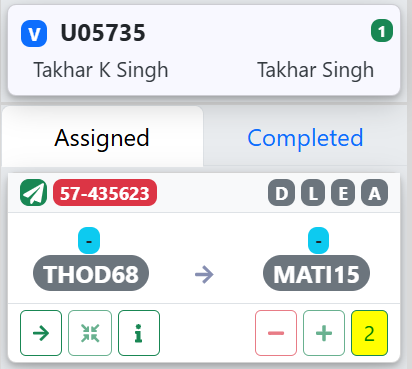
Under the selected Vendor:
Displays all currently assigned moves
Each move card includes:
Pro Number
Route (Origin → Destination)
Action buttons
Displays completed brokered moves
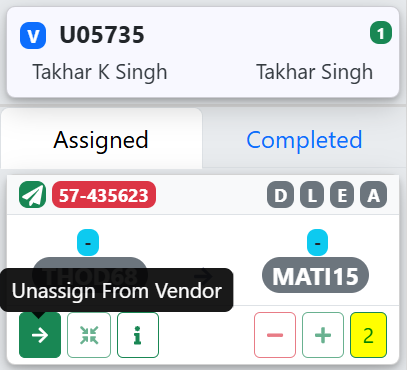
There are two ways to unassign a brokered move:
Click and hold the move card
Drag it from the Assigned tab
Drop it back into the list view
✅ The move is removed from the vendor
Select the move under the Vendor card
Click the Right Arrow (→) Unassign from Vendor action button
✅ The move is returned to the available load list
Brokerage Mode is used when assigning freight to external/vendor capacity
Vendor must be properly configured to support brokerage, including SRM setup and the Vendor Entity field in the Vendor screen set to LMC
The brokerage process creates the formal vendor assignment record
Assignment visibility shifts from internal resources to vendor-based cards
Use Brokerage Mode when:
Assigning moves to LMC vendors
Managing outsourced/brokered freight
Balancing capacity across vendor partners instead of internal fleet