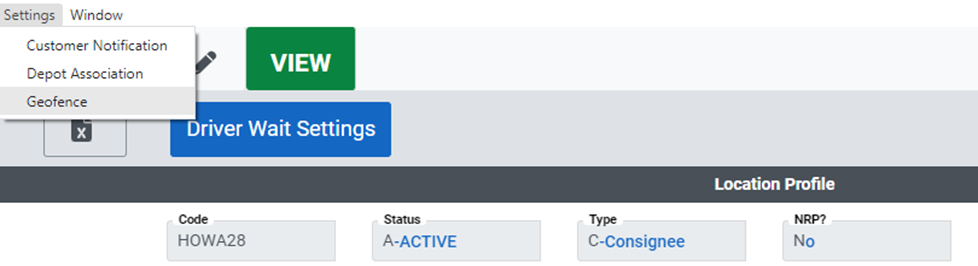
From SWS main menu go to Customer Service, left click on File Maintenance, then left click on Location Profiles. Once you have queried a location profile, left click on “Settings” and select “Geofence” from the dropdown. (See below example)
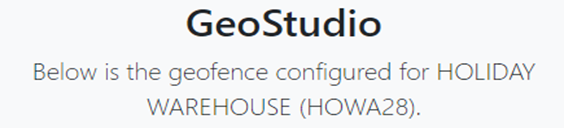
“GeoStudio” will launch and the Location Profile being viewed will be displayed at the top of the page. (Example below)
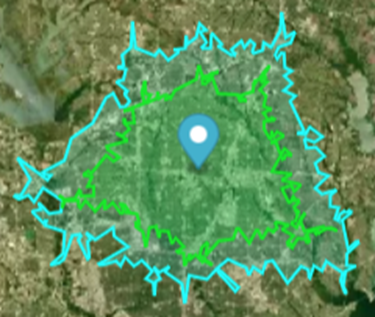
A graphic similar to the below should also be displayed.
NOTE: Use the Scroll Wheel on the Mouse to ZOOM IN or ZOOM OUT on the map.
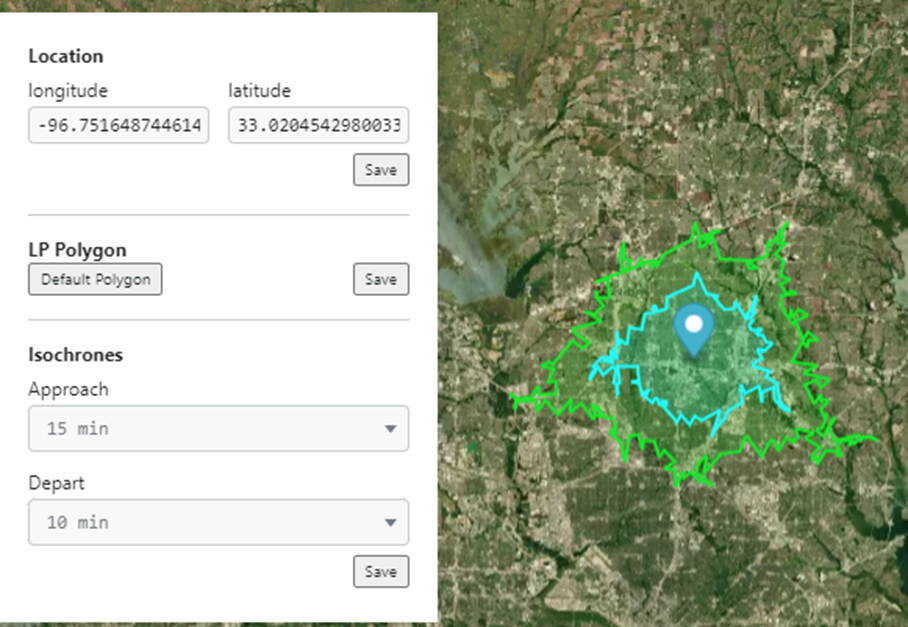
In the graphic below: The blue pinpoint represents the Location Profile. The cyan line is the “Depart” line. The green line is the “Approach” line.
An information box shows to the left of the map. (Example below)
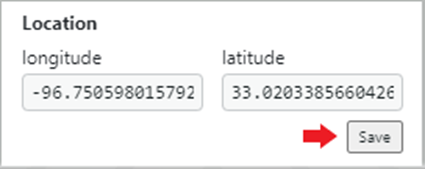
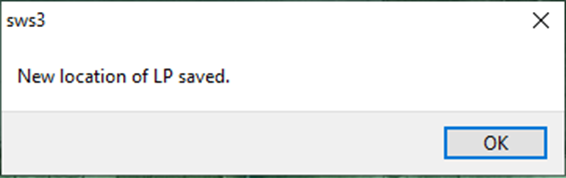
ZOOM IN on the map to view a more defined location of the blue pinpoint. Position the cursor/hand over the blue pinpoint and hold to reposition. The Lat/Long will change whenever the pinpoint is moved. You must left click on the “Save” button (below) to capture the repositioning. A system message will display confirming the Saved location. (As below)
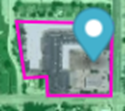
A magenta “Polygon” around the Location Profile will appear as below. As you ZOOM IN the borders will become clearer.

Double left click within the ”Polygon” to display a dotted yellow line which can be used to redraw the ”Polygon” itself. (As below)
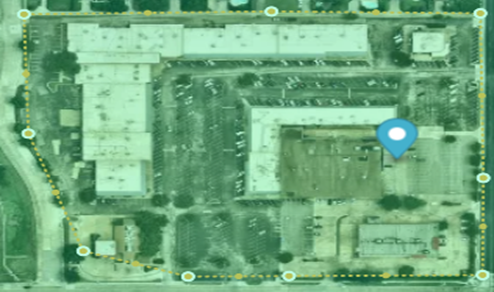
Left click and hold the cursor/hand on any of the yellow points and move to reposition that section of the dotted line.

To delete an adjusted section of the yellow line, left click on any of the yellow points then left click on the Trash Can symbol at the top right of the screen. Multiple points can be selected by holding down the “Ctrl” button prior to selecting.

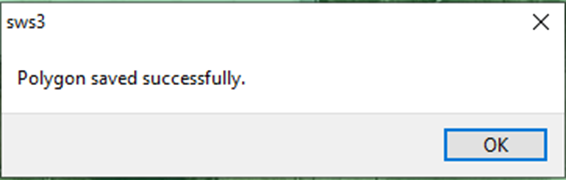
Left click on the “Save” button below to capture changes made. A system message will display confirming the Saved “Polygon” . (As below)
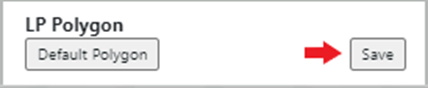
NOTE: Prior to hitting “Save”, you can left click on ”Default Polygon” to reset to the previous settings prior to any changes made.
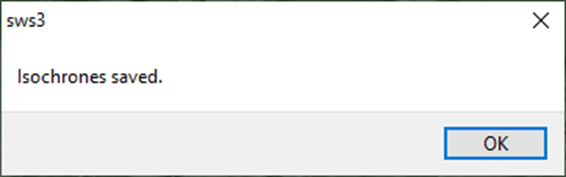
To set the “Isochrones” (Depart & Approach lines) use the dropdown arrows below to select the desired time for each. The times represent how many minutes away from the Location Profile you wish to set the notification boundary. Left click on the “Save” button below when selections have been made. A system message will display confirming the Saved “Isochrones” . (As below)