DRIVER SCHEDULE
To access the Driver Schedule from SWS main menu, go to Easy Operations, left click on Driver Information, then left click on Driver Schedule.
The Driver Schedule can be used to:
· Review driver pay by day & week
· Review completed miles by day & week
· Review driver completed move list by day
· Review driver events & add driver notes
Once the application is launched, there are 3 search options available: “By Division”, “By Driver”, or “By Dispatcher”. (As below)

NOTE: By default, “By Division” will be the active selection. To select “By Driver” or “By Dispatcher”, left click on either option in the green box. The active search category will then be shaded in a darker green. (As below)

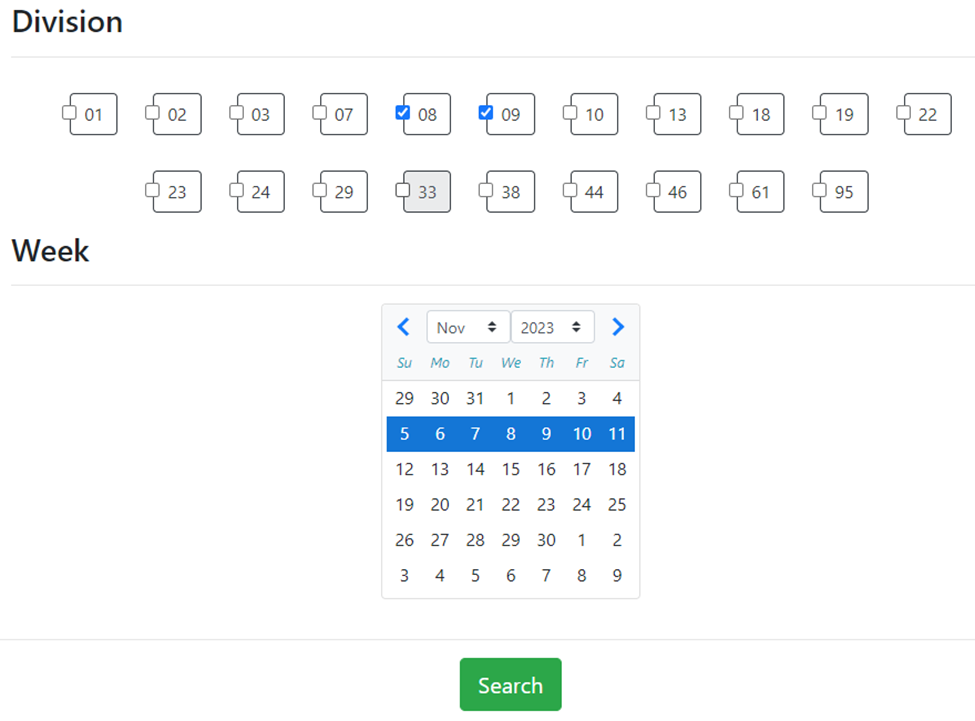
SEARCH BY DIVISION:
Select one or more divisions to search by left clicking in the box to the left of the division number.
Next, left click the week on the calendar that you wish to review. The selected week will be shaded in blue. (See below)
NOTE: When searching by division, only one week can be selected and viewed at a time.
Once the desired divisions and week to review have been selected, left click on the green “Search” button.
After the “Search” button has been clicked, the report data will be displayed for review. At the top left of the page are three (3) green action buttons: “Query”, “Refresh” and “Export”. The selected week will be displayed in the middle of the report and at the top right is a “Search” box. (All as below)

“Query” button- Left click to return to the previous page and select new Search criteria.
“Refresh” button- If applicable, left click to refresh the data. NOTE: An automatic counter will refresh the data every 5 minutes. Any previously set Sorts will NOT be saved and will have to be reselected after the Refresh.
“Pause Refresh”- Left click in the box to Pause the 5-minute Refresh countdown timer. Left click in the box again to restart the countdown.
“Export” button- If needed, left click to save the report data to a file for reference
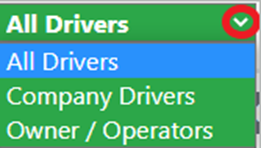
Below the action buttons, there is a “All Drivers” dropdown menu. The default selection is “All Drivers”.
Left click on the dropdown arrow to select/view “Company Drivers” or “Owner / Operators”. (As below)
NOTE: To locate a specific driver, use the “Search” box mentioned above. Type the driver’s # or name in the field to display any data for that driver. Erase the data in the “Search” field to return to the previous view.
The report displays the driver name/number listed on the left-hand side followed by daily pay & miles data Sunday to Friday of the chosen week. In addition, there is a “Totals” column for the entire week. (Abbreviated view below)

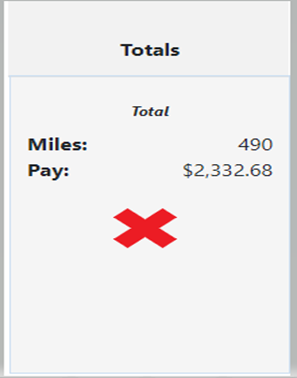
Any day in which the driver has completed moves will show as below:
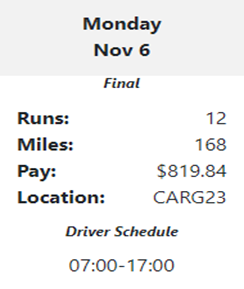
NOTE: The “Driver Schedule” for that day will only display if it has been entered in as a “Change Driver Events” in the Dispatch Optimizer. Any entered events (vacation, sick, truck down, etc.) in addition to entered notes will display as well. Please review the Driver Schedule Events training doc in SharePoint for instructions.
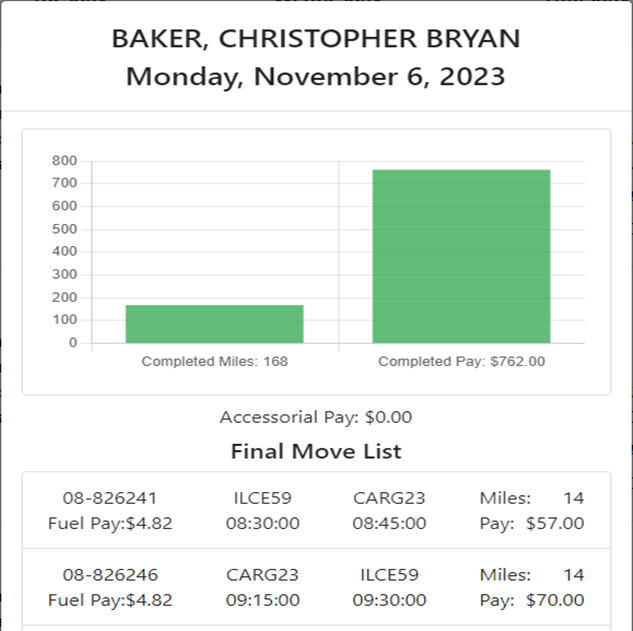
Left click on any day to display “Completed Miles” and “Completed Pay” in graph form. “Accessorial Pay” will also display if applicable as well as a list of all Order Pros the driver completed that day. (See abbreviated example below)
NOTE: Left click on the Current day/date and the graph will show “Actual Moves” and “Planned Moves’ versus Completed.
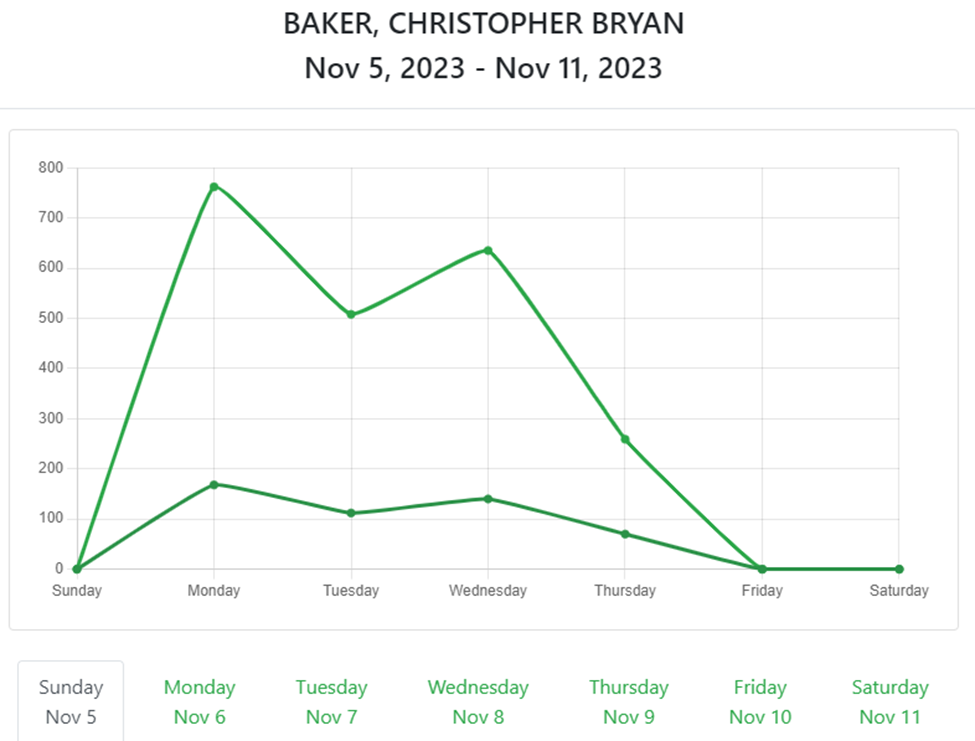
Left click anywhere in a driver’s “Totals” section and a line graph will display Completed Pay (top line) and Completed Miles (bottom line) information for the selected week. (As below)
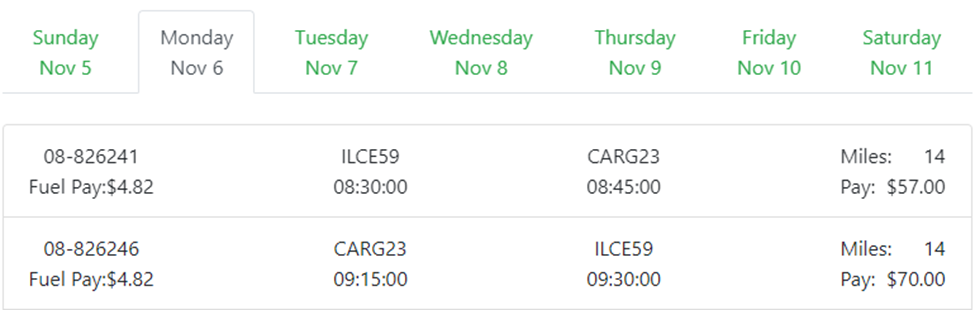
Left click on any of the day/date tabs below the graph to view the Final Move List for that day. (Abbreviated example below)
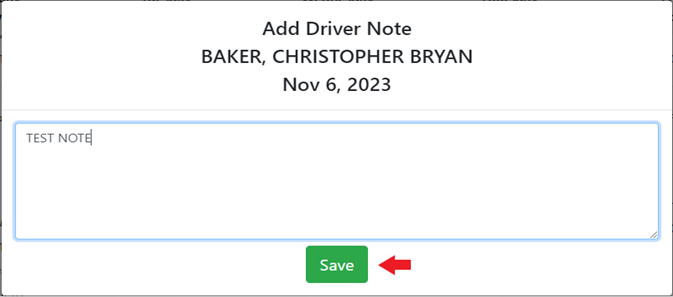
To ADD A DRIVER NOTE as a dispatcher, D.I. or other reviewer, right click on a specific day and the below window will pop up. Enter desired notes in the box then left click on the green “Save” button. (As below)
The Saved Note will then display on that specific day on the calendar. (As below)
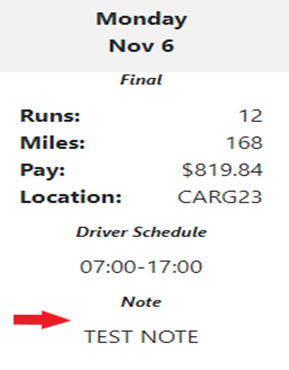
NOTE: To erase or edit a previously entered note, right click on that specific day to display the note window again. Erase or make changes to the note then left click on the “Save” button again.
To SORT DATA, left click on an individual Day/Date column header or the “Totals” column header. The below window will display:
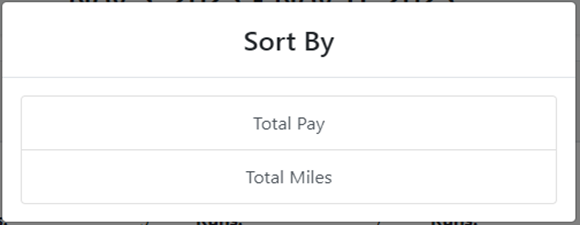
Left click on either “Total Pay” or “Total Miles”. The below window will display:
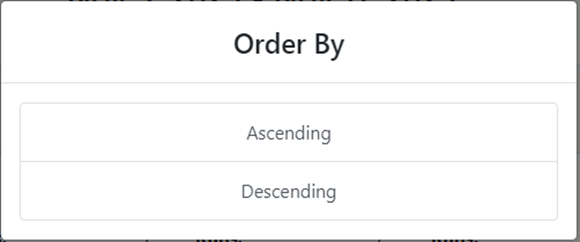
Left click on either “Ascending” or “Descending” and the individual Day/Date or “Totals” column will reflect the applied Sort.
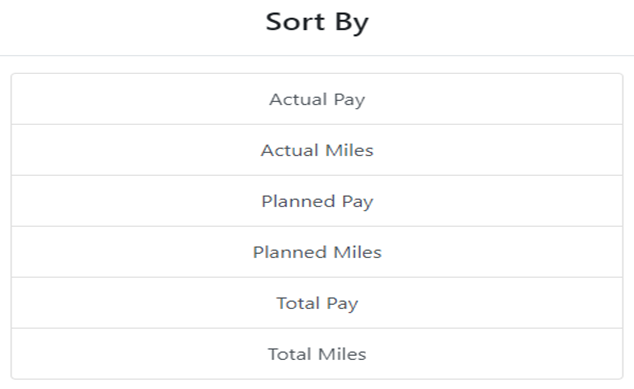
NOTE: Left click on the Current day/date and additional sorting options are available. (As below)
SEARCH BY DRIVER:
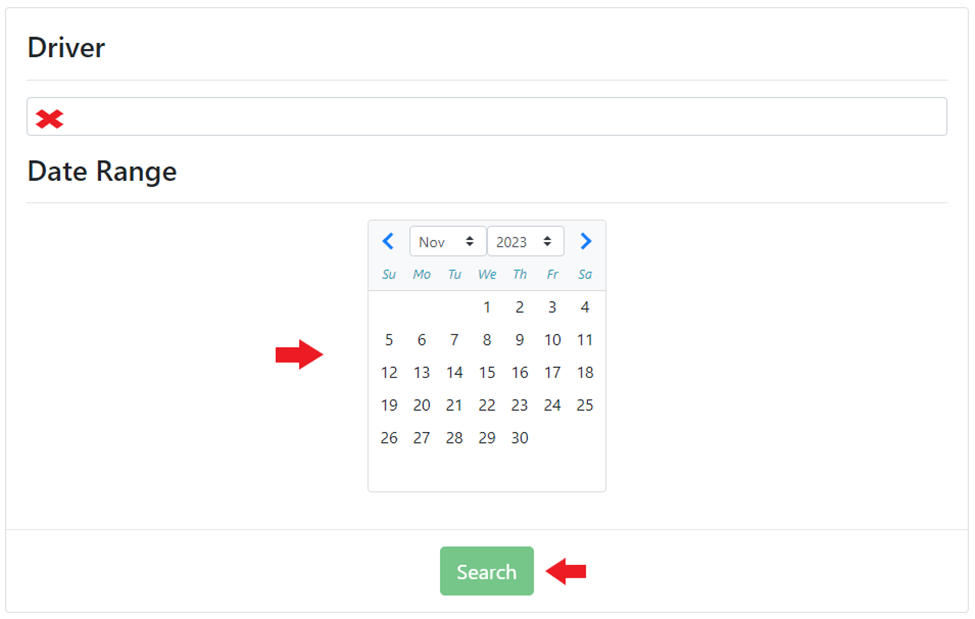
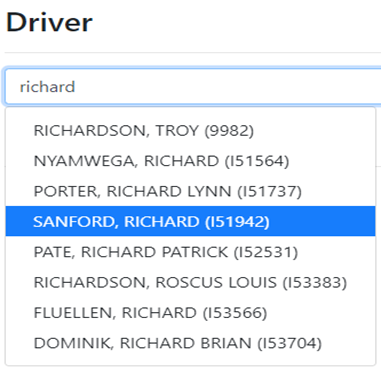
In the “Driver” field, begin typing either the driver’s last name, first name or driver #. This field uses typeahead and will display all matches. Left click on the desired driver to select. (Will highlight in blue as below).
Next, select the “Date Range” you wish to view on the calendar. First left click on the desired start date then left click on the desired end date. The selected days within the range will all be highlighted. (As below) Once date range has been selected, left click on the green “Search” button.

NOTE: When viewing one driver, you can also left click on any day with activity to display “Completed Miles” and “Completed Pay” in graph form. Right click on any day to add a “Driver Note”.
Left click on the “Query” button to view another driver or perform a different search.
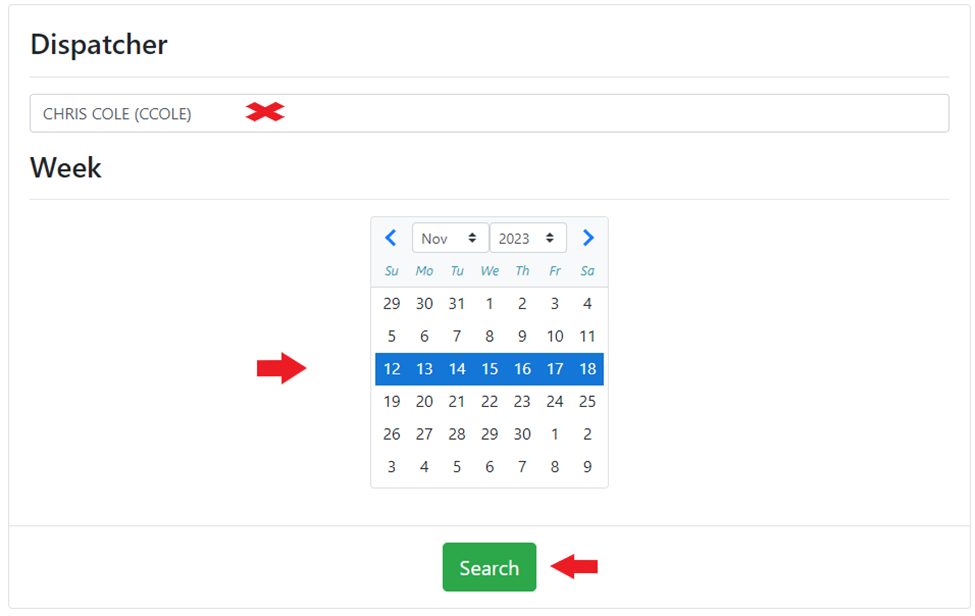
SEARCH BY DISPATCHER:
In the “Dispatcher” field, begin typing either the dispatcher’s first or last name. This field uses typeahead and will display all matches. Left click on the desired dispatcher to select. (Will highlight in blue).
Next, left click the week on the calendar that you wish to review. The selected week will be shaded in blue. (See example below)
NOTE: When searching by dispatcher, only one week can be selected and viewed at a time.
Once the desired dispatcher and week to review have been selected, left click on the green “Search” button.
As in the other views, left click on any day to display a “Completed Miles” and “Completed Pay” graph for that day as well as a “Final Move List”.
Left click anywhere in a driver’s “Totals” section and a line graph will display Completed Pay (top line) and Completed Miles (bottom line) information for the selected week. Left click on any of the day/date tabs below the graph to view the Final Move List for that day.
Right click on any day to add a “Driver Note”.