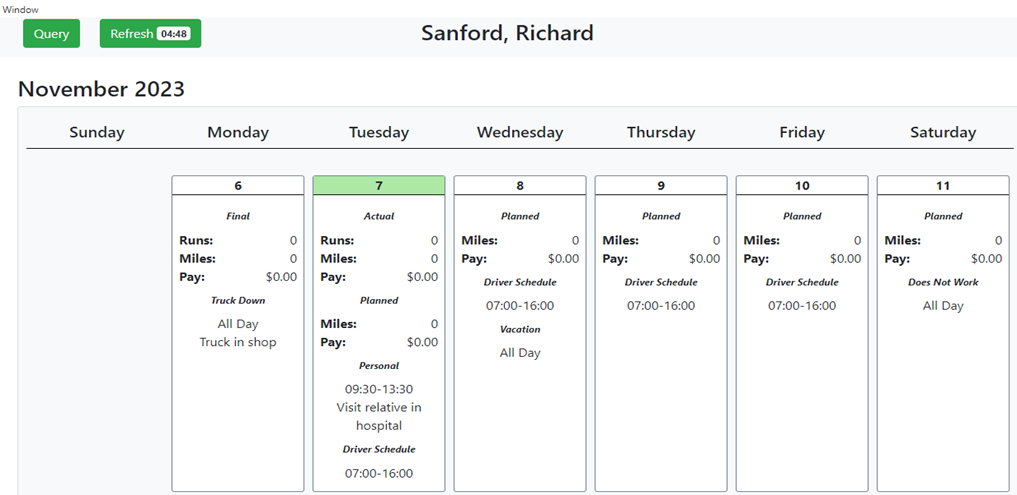
Para acceder al Optimizador de Despacho (O.D.) desde el menú principal de SWS, ve a Operaciones Fáciles, haz clic izquierdo en Despacho, luego haz clic izquierdo en Optimizador de Despacho.
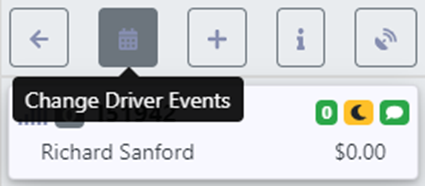
El Calendario de Eventos del Conductor se utiliza para registrar cambios en el horario de trabajo de un conductor individual. Para acceder al calendario, primero haz clic izquierdo en la "tarjeta" del conductor de la lista de conductores. A continuación, haz clic izquierdo en el icono de calendario "Cambiar Eventos del Conductor" botón directamente arriba de la "tarjeta" del conductor. (Como se muestra abajo)
Se mostrará un calendario (ejemplo abreviado abajo). La vista predeterminada es el mes actual con "Hoy" sombreado en verde claro.
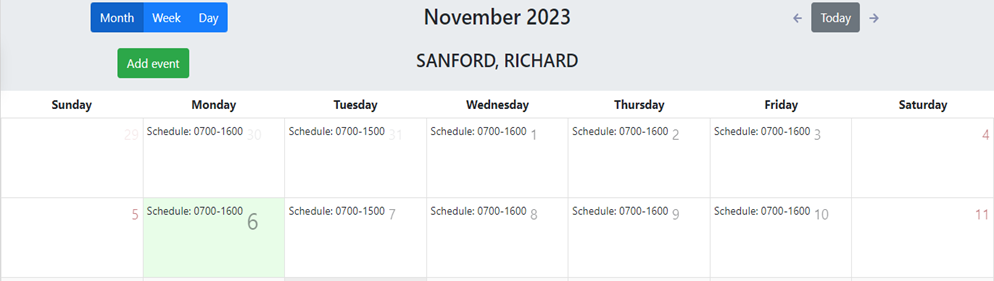
“Week” & “Day” view are also available by left clicking on the desired tab. (As below)

To view a previous or future Month, Week or Day (based on selection),left click on the left or right arrows visible next to the “Today” button. To return to the current view, left click on “Today”. (As below)

NOTE: Driver schedule events can be added for past or future dates.
To ADD a one-time event, left click on the green “Add event” button. (As below)

The below window will display:
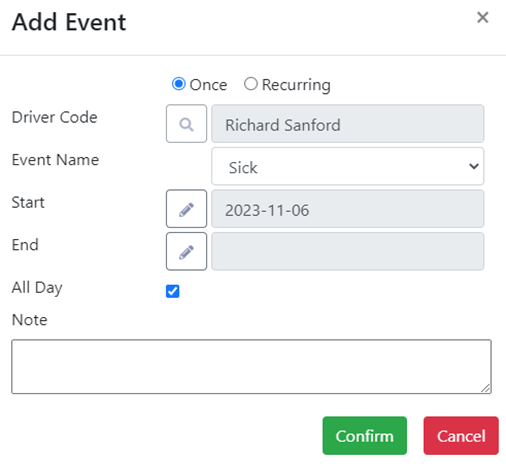
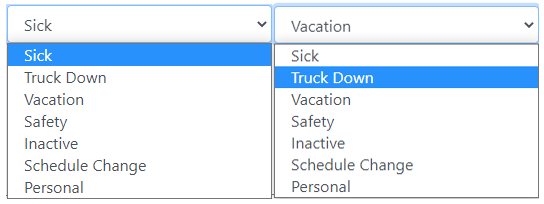
The default setting will add an event “Once”. Left click on the down arrow to the right of “Event Name”, then left click on the applicable classification. (As below)
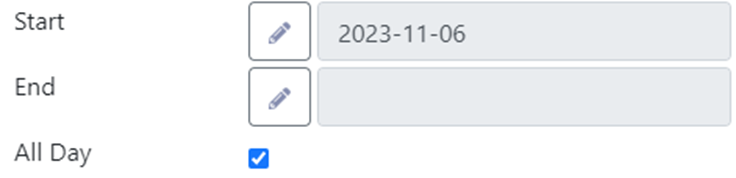
The “Start” date defaults to the current date and the “All Day” box will automatically autofill. (As below)
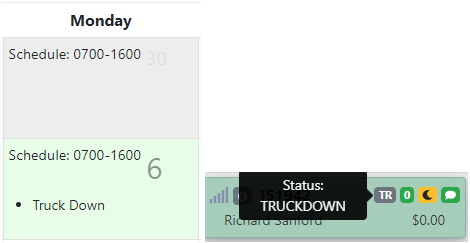
If the event is applicable only to the current date and is an “All Day” occurrence, type any necessary details in the “Note” field then left click on the green “Confirm” button. The entered event will then show on the calendar and the driver’s “card” as well as turn the “card” Green for easier visibility. (As below)
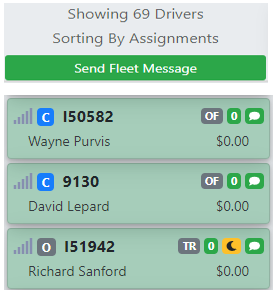
NOTE: The drivers with confirmed events will display at the end of the driver list although the order could be impacted by applied filters. (See example below)
Para AGREGAR un evento que no sea "Todo el día", desactiva la casilla y luego haz clic izquierdo en el botón de acción Lápiz a la derecha de "Inicio". (Como se muestra abajo)
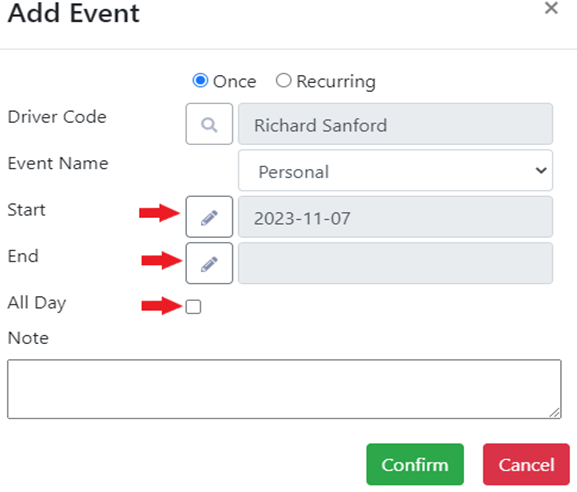
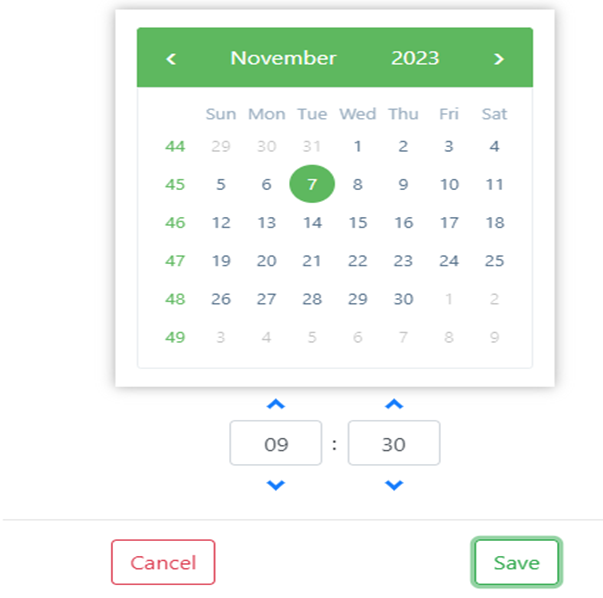
Se mostrará la siguiente ventana. Haz clic izquierdo en la fecha deseada y luego selecciona la hora de "Inicio" en horas y minutos usando las flechas hacia arriba y hacia abajo o escribiendo la hora deseada (en formato militar) en los campos. Una vez seleccionado, haz clic izquierdo en el botón "Guardar". Repite el proceso para la hora de "Fin". (Como se muestra abajo)
NOTA: Para cancelar la entrada, haz clic izquierdo en el botón "Cancelar".
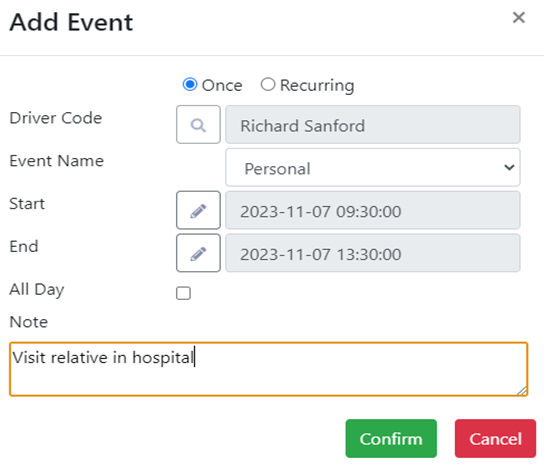
Left click on the “Confirm” button when both the “Start” and “End” times have been selected. Remember to enter any necessary or helpful information in the “Note” section. (As below)
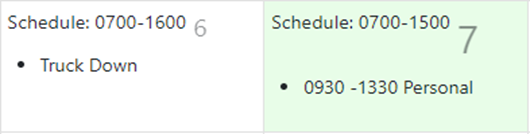
The event will then be displayed on the calendar. (As below)
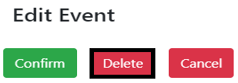
To DELETE an event, left click on the entry on the calendar itself. An “Edit Event” window will display. Left click on the red “Delete” button to erase the entry. (As below)
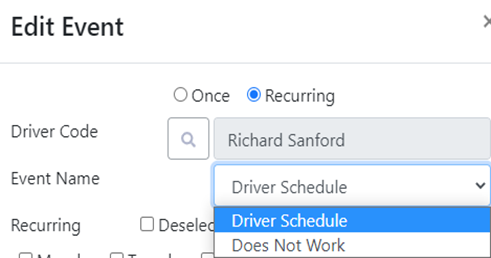
Para AGREGAR un evento Recurrente o repetido, haz clic izquierdo en el botón verde Agregar evento y luego haz clic izquierdo en el botón de radio a la izquierda de Recurrente para seleccionar esta opción. Hay dos opciones disponibles bajo Nombre del evento: Horario del conductor y No trabaja. (Como se muestra abajo)
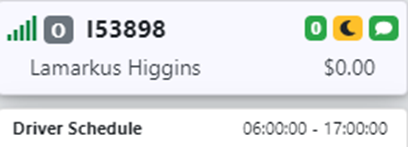
Ingresar un horario del conductor no es obligatorio pero podría ser útil al despachar mudanzas. El horario ingresado aquí se muestra en la "tarjeta" del conductor. (Ver ejemplo abajo)
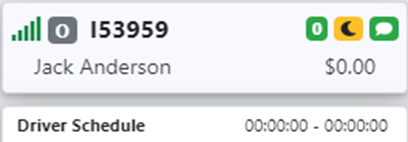
Si no se ingresa un horario, la tarjeta se mostrará de la siguiente manera:
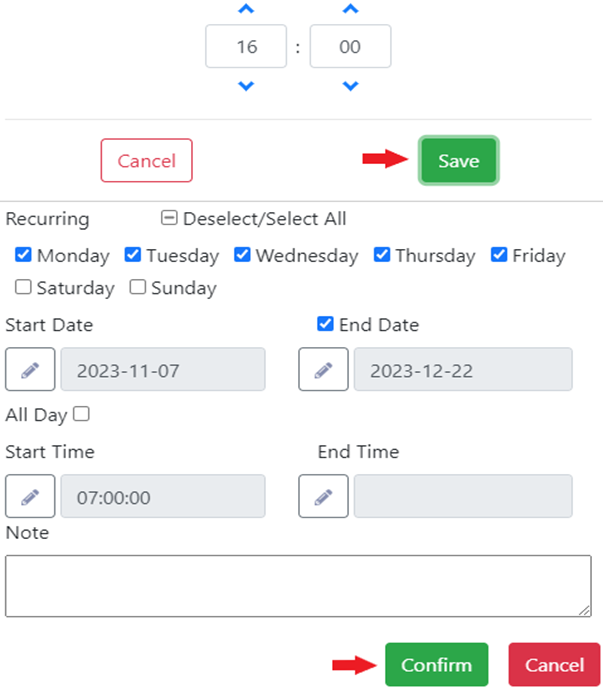
Si es aplicable, usa la casilla para Seleccionar o Deseleccionar todos los días o selecciona solo los días afectados. (Como se muestra a continuación)

Next, select a “Start Date” by left clicking on the pencil action button. Select a date on the popup calendar then left click on the “Save” button. If the schedule is temporary, left click to select ”End Date”. NOTE: If “End Date” is not selected, the schedule entered will populate in perpetuity.
Next, enter the “Start Time” and “End Time” for the days selected. Enter a “Note” if needed then left click on the “Confirm” button. (See example below)
The entered schedule will now display on both the driver’s calendar and the driver’s “card”.
NOTE: The “All Day” option cannot be selected when entering a driver’s schedule.
In the event a duplicate schedule entry is attempted, the below error message will display:

The existing schedule event must be edited/deleted before the new one can be saved.
Left click on the driver’s schedule for any given day and the “Edit Event” window below will display.
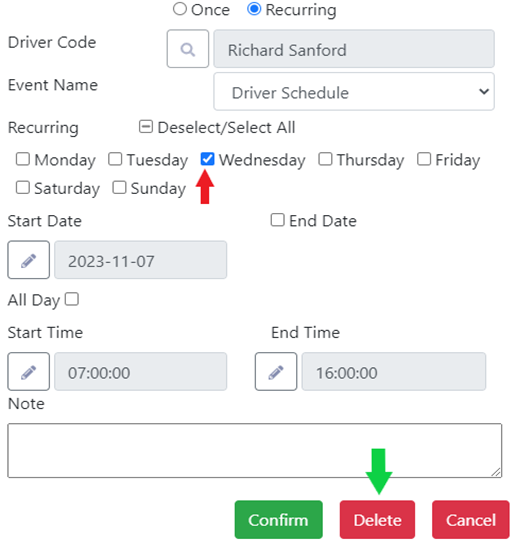
Select the day or days you wish to delete (Wednesday in the example above) then left click on the “Delete” button.
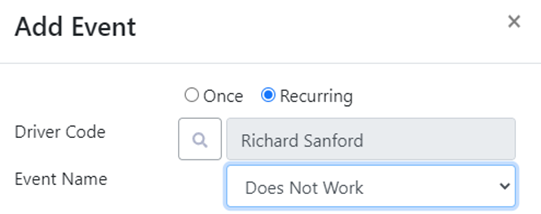
“Does Not Work” is the other recurring option available from the dropdown arrow to the right of “Event Name”. Left click on this option to select. (As below)
Para ingresar los días que un conductor no trabaja, sigue los mismos pasos descritos arriba cuando ingreses el horario de un conductor.
NOTA: La opción "Todo el día" puede ser seleccionada cuando ingreses los días que un conductor no trabaja.
Una vez que hayas ingresado los días y (si aplica) las horas, haz clic izquierdo en el botón "Confirmar". (Como se muestra abajo)

NOTA: Si un despachador intenta asignar movimientos de un conductor en un día que ha sido marcado como "No trabaja", se mostrará el siguiente mensaje:

El evento debe ser eliminado antes de que se puedan asignar movimientos.
NOTA ESPECIAL: Todos los eventos del horario del conductor agregados en el D.O. se mostrarán en el horario del conductor. Para acceder al horario desde el menú principal de SWS, ve a Operaciones fáciles>Información del conductor>Horario del conductor (Ejemplo abajo)