To access the Dispatch Optimizer (D.O.) from SWS main menu, go to Easy Operations, left click on Dispatch, then left click on Dispatch Optimizer.
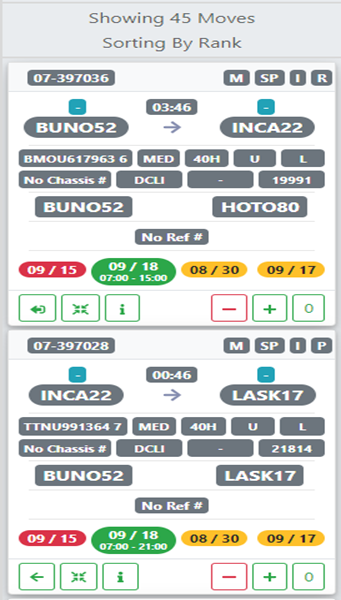
Based on applicable filter settings, a list of (Dispatch) “Moves” will display on the right-hand side of the page. These can also be referred to as Move “cards”. (See example below)
NOTE: By default, Moves will be sorted by “Rank”.
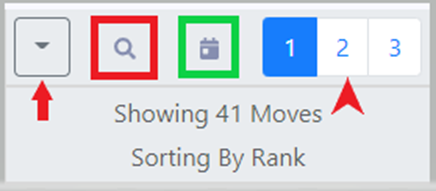
At the top of the Move list there are a several options available (shown on next page):
1) Dropdown arrow – select additional move sorting options (Covered in another training module)
2) Magnifying glass icon (red box) – left click to do a search by container # or location profile
3) Date Search for Per Diem LFD (Last Free Day) (green box)
4) Page # within the selected move sort. Left click on the page # to advance to that page or to view a previous page.
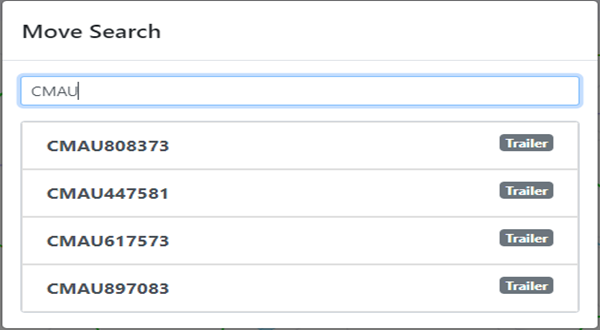
If using the Magnifying Glass/Search option, the below box will display:
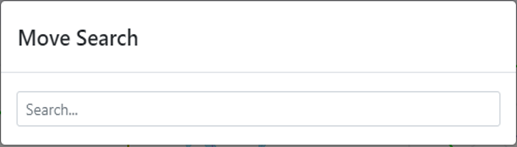
This search field uses typeahead and all results that contain the entered data will display. When the desired selection is displayed, left click on that option. (See example below)
NOTE: If searching by LP code, once the desired location is selected, the below box will display. Left click on the desired option to display driver list results.

With the mouse, hover over any label on the Move “card” to display a description of that label. (See examples below)

At the bottom of the move “card”, there are several actions buttons. (As below)

Left click on the left arrow symbol below to assign that move (or moves) if a driver has been selected to dispatch.
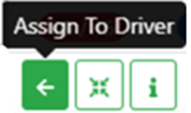
The left arrow with a right bracket (as below) indicates more than one move to assign.

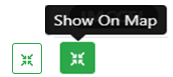
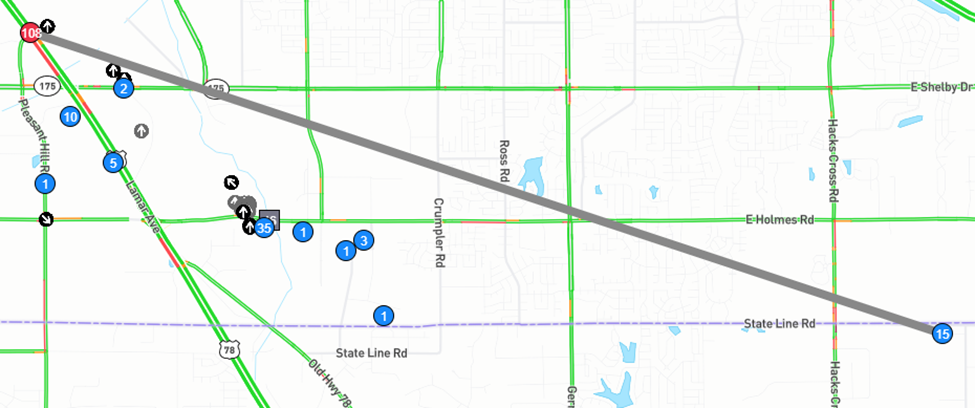
If in “Map” mode, left click on the below symbol to show that move on the map (gray line).
Left click on the symbol below (“Show More Info”) to open up the move “card” to view/edit information pertaining to the move/Pro.

A partial snapshot of the “More Info” screen is below:
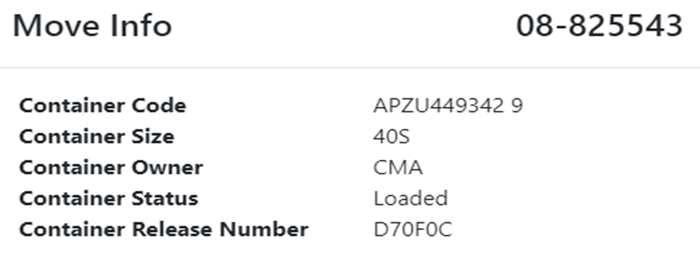
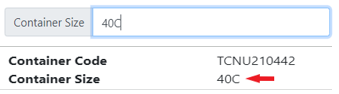
All of the fields on the ”Move Info” screen (with the exception of the Container Owner above) can be edited/updated by left clicking in the data field to the right of the field description. (See below example)

Delete the current data then type the new data in the pop up window. Next, hit the “Enter” key. The field will update accordingly both in the D.O. and in the Order Screen. (As below)
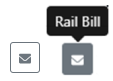
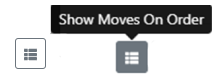
At the bottom left of the ”More Info” window, there are 4 additional action buttons. (As below)

“Rail Bill” action button will be covered in another training module.
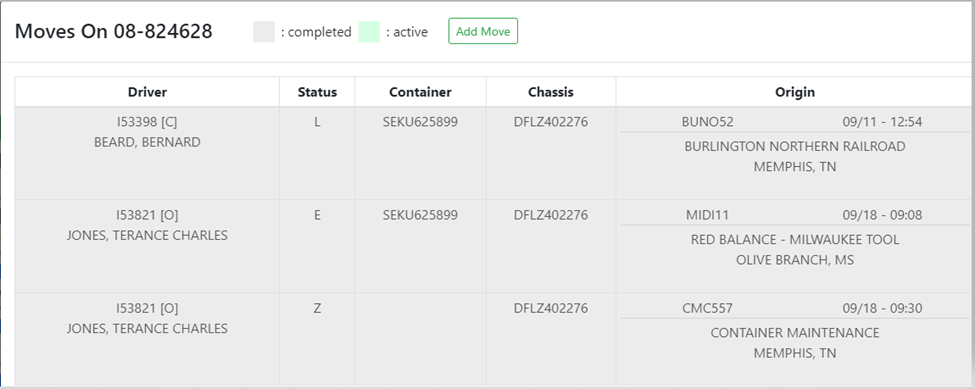
Left click on the “Show Moves On Order” action button to display all moves on the selected Pro. “Completed” moves will be shaded in light gray and “active” moves (current dispatch) will display in light green. The “Add Move” action button will be covered in another training module. (See example below)
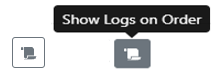
Left click on the “Show Logs on Order” action button to display the order logs. (As below)
An abbreviated snapshot is below:

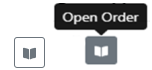
Left click on the “Open Order” action button to open the order screen in another window. (As below)
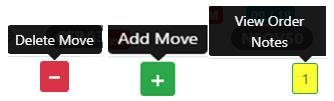
“Delete Move” & “Add Move” action buttons (below) will be covered in another training module.
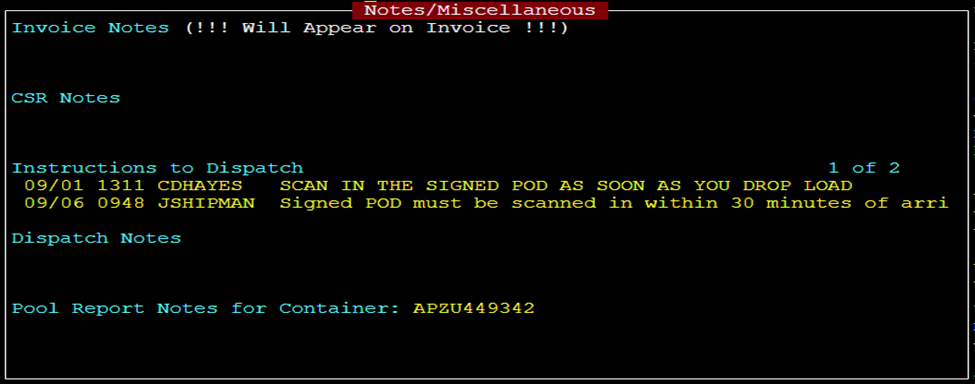
If the ”View Order Notes” box is shaded in Yellow with a number inside the box, this indicates there are order notes to view. Left click in the box to view the order notes onscreen. (See example below)
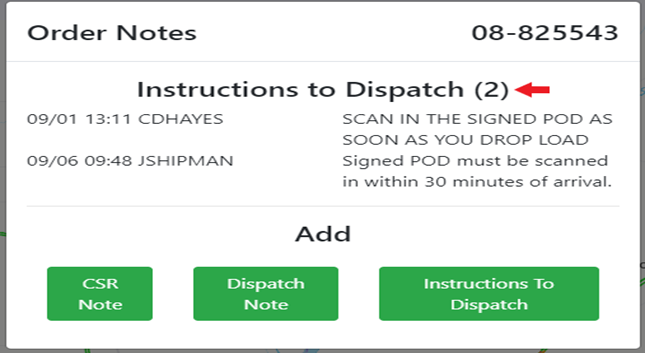
To ADD notes to the selected order Pro, left click on one of the 3 options available:
”CSR Note”, “Dispatch Note” or “Instructions to Dispatch”
NOTE: These options match the available note sections found in the Order Screen (F5 option) and is equivalent to “Sending a note through the Pro”. (See example below)
The same popup window will display when any of the green “Add” action buttons are selected. (See example on next page)
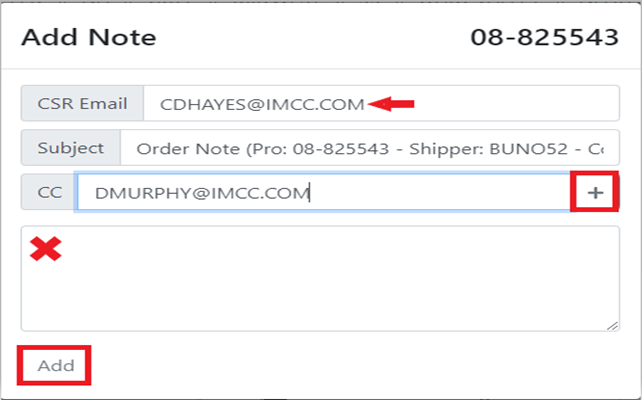
The “CSR Email” field will auto populate with the email address in the “CSR” field on the Order Screen.
To add additional email addresses, type the full email address in the “CC” field and left click on the “+” sign above. Repeat the process if necessary.
NOTE: For an internal user, you can enter the persons userid instead of the full email address.
Type the note in the field marked with an “x” above. Next, left click on the “Add” button.
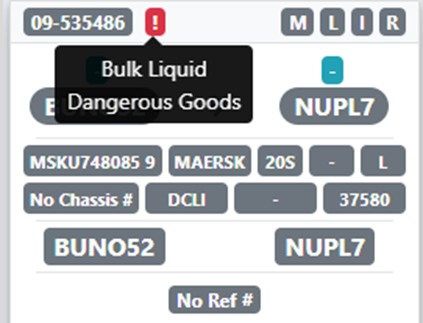
Service Type Indicators
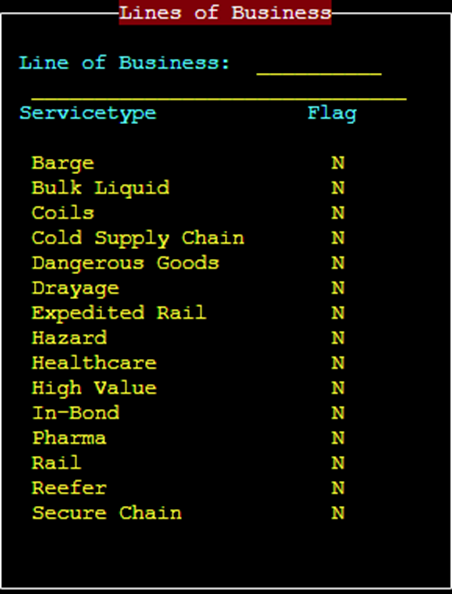
If applicable, a Service Type Indicator (represented by a red explanation point) will display on the move card. Users can hover over the explanation point and the name or names of the Service Types applied to the order in F10 will display. (As below)
Service Types listed in F10 on the Order Screen are listed below: