TOLL INVOICES
Toll invoices can be processed through the Equipment Management Portal.
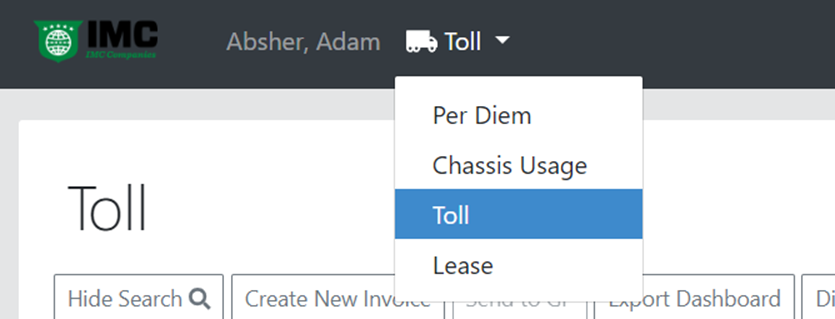
Locating/Working Toll Invoices:
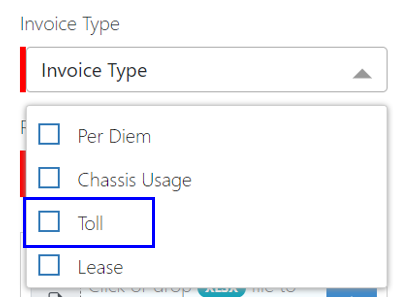
In the invoice type drop down, you will see Toll as an option. (As below)
Selecting Toll will take you to a dashboard screen that is similar to the Per Diem and Chassis dashboard. (As below)
NOTE: Toll invoices that have not been manually uploaded into the portal will not be viewable on the dashboard screen.

Processing of Toll invoices has the same flow as Per Diem and Chassis with the same or similar invoice statuses as Chassis.
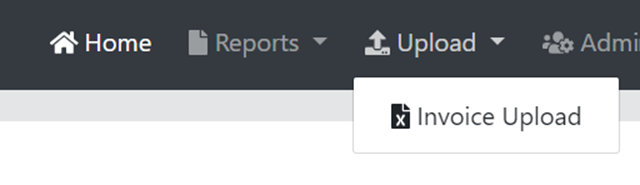
Manually Uploading Toll Invoices:
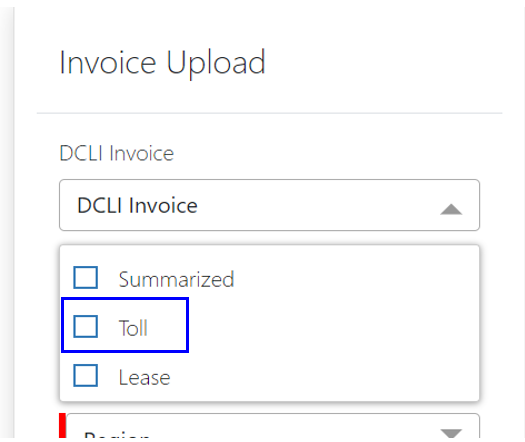
The process for manually uploading Toll invoices depends on the vendor (much like manually uploading Chassis invoices). For DCLI Toll invoices:
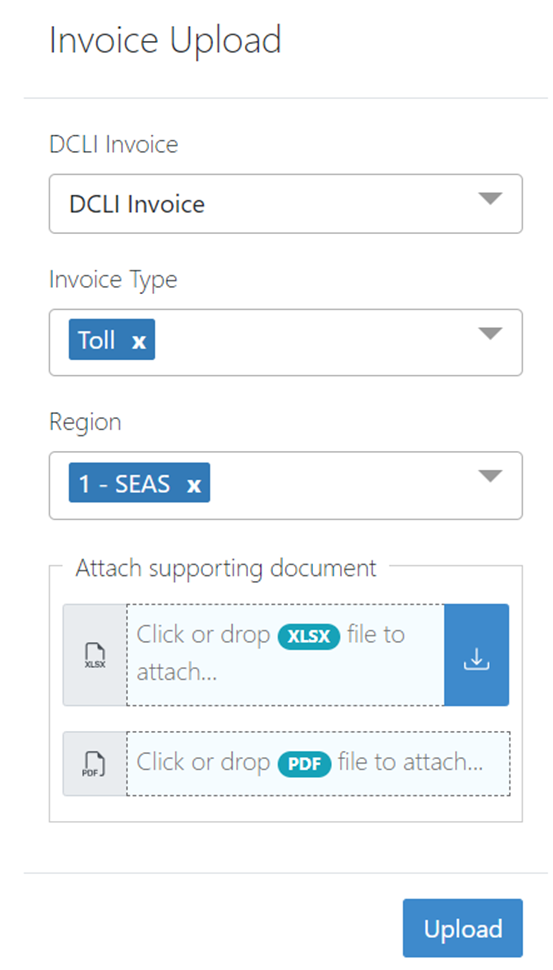
First, click Upload, then Invoice Upload. (As below)
Once on the Invoice Upload screen, select Toll from the DCLI Invoice drop down menu. (As below)
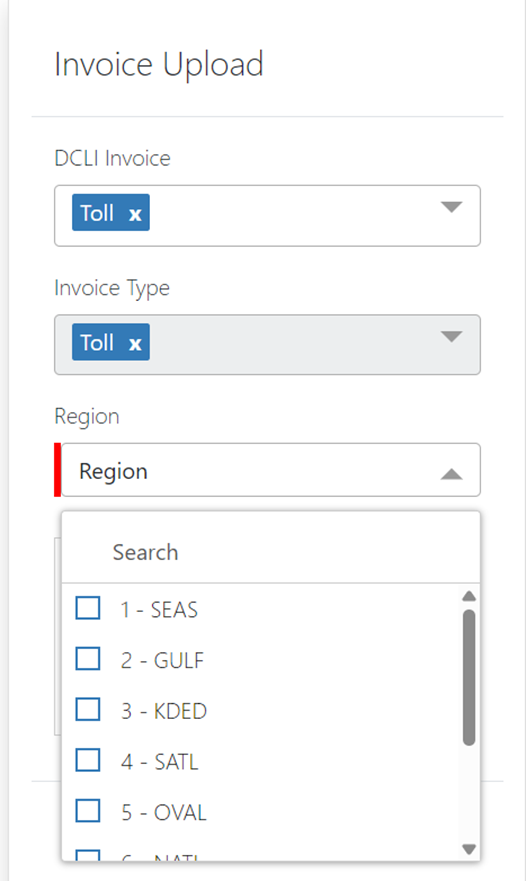
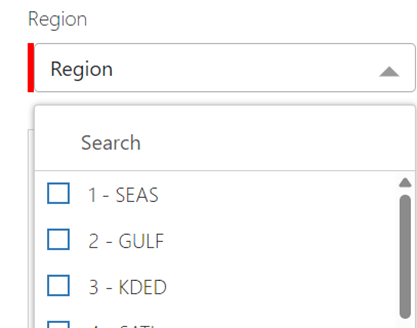
Your screen will update with Toll selected. Next, select the Region from the drop-down menu. (As below)
Next, attach the PDF and XLS documents from DCLI just as you would for DCLI Chassis invoices.
For non-DCLI Toll Invoices, select Toll from the Invoice Type drop down menu. (As below)
Next, select the Region. (As below)
Next, the Create Header screen will display. (As below) Select the Vendor, enter the Invoice Number, Invoice Date, Invoice Total, Period Start Date and Period End Date. Lastly, click Add.

The Invoice Upload screen will then display. (As below) For Toll invoices, two new columns (tolltime and tollstate) have been added to the nonstandard template. It is important that users download and save the new template if uploading Toll invoices.
NOTE: The existing nonstandard template will not process correctly if it is used for a Toll Invoice manual upload. The updated template that includes the columns specific to Tolls can also be used for Chassis manual uploads.
Once the template has been populated, attach and click Upload.