To access the Dispatch Optimizer (D.O.) from SWS main menu, go to Easy Operations, left click on Dispatch, then left click on Dispatch Optimizer.
“Dispatch” mode is the default mode when the D.O. is launched. (As below)
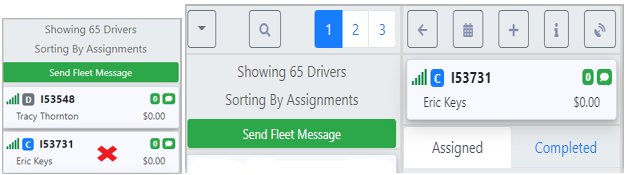
Based on applied filter settings, a list of drivers will display on the left-hand side of the screen and a list of available moves will display on the right-hand side of the screen with a map in the middle displaying the applicable geographic area in which the moves & drivers are active.
NOTE: “Map” view is the default view when the D.O. is launched.
To select a driver for dispatch, left click on the driver’s “card” to move the card right. (As below)
To Assign a move in “Map” view, left click on the left arrow on the desired move card. (Example below)
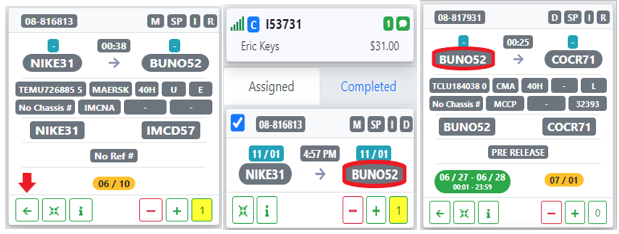
NOTE: Once a driver has been assigned a move or moves, the D.O. will automatically display the best possible “match” for the last assigned move. In the example below, the driver is dispatched to go to BUNO52, so on the move side, order pros out of BUNO52 are displayed first.
The left arrow with a right bracket (as below) indicates more than one move to assign.

Left click on this action button and a window will display showing all available moves associated with that Order Pro. (As below) The top move will auto select to assign to the driver. To assign both moves, left click in the box to the left of that move then left click on the “Assign” button.

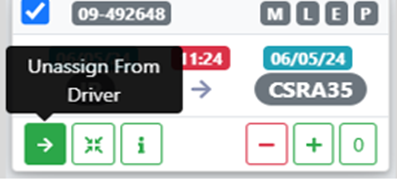
To Unassign a move in “Map” view, position the cursor on the assigned move card to be removed from the driver, left click & hold, then position the move card just to the right over the map and release. Alternatively, left click on the right arrow to remove the move card from the driver. (As below)

To Assign a move in “List” or “Table” view, double left click on the “6 dots” to the left of the Pro. (As below)

To Unassign a move in “List” or “Table” view, position the cursor on the assigned move card to be removed from the driver, left click & hold, then position the move card just to the right over the list of Order Pros and release. Alternatively, left click on the right arrow to remove the move card from the driver. (As below)
When moves are assigned, the date on those moves is set by the date on the D.O. itself. (As below)

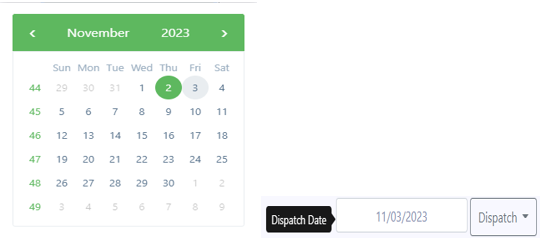
To assign moves for a future date, left click in the date field, then left click on the desired date on the calendar. The “Dispatch Date” will update to the one selected. (As below)
To change the date on a move card assigned to a driver, left click on either of the date fields. (As below)
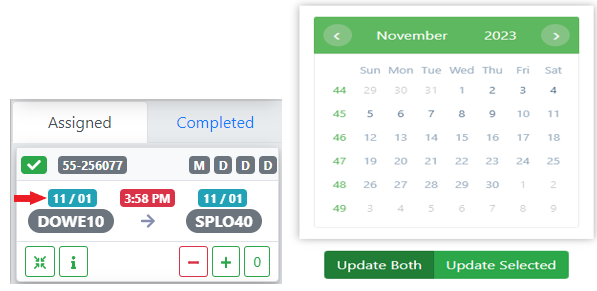
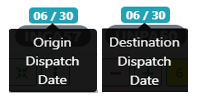
The default selection is “Update Both” date fields. Select a date on the popup calendar and the move card will be updated with the selected date. To only change one date field, left click on either the “Origin Dispatch Date or the “Destination Dispatch Date” (as below), then left click on “Update Selected” and then left click on the desired date on the popup calendar.
To Add a move to an Order Pro in the D.O., left click on the “+” sign at the bottom left of the move card. (As below)
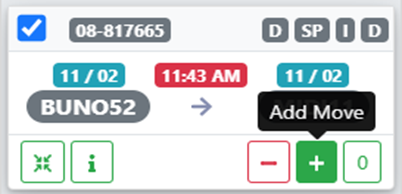
A popup window will display the details of the move. (See example below)
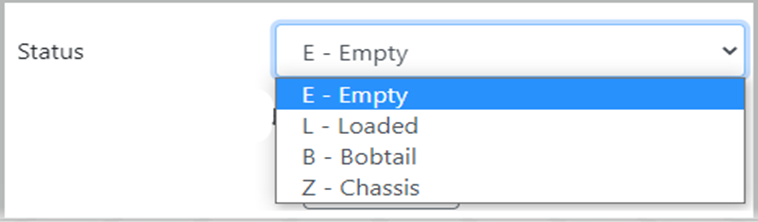
If applicable, left click on the “Status” dropdown arrow and select the applicable move type. (As below)
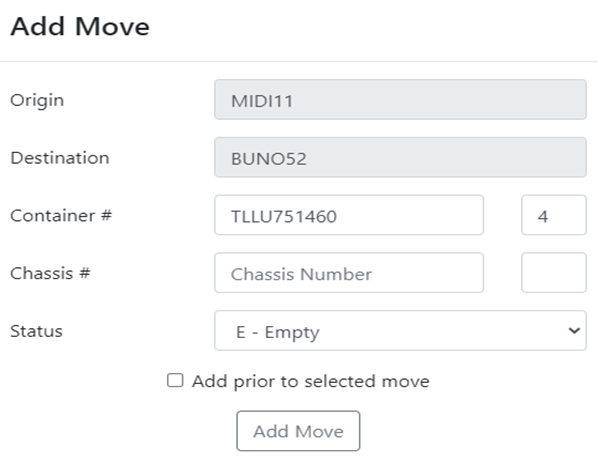
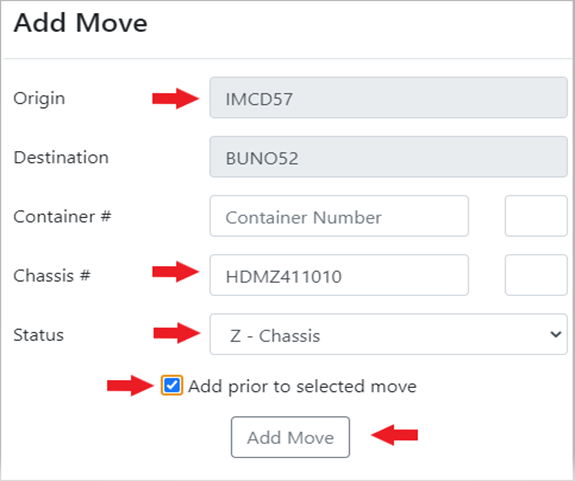
Using the example move above, a loaded container out of the BNSF, if the user needed to add a chassis move prior to this one:
“Z-Chassis” would be selected from the “Status” dropdown. Next, the “Origin” Location Profile would need to be changed to reflect the origin of the chassis. Left click in the field and use the ”Location Search” box to enter the origin Location Profile. Next, type the chassis number in the “Chassis #” field. Next, left click in the box “Add prior to selected move”. Lastly, left click on the ”Add Move” button. (See example below)
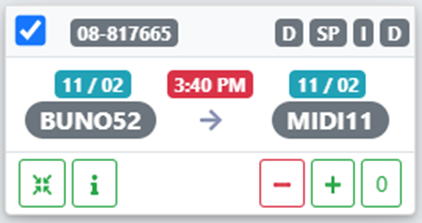
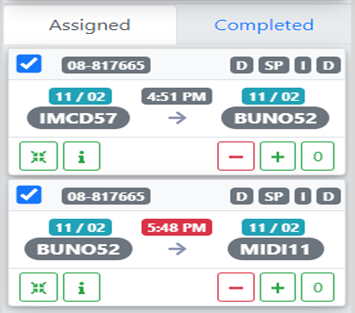
The move is then added to the selected driver’s dispatch. (As below)
NOTE: If the “Add prior to selected move” box is not checked, the added move will fall into place AFTER the move selected.
To Delete a move from an Order Pro in the D.O., left click on the “-” sign at the bottom left of the move card to be deleted. (As below)
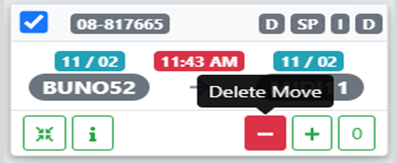
NOTE: Do not use “Delete Move” to unassign a move from a driver. This action DELETES the move completely from the Order Pro.
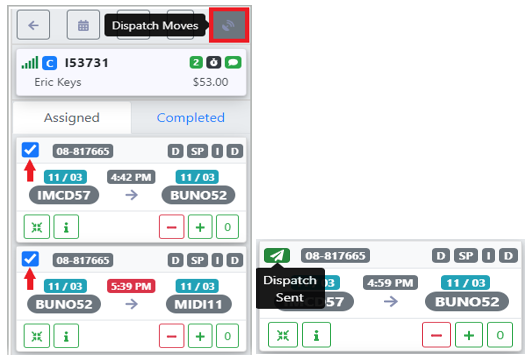
Once all moves have been assigned, left click on the “Dispatch Moves” button located at the top right of the driver’s “card”. (As below)
NOTE: Prior to dispatch, a blue check mark will appear to the left of the “Div-Pro” for each move. Uncheck the box if you do not wish to transmit or dispatch that move to the driver. (See below example) To dispatch the move(s) to the driver, check the box and left click on the “Dispatch Moves” button.
A green & white “paper airplane” symbol indicating “Dispatch Sent” will then appear to the left of the “Div-Pro” for each move. (See example below)
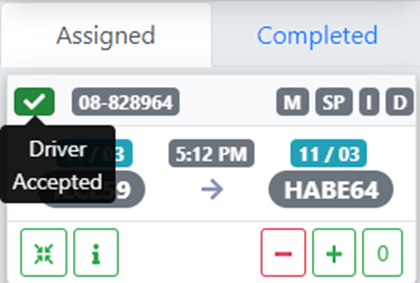
A green check mark will appear to the left of the “Div-Pro” for the move when a driver has accepted on their tablet. (As below)
The default mode for driver moves is “Assigned”. If applicable, left click on the “Completed” tab to view those moves the driver has updated as being done. (See below)
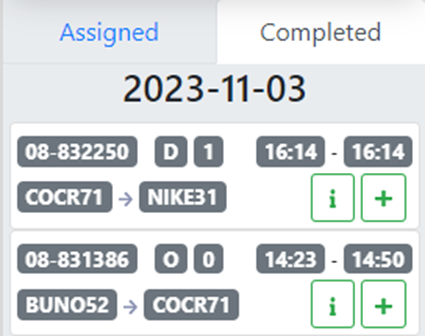
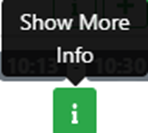
NOTE: A move can be added from the completed tab by left clicking on the “+” symbol above. Additionally, left click on the “i” info symbol to show more move information.