To access the Dispatch Optimizer (D.O.) from SWS main menu, go to Easy Operations, left click on Dispatch, then left click on Dispatch Optimizer.
“Dispatch” mode is the default mode when the D.O. is launched. (As below)
Based on applied filter settings, a list of drivers will display on the left-hand side of the screen and a list of available moves will display on the right-hand side of the screen with a map in the middle displaying the applicable geographic area in which the moves & drivers are active.
NOTE: “Map” view is the default view when the D.O. is launched.
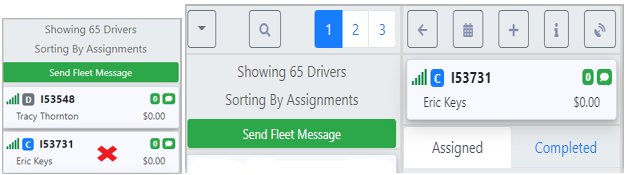
To select a driver for dispatch, left click on the driver’s “card” to move the card right. (As below)
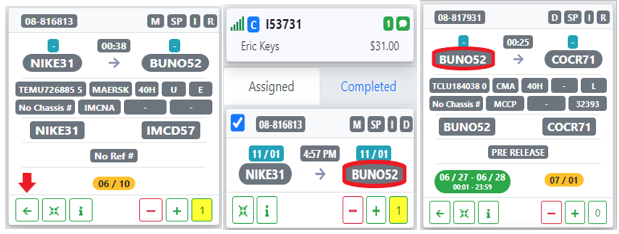
To Assign a move in “Map” view, left click on the left arrow on the desired move card. (Example below)
NOTE: Once a driver has been assigned a move or moves, the D.O. will automatically display the best possible “match” for the last assigned move. In the example below, the driver is dispatched to go to BUNO52, so on the move side, order pros out of BUNO52 are displayed first.
The left arrow with a right bracket (as below) indicates more than one move to assign.

Left click on this action button and a window will display showing all available moves associated with that Order Pro. (As below) The top move will auto select to assign to the driver. To assign both moves, left click in the box to the left of that move then left click on the “Assign” button.

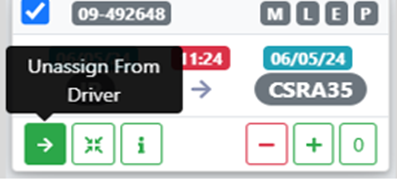
To Unassign a move in “Map” view, position the cursor on the assigned move card to be removed from the driver, left click & hold, then position the move card just to the right over the map and release. Alternatively, left click on the right arrow to remove the move card from the driver. (As below)

To Assign a move in “List” or “Table” view, double left click on the “6 dots” to the left of the Pro. (As below)

To Unassign a move in “List” or “Table” view, position the cursor on the assigned move card to be removed from the driver, left click & hold, then position the move card just to the right over the list of Order Pros and release. Alternatively, left click on the right arrow to remove the move card from the driver. (As below)
When moves are assigned, the date on those moves is set by the date on the D.O. itself. (As below)

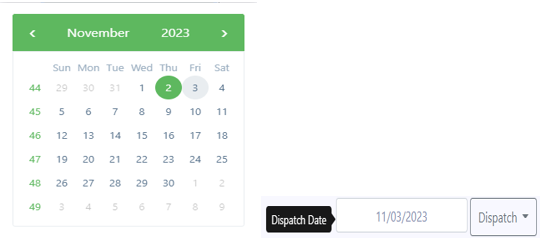
To assign moves for a future date, left click in the date field, then left click on the desired date on the calendar. The “Dispatch Date” will update to the one selected. (As below)
To change the date on a move card assigned to a driver, left click on either of the date fields. (As below)
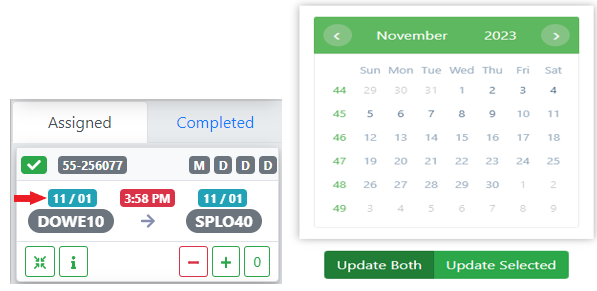
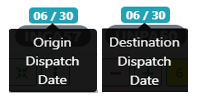
La selección predeterminada es "Actualizar Ambos" campos de fecha. Selecciona una fecha en el calendario emergente y la tarjeta de movimiento se actualizará con la fecha seleccionada. Para cambiar solo un campo de fecha, haz clic izquierdo en "Fecha de Despacho de Origen o en "Fecha de Despacho de Destino" (como se muestra abajo), luego haz clic izquierdo en "Actualizar Seleccionado" y después haz clic izquierdo en la fecha deseada en el calendario emergente.
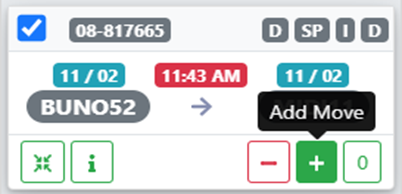
Para Agregar un movimiento a una Orden Pro en el D.O., haz clic izquierdo en el signo "+" en la parte inferior izquierda de la tarjeta de movimiento. (Como se muestra abajo)
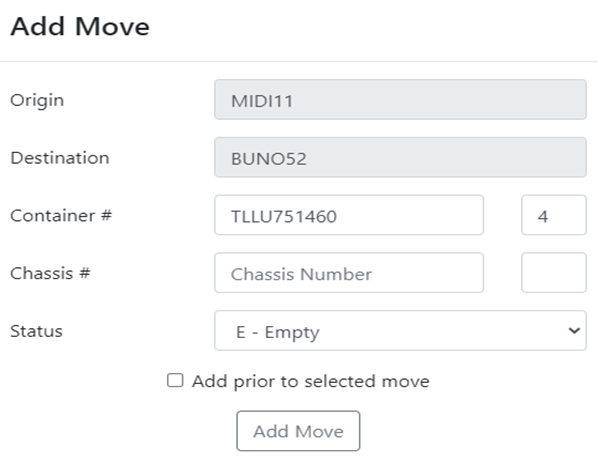
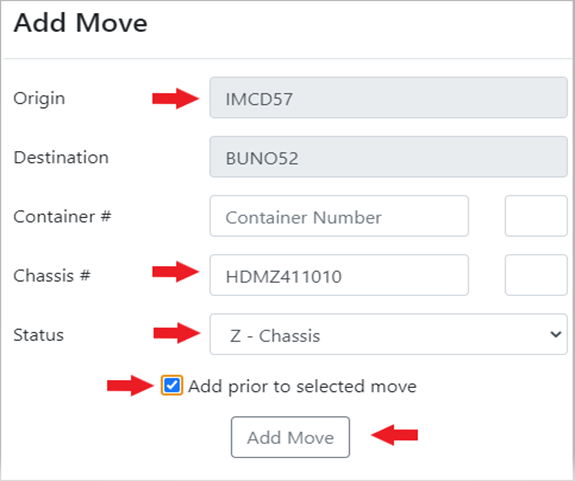
Se mostrará una ventana emergente con los detalles del movimiento. (Ver ejemplo abajo)
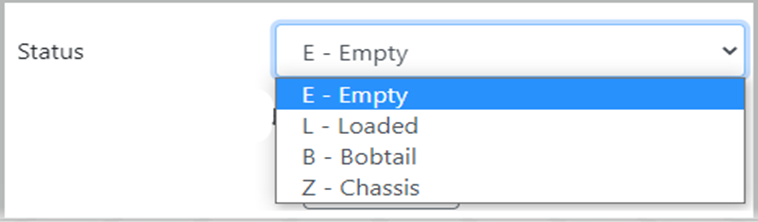
Si es aplicable, haz clic izquierdo en la flecha desplegable "Status" y selecciona el tipo de movimiento aplicable. (Como se muestra abajo)
Usando el ejemplo de movimiento anterior, un contenedor cargado del BNSF, si el usuario necesitaba agregar un movimiento de chasis antes de este:
"Z-Chassis" se seleccionaría del desplegable "Status". A continuación, el Perfil de Ubicación "Origin" tendría que cambiar para reflejar el origen del chasis. Haz clic izquierdo en el campo y usa la caja "Location Search" para ingresar el Perfil de Ubicación de origen. A continuación, escribe el número de chasis en el campo "Chassis #". Luego, haz clic izquierdo en la casilla "Add prior to selected move". Por último, haz clic izquierdo en el botón "Add Move". (Ver ejemplo abajo)
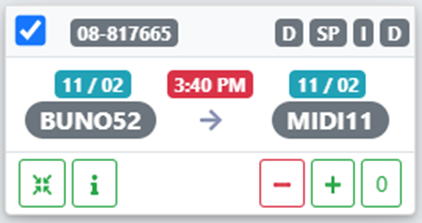
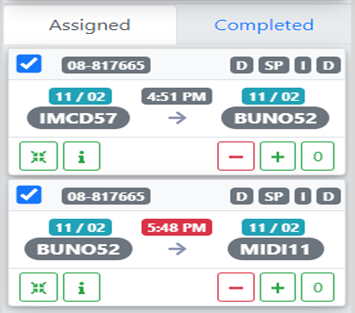
El movimiento se agrega entonces al despacho del conductor seleccionado. (Como se muestra abajo)
NOTA: Si la casilla "Agregar antes del movimiento seleccionado" no está marcada, el movimiento agregado se colocará DESPUÉS del movimiento seleccionado.
Para Eliminar un movimiento de una Orden Pro en el D.O., haz clic izquierdo en el signo "-" en la parte inferior izquierda de la tarjeta de movimiento a eliminar. (Como se muestra abajo)
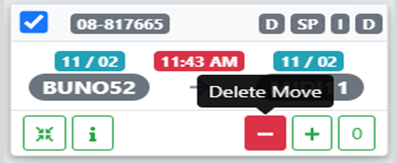
NOTA: No uses "Eliminar Movimiento" para desasignar un movimiento de un conductor. Esta acción ELIMINA el movimiento completamente de la Orden Pro.
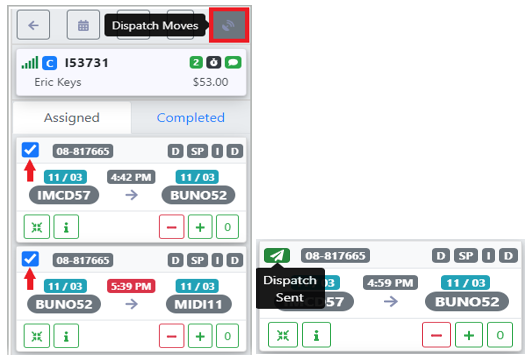
Once all moves have been assigned, left click on the “Dispatch Moves” button located at the top right of the driver’s “card”. (As below)
NOTE: Prior to dispatch, a blue check mark will appear to the left of the “Div-Pro” for each move. Uncheck the box if you do not wish to transmit or dispatch that move to the driver. (See below example) To dispatch the move(s) to the driver, check the box and left click on the “Dispatch Moves” button.
A green & white “paper airplane” symbol indicating “Dispatch Sent” will then appear to the left of the “Div-Pro” for each move. (See example below)
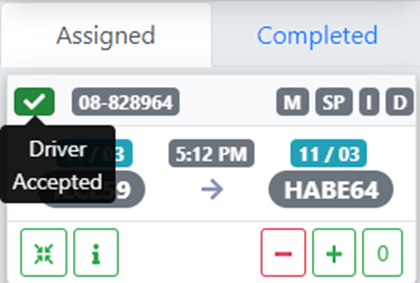
A green check mark will appear to the left of the “Div-Pro” for the move when a driver has accepted on their tablet. (As below)
The default mode for driver moves is “Assigned”. If applicable, left click on the “Completed” tab to view those moves the driver has updated as being done. (See below)
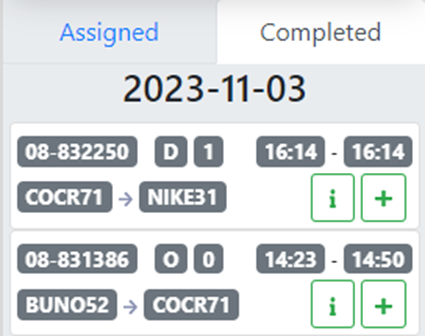
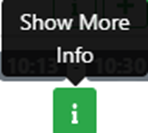
NOTE: A move can be added from the completed tab by left clicking on the “+” symbol above. Additionally, left click on the “i” info symbol to show more move information.