Within the 2nd stage of the Customer/Order Cycle we have Order Preparation. Once a Work Order (hereafter referred to as W/O) or Delivery order (hereafter referred to as D/O) has been accepted via email, spreadsheet (GOES or other), EDI (Electronic Data Interchange) or ICB (Internal Company Brokerage), you can then move to the next step Order Entry. The order entry function is used to input the required information necessary to create an order for dispatch. A pro number is assigned to each order for tracking purposes.
NOTE: Each order is unique and may require additional information to be entered.
From SWS main menu go to Customer Service, click on Order Entry, then click on Order. Next, from the Command Line (indicated by cursor location in green), type an “A” to “Add”.

The below screen will display with some fields prepopulated:
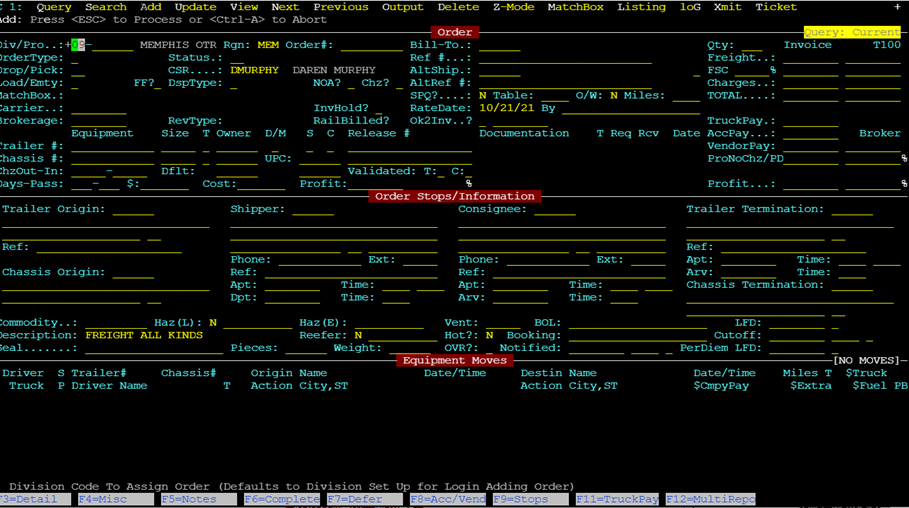
NOTE: For each field you will see a key in white at the bottom of the screen with the available entry codes or information about the field itself.

An import is defined as “a commodity, article, or service brought in from abroad for sale.” In our business model it refers to a marine container arriving at a U.S or Canadian Port and being moved via rail and/or truck to the final destination or consignee.
List of fields on the Order Screen (* denotes a required field)
***Enter all the available information from the Delivery Order itself (hereafter referred to as D/O) or other shipping document provided by the customer*** See Appendix A for an example of a D/O)
Hit the “Tab” button or directional arrows to advance to the next field.
NOTE: When a white + (plus sign) proceeds a field itself (see screenshot on next page), this indicates a Thumb function is available. (Click on this link to view SWS Special Keys and Commands)
Div/Pro..: The division field should prepopulate, type the correct div # if applicable
OrderType:* Type an “I” for Import
Drop/Pick:* Type an “L” for Live unload, a “D” for Drop or other code listed (key at bottom of screen)
DspType:* As defined by your division
Bill-To:* Enter the customer # that is responsible for the payment of services/costs
To find the Bill-To party, use the Thumb function within that field and type the name of the company. Once located and highlighted in white, hit enter to select. This could be the customer themselves or in some cases the SSL (Steamship line).
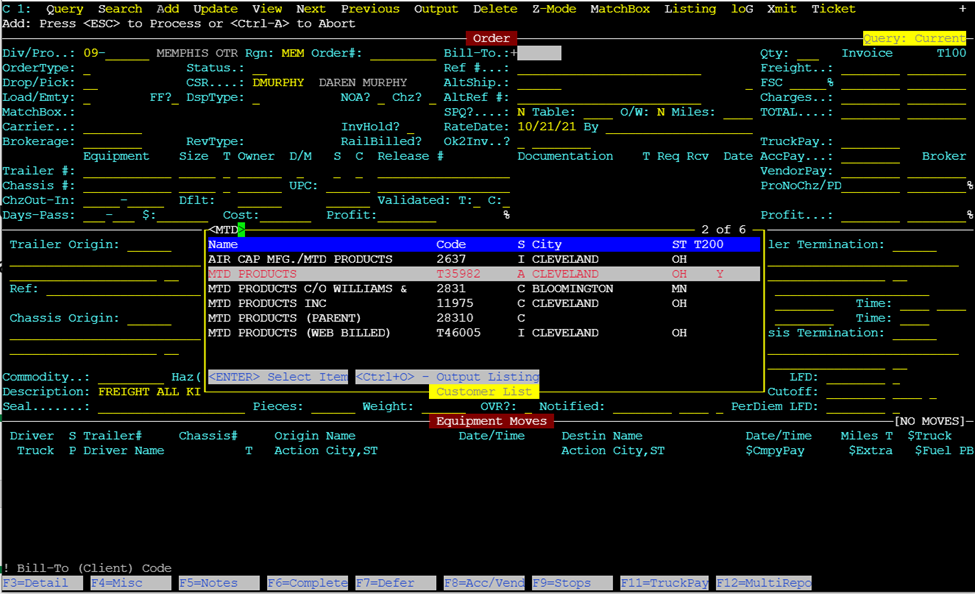
NOTE: Bill-To Customer Status must be A for “Active” as shown.
Ref #: Customer reference # found on the D/O or other shipping document
AltShip.: Can be used to track loads other than by Bill-To
AltRef #: Used for Cargo owner reporting (EDI, Web Tracing)
SPQ?....: Special Price Quote (defaults to N) Change to “Y” if entering Freight & FSC charges
For an explanation of SPQ and table rates see Appendix C
RateDate: Date used in rating…typically day order was received/entered
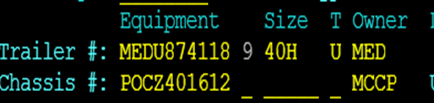
Trailer #: Use the 11 digit alphanumeric number provided on the D/O (see Additional Field Information within this module)
Chassis #: If available, type the 10 digit alphanumeric number provided on the D/O (see Additional Field Information within this module)
Release # Type the rail release # (aka rail pickup #) or Port pickup # (if applicable) The release # is typically provided by the SSL (Steamship Line), expeditor or freight forwarder.
Leave field blank if unknown
Trailer Origin: Type the 6 digit alphanumeric LP (Location profile) for trailer origin
See Appendix C “How to enter a Location Profile” if entering a new customer code
Chassis Origin: If applicable, type the 6 digit alphanumeric LP for the chassis (if different from trailer)
Shipper*: Type the 6 digit alphanumeric LP code for the customer loading the container
Consignee*: Type the 6 digit alphanumeric LP code for the company receiving the goods
Trailer Termination:
Type the 6 digit alphanumeric LP code for trailer termination point (if unknown leave blank)
Chassis Termination:
Type the 6 digit alphanumeric LP code for chassis termination point (if unknown leave blank)
The preceding are some of the main fields within the order entry screen itself. Some fields may be left blank depending on the available information provided on the D/O or shipping document.
NOTE: The “lines of dispatch” under Equipment moves will be created from the LP codes entered in the below fields:
Trailer Origin: ______ Shipper: ______ Consignee: ______ Trailer Termination: ______
Additional Field Information:
When entering a Trailer #: be sure to include the check digit. SWS will display an error message if an incorrect check digit is entered.

Hit the “Tab” button or directional arrows to advance to the next field. Enter the Size and Owner of the container as shown on the D/O.
Press “CTRL-T” within that field to view entry options (equipment size example below).
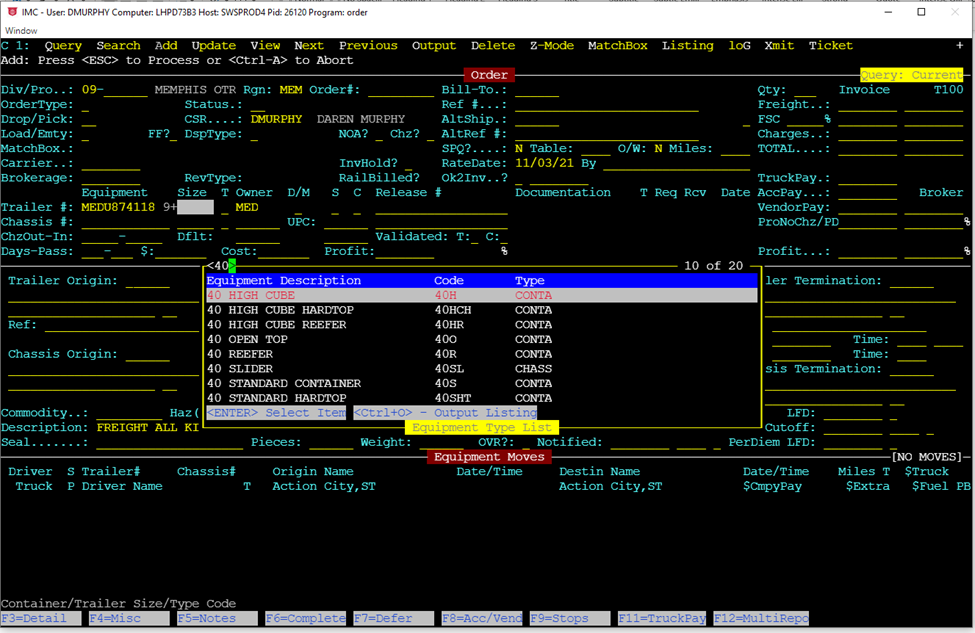
Use the up and down arrows to find correct description and hit the “Enter” key when highlighted in white as shown. The cursor will advance to the Owner field. Press “CTRL-T” within that field to view entry options. Start typing the name of the SSL (steamship line) and once the correct one is highlighted in white (as shown below) hit the “Enter” key to select.
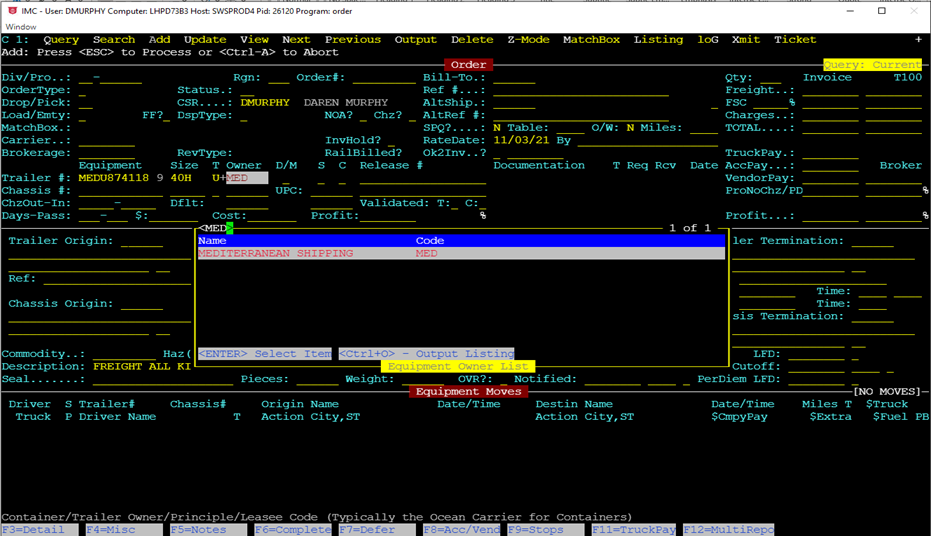
NOTE: The box owner can often be determined by the BOL # listed on the D/O. The first 4 letters in the BOL indicate the container owner. Examples:
ZIMUTPE8192232 Indicates a Zim Lines container (box)
CMDUCNML359094 Indicates a CMA box
MEDUG5625751 Indicates a Mediterranean Shipping Box
MAEU204034050 Indicates a Maersk box
YMLUW226229289 Indicates a Yang Ming box
When in doubt, you can use this link to confirm owner:
https://www.track-trace.com/container
SWS will recognize some container #’s when entered and automatically populate the size and owner of the box. Be sure to double check for accuracy and change if necessary.
Chassis #: When entering a chassis #, a chassis owner code must also be entered (system will sometimes populate this field automatically based on the Container Owner field, be sure to double check for accuracy and change if necessary).
Chassis Owner/Pool Code - AKA What Owner/Pool is Stenciled? (MCCP, DCLI, SACP, TRAC, etc.)
NOTE: If an incorrect chassis owner is selected, the below error message (in red) will appear at the bottom of the order screen.

In the example above the chassis owner should be changed to “DCLI”.
In some instances, it may be necessary to enter the code SHIPP in this field in order for the system to accept the entry. Check with your supervisor if necessary.
Volume: Only applies when the order Service Type is “Bulk Liquid”
Volume in Gallons-to convert from Liters to Gal suffix with L (ex. 100L will convert to 26Gal)-Bulk Liquid must be the service type
Reefer: ! Refrigerated Freight? (Y/N) Type a “Y” if applicable
This would apply to a refrigerated container and requires special handling.
Temperature Setting in Celsius - to convert from Fahrenheit suffix the temperature with an F (ex. 32 F will convert to 0 C)
Hot/Expedite/High Priority Order? (Y/N)
Type a “Y” if customer has requested expedited delivery. The word “HOT” will appear on the order screen as below

BOL: Bill of Lading Number (Separate multiple BOL's by SPACES or COMMAS)
Seal: Type the # from the seal used to secure the container doors
Pieces: Type the # provided on the D/O; this could be total pallets, cartons or pieces
Weight: Net Weight of Order in Pounds - to convert from Kg to Lbs suffix weight with a K (ex. 9,800 K will convert to 21,605 lbs)
LFD: Last Free Date to Pickup Order (field will typically prepopulate based on trailer origin, confirm date after order release)
PerDiem LFD: Per diem Last Free Date – Per diem Starts Day after this Date
Per diem stands for per day charges from the container owner.
Haz(L): Hazardous Material – Loaded Container (Y/N)? See Appendix D if applicable
Once verified, to identify a particular container as containing hazmat materials, type a “Y” in the “Haz(L)” field.
Next type the UN code in the field. (ex. UN3171) The description of the UN code will auto populate. (As below)

Haz(E): HazMat UN Code if Required for Empty move (if different from Load). This field is usually left blank.
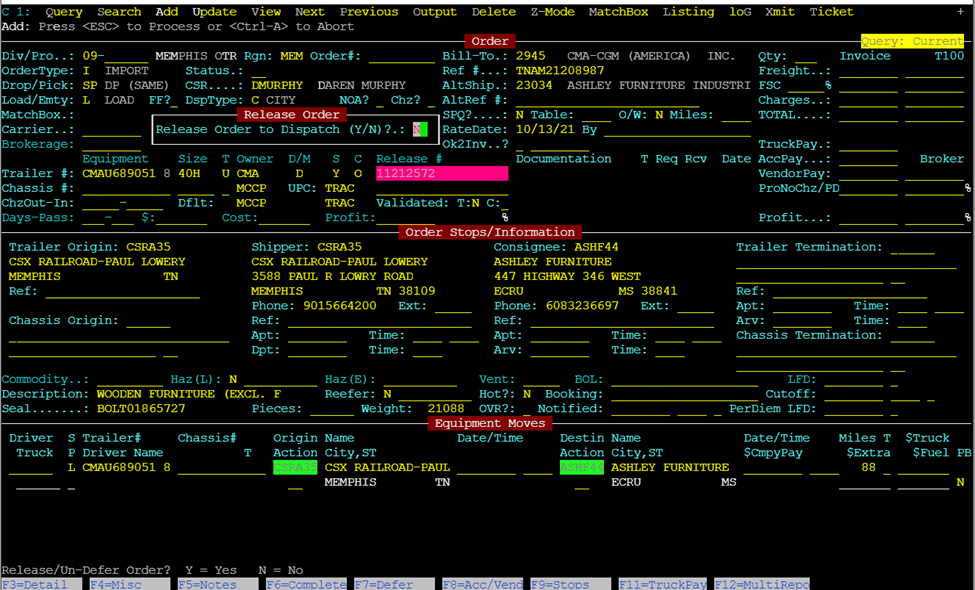
Once you have completed entering all the information in the order fields hit the “Esc” key once. The system will display the message Release Order to Dispatch (Y/N)?:
Type “N” for No and hit the “Enter” key.
SWS will update and auto assign a 6 digit number after the Div #. Including the Div #, this 8 digit # is the Pro number for that particular move(s). (See example screenshots below)
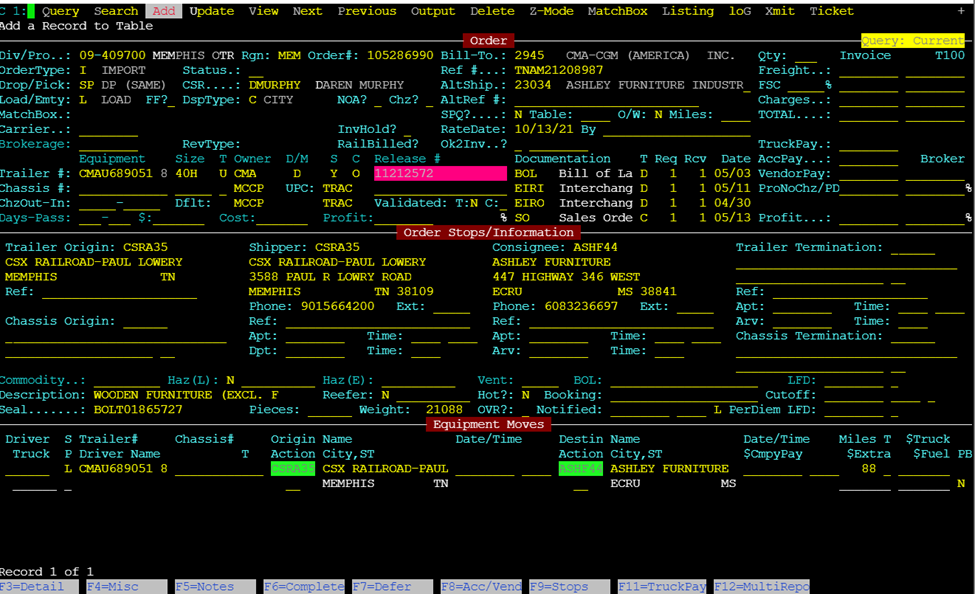
The Order/Pro is now ready to be released for dispatch. (See Releasing an Order Module 1.1)
An export is defined as “a commodity conveyed from one country or region to another for purposes of trade.” The same fields that are completed when entering an Import Order will still apply with some additional points below: (* denotes a required field)
OrderType:* Type an “E” for Export
Shipper*: Type the 6 digit alphanumeric LP code for the customer loading the container
Consignee*: Type the 6 digit alphanumeric LP code for the rail or Port location
Cutoff: Cutoff Date at Port/Rail (when the container must ingate at the rail to make on-time delivery to the customer)