The next step after releasing a new order is to assign/dispatch that order.
From SWS main menu go to Customer Service, click on Order Entry, then click on Order. Next, type a “Q” to “Query”. Type the Div/Pro for the Pro # you wish to assign and hit the “Esc” key to display the Pro.
NOTE: All Regions should be using the Dispatch Optimizer when assigning orders to their respective drivers.
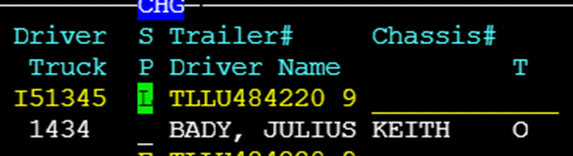
In the event a driver must be assigned a Pro manually: Type a “U” to “Update”. The cursor will automatically highlight the first line of dispatch in white with the cursor in the Driver field. Hit the “Enter” key. If known, type the driver’s # in the field and hit the “Tab” key to display the driver’s name and truck #. (See below example):
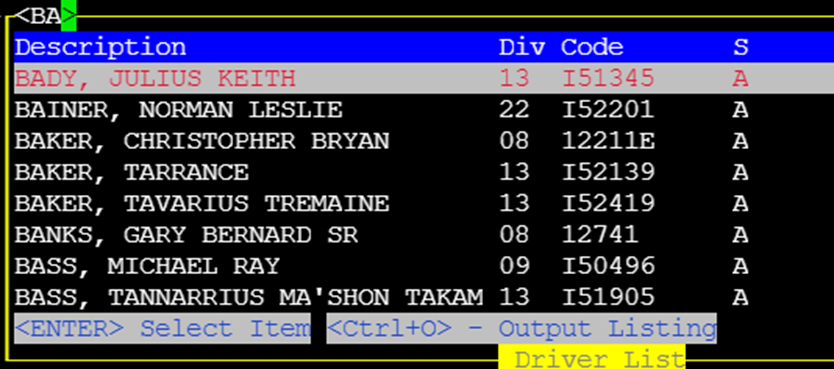
If the driver’s # is not known, use the Thumb function “CTRL-T” within the driver field to display a list of drivers. Start typing the driver’s last name and once desired driver is highlighted in white (as below) press the “Enter” key to select that driver to assign.
Next, using the “Tab” key or right directional arrow, position the cursor under the Date/Time field. Type the “T” key to select current date or type in desired date in DDMMYY format. Hit the “Tab” key or right directional arrow to position the cursor under the destination Date/Time field and repeat entry of desired date. Once the date has been entered under both the origin and destination fields, hit the “Esc” key. If applicable, the next line of dispatch will be highlighted in white. Hit the “Enter” key and proceed with update as defined above. Once the desired line or lines of dispatch have all been assigned, hit the “Esc” key. The below message will display on the screen:

Type a “Y” for Yes to complete order assignment or “N” for No to return to order for possible changes if needed.