Users can attach supporting documents to invoices after they have been added to the portal.
Once you locate the invoice record to attach documents to, click on the ellipsis button and select “Upload Documents”. (As below)

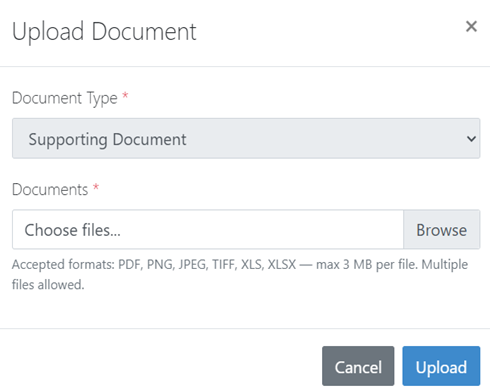
The below “Upload Document” window will display. Next, choose the “Document Type” (default will be Supporting Document if the invoice record already has at least one document present). Next, click “Browse” and attach the file you would like added. Finally, click “Upload” to attach the document.
NOTE: Multiple documents can be selected and attached at once. There is a file size limit of 3MB per file.
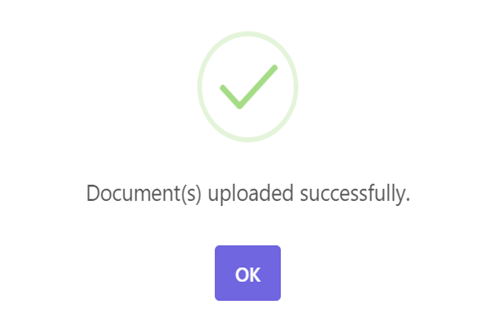
After clicking Upload, you will see this success message:
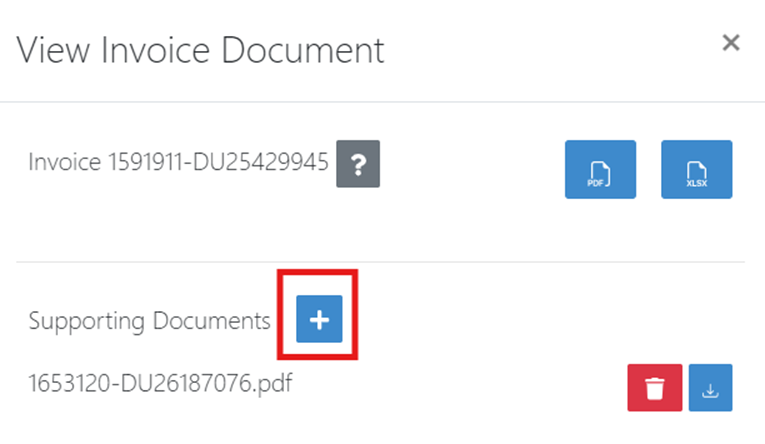
To view the newly attached document, click on the ellipsis button again and choose View Documents

Next, you will see the newly attached document in the Supporting Documents section. From here, you can also delete the document if needed as well as download if needed.
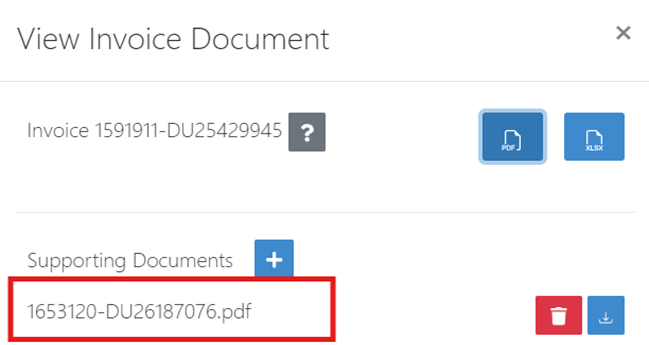
You can also attach additional documents from this screen by clicking the blue and white plus sign. After clicking the plus sign, browse for the file to attach, and click Upload