Para acceder a la Hoja de trabajo EDI desde el menú principal de SWS, ve a Servicio al cliente, haz clic izquierdo en EDI, luego haz clic izquierdo en LoadTender (204) NEW.
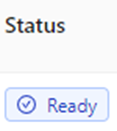
Ya sea que veas un filtro predeterminado o guardado, los usuarios pueden aceptar uno o varios Tenders EDI dentro de la hoja de trabajo que muestren un estado "Listo" (Listo para aceptar). (Como se muestra a continuación)
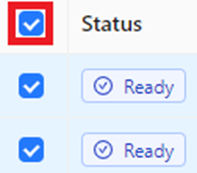
Una columna aparecerá a la izquierda de la columna "Status". Para seleccionar TODOS los EDI Tenders, haz clic izquierdo en la casilla a la izquierda de "Status". Para seleccionar EDI Tenders individuales para aceptar, haz clic izquierdo en la casilla a la izquierda de ese EDI Tender. Para deseleccionar TODOS los EDI Tenders, haz clic izquierdo en la casilla a la izquierda de "Status" o para EDI Tenders individuales, haz clic izquierdo en la casilla (Como se muestra a continuación)
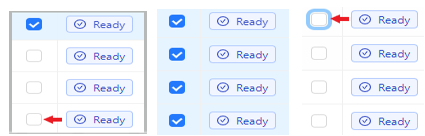
NOTA: Para seleccionar múltiples EDI Tenders en sucesión, primero mantén presionada la tecla "Shift" y luego haz clic izquierdo en la casilla a la izquierda del primer Tender a aceptar. A continuación, con la tecla "Shift" aún presionada, haz clic izquierdo en la casilla a la izquierda del último Tender a aceptar. Todos los Tenders entre el primero y el último seleccionados se seleccionarán automáticamente. Para deseleccionar, con la tecla "Shift" presionada, haz clic izquierdo en la casilla a la izquierda del primer Tender seleccionado. Todos los Tenders en la agrupación previamente seleccionada serán deseleccionados. (Como se muestra a continuación)
When one or more Tenders have been selected, an “Action Bar” will appear at the bottom of the worksheet. The number of Tenders selected will be listed in a green box at the top left of the “Action Bar”. Left click on the “Accept” button to accept all selected Tenders. (As below)

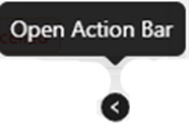
NOTE: To HIDE or minimize the “Action Bar”, left click on the “-” symbol located at the top right of the “ActionBar”. To close the “Action Bar” and “deselect” any tenders, left click on the “x” at the top right of the “Action Bar”. (As above) To UNHIDE the “Action Bar”, left click on the left arrow “Open Action Bar” visible at the bottom right of the worksheet. (As below)
After the “Accept” button has been selected, the successful Tenders will then display a status of “Accepted’ and the Order Pro will be listed under the “Update Result” column. (As below)
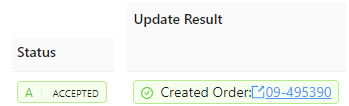
Para abrir el Pro recién creado, haz clic izquierdo en el Pro # (azul) mostrado. (Como arriba)
NOTA: Una vez que se ha ejecutado una "Aceptación masiva", no se puede deshacer.
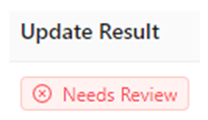
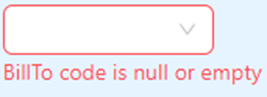
Si se selecciona una Oferta EDI no elegible para Aceptar", el sistema mostrará el siguiente mensaje en la columna "Resultado de actualización" y también resaltará los campos requeridos que faltan. (Ver ejemplo abajo)
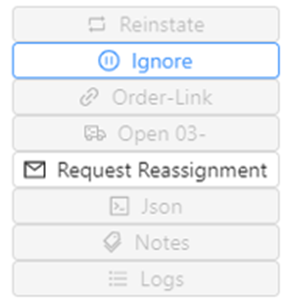
Users may choose to “Ignore” EDI Tenders that are not valid, and which do not need to be accepted or will not need to be accepted at a later date.
Once one or more EDI Tenders have been selected, left click on the “More” button on the “Action Bar”, then left click on the “Ignore” button. (As below)
A command confirmation message will then be displayed. (See example below)
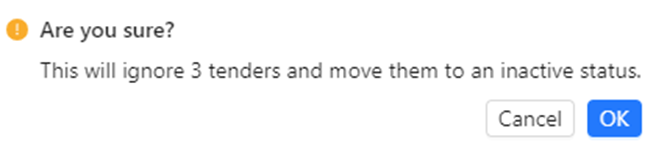
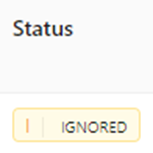
Left click on the “Cancel” button to return to the previous step. Left click on the blue “OK” button to process. The “Status” of the EDI Tenders selected will change to “IGNORED”. (As below)
If either the “Refresh Results” or the “Hard Refresh Page” button is used or the Load Tender Worksheet is closed then relaunched, all “IGNORED” EDI Tenders will no longer appear in the Active Tenders or Acceptable Import filters.
