El siguiente paso después de liberar un nuevo pedido es asignar/enviar ese pedido.
Desde el menú principal de SWS ve a Customer Service, haz clic en Order Entry, luego haz clic en Order. A continuación, escribe una "Q" para "Query". Escribe el Div/Pro del número de Pro que deseas asignar y presiona la tecla "Esc" para mostrar el Pro.
NOTA: Todas las regiones deben usar el Dispatch Optimizer al asignar pedidos a sus respectivos conductores.
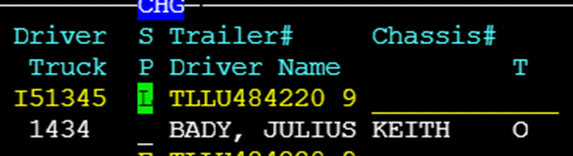
En caso de que un conductor deba ser asignado a un Pro manualmente: Escribe una "U" para "Update". El cursor resaltará automáticamente la primera línea de envío en blanco con el cursor en el campo Driver . Presiona la tecla "Enter". Si lo sabes, escribe el número del conductor en el campo y presiona la tecla "Tab" para mostrar el nombre del conductor y el número del camión. (Ver ejemplo a continuación):
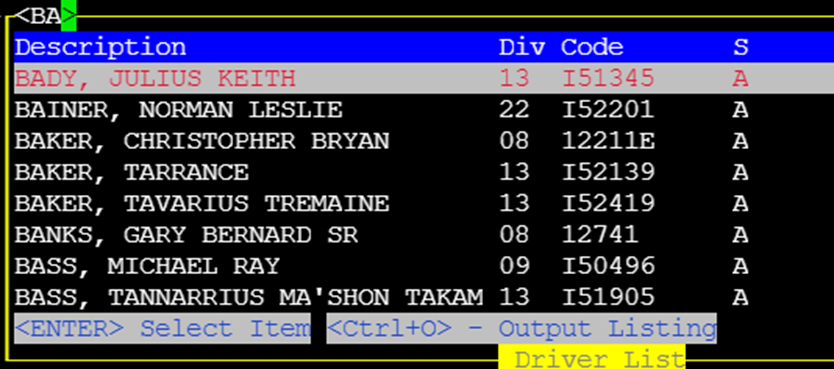
If the driver’s # is not known, use the Thumb function “CTRL-T” within the driver field to display a list of drivers. Start typing the driver’s last name and once desired driver is highlighted in white (as below) press the “Enter” key to select that driver to assign.
Next, using the “Tab” key or right directional arrow, position the cursor under the Date/Time field. Type the “T” key to select current date or type in desired date in DDMMYY format. Hit the “Tab” key or right directional arrow to position the cursor under the destination Date/Time field and repeat entry of desired date. Once the date has been entered under both the origin and destination fields, hit the “Esc” key. If applicable, the next line of dispatch will be highlighted in white. Hit the “Enter” key and proceed with update as defined above. Once the desired line or lines of dispatch have all been assigned, hit the “Esc” key. The below message will display on the screen:

Type a “Y” for Yes to complete order assignment or “N” for No to return to order for possible changes if needed.
